


Yesterday, we embroidered some free-style holly leaves using fly stitch – a very simple approach to adding just a touch of Christmas embroidery to linens, towels, or whatever!
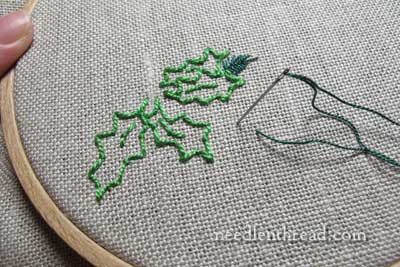
Today, we’ll add some background evergreen sprigs to the same holly, using the same stitch – fly stitch – on this time, worked vertically.
Here’s the holly from yesterday’s tutorial. To recap: it was stitched in fly stitch, worked horizontally, without a pattern, using perle cotton #5 in a bright green.
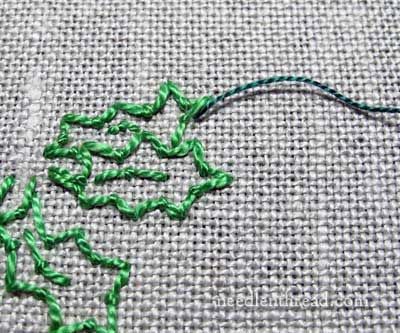
I’ve switched now to a perle cotton #12 in a darker, pine green, and now I’m going to add a bit of background greenery to round out the bunch of holly.
Pick anywhere to start – preferably in a spot nestled between some holly leaves, or just to the outside of the bunch.
Again, it’s just a matter of “eyeballing” where you want your sprig of evergreen. Using fly stitch worked vertically, I’m stacking the stitches inside each other, to create a spindly piney branch.
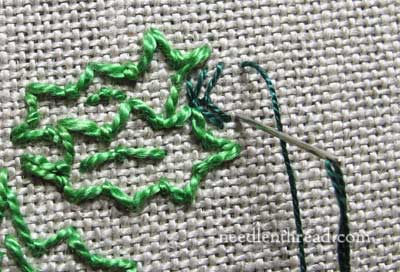
When you’re evergreen sprig is as full as you want it to be, and about the right side, end by taking a long straight stitch into the center of the last fly stitch.
And there’s one little sprig of evergreen.
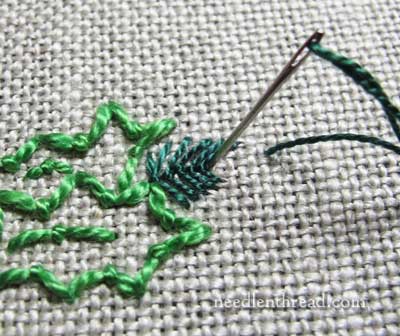
You can also begin the evergreen sprig at the tip, like I’m doing here. I judged about where I wanted the tip of it to be and started with the long straight stitch.
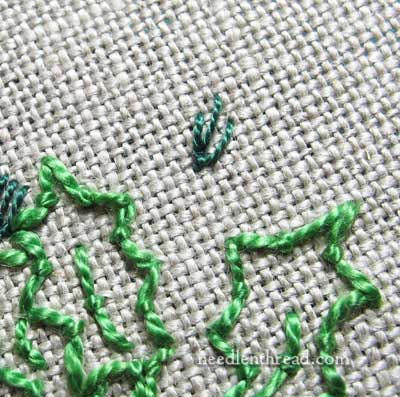
Now, it’s just a matter of building around the straight stitch with the vertical fly stitch, working back towards the holly bunch.
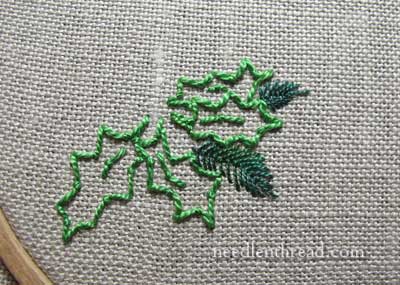
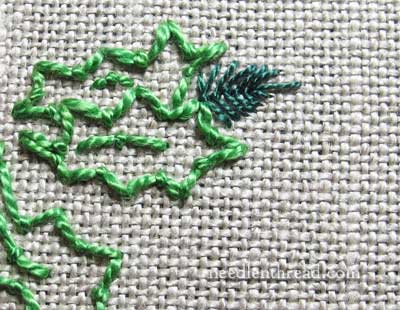
Tuck the ends of the fly stitch just under the outlines of the holly, to give the impression that the evergreen is behind the holly.
In most embroidery endeavors, I generally stitch whatever is farthest back in a design, first. But in this case, since we’re working completely free style at this point, and since the holly aren’t filled in, it worked better to stitch the holly first, and then tuck everything else behind the holly outlines.
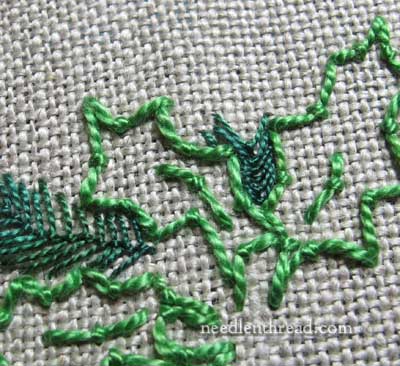
Here, you can see that I’m really tucking the stitches in behind the holly outline. In fact, in some places, you might work a few straight stitches out to the sides beyond the points of the holly, to enhance the impression that the evergreen is behind the holly.
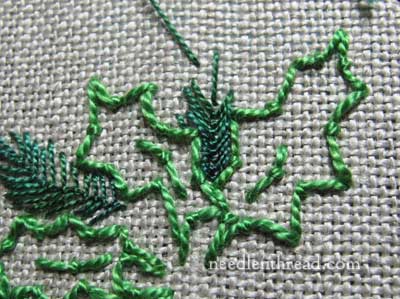
And here, we’re back to the straight stitch tip. It’s a little too isolated, so I’ll add a few more straight stitches around it, fanning the tip out a bit.
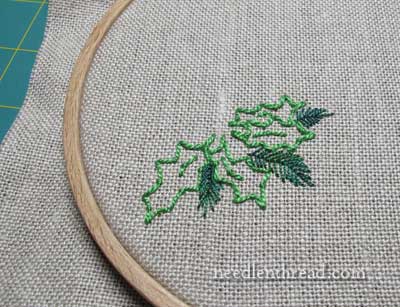
And there’s the holly bunch, with a little bit of evergreen peeking through.
All told, I’ve now spent about 15 minutes of stitching on this (and I snapped pictures along the way). Next up, the berries – because you just can’t have holly and evergreen without bright red berries. They’re quick, but they’re definitely the prettiest part of the bunch and they really bring it to life. And beside, it’s just an all-around great way to embroider a good, fat dot. So that’s tomorrow! See you then.
Stitch Fun is a series of embroidery tutorials here on Needle ‘n Thread that demonstrate some different and fun things you can do with individual embroidery stitches and their variations. Feel free to visit my Stitch Fun Index, where I explore different variations on familiar embroidery stitches, just for the fun of it!
Fly stitch is also great for making little Christmas trees – you can see some on my blog, here: http://suetortoise.wordpress.com/2012/12/16/wishing-you-a-very-happy-christmastime/
An hour later…Sue, I became so absorbed in your wonderful blog that I couldn’t remember where I entered it from. Just as well for the ‘history’ tab or I’d really be out there somewhere in cyberspace! Sorry Mary. : )
love this – quick, simple, elegant!!
Anxiously waiting for those berries!!!!
G’day Mary. It always surprises me the difference little touches give a design/project. This is sweet and the berries are going to be a top notch touch too. Cheers, Kath
You’re a babe, Mary. And I say that in the most flattering way possible
This is simple and beautiful!
I just discovered your website and have to comment on it. It’s wonderful! I have an Arts and Crafts Group on Facebook and recommended your site to my members. Thank you for this extensive look into embroidery, I love this!
Now I need to dig through it, lol.
merci pour l effort que vous faites pour nous; pour vos conseils et vos broderies vous etes tres genereuse