


It seems as if Tuesday is becoming my new Monday, thanks to what I like to call The Upheavals of Life. Hopefully, there will be some Downheavals soon. Thanks for your patience!
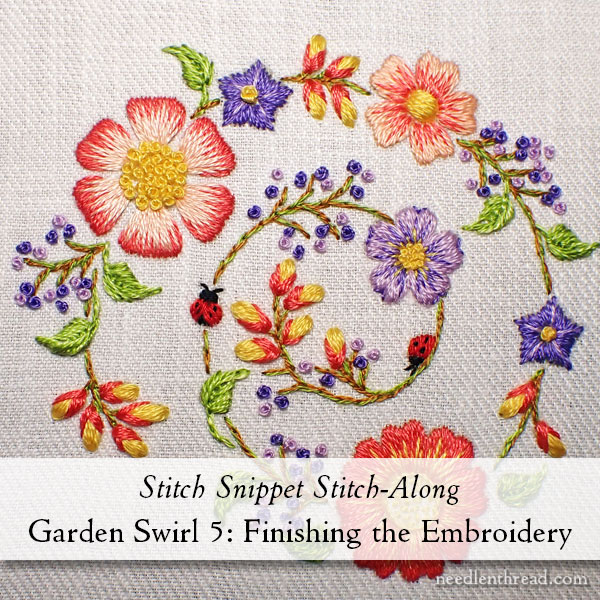
Last week, we finished up the major flowers and centers on Garden Swirl, the current stitch-along here on Needle ‘n Thread. Today, we’re going to finish up all the embroidery and prepare the embroidery for the finish work of mounting the embroidery in the box lid.
If you are new to the Garden Swirl stitch-along, you’ll find all the previous installments of this project – including design, materials list, and instructional content – listed here in the Garden Swirl Project Index.
You’ll find complete materials kit (with the design pre-transferred on beautiful linen twill, plus all the threads and needles) and the decorative box for mounting the embroidery available here in my shop.
If you are a member of the Needle ‘n Thread Community on Patreon, you will find this information in today’s lesson already available in the last PDF download that was posted over there. The PDFs contain more information in one spot, compared to the blog content here, because I can fit more information in a PDF than I can in a blog post. So you have received this PDF already.
Prelims over, let’s finish up this embroidery project!
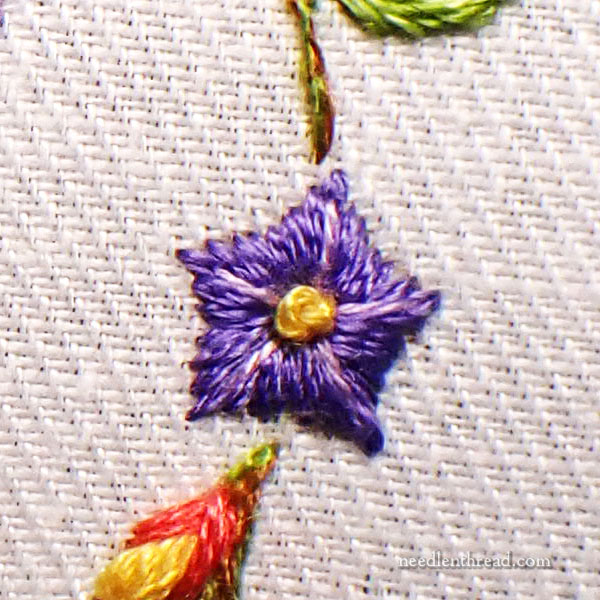
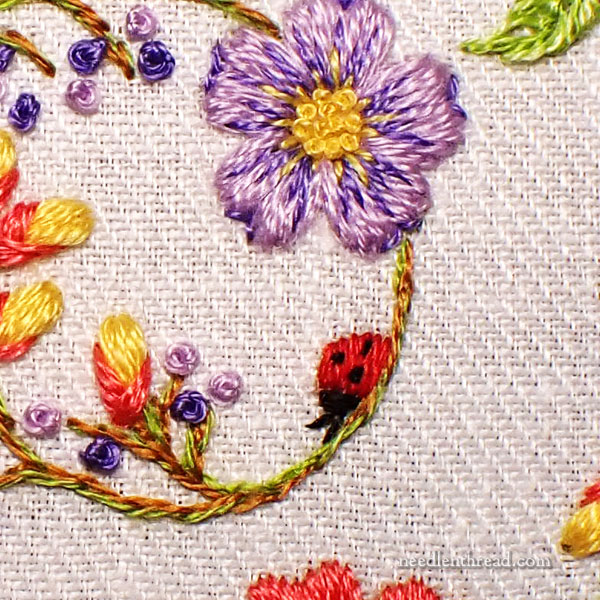
First things first: when we did the flower centers last week, I overlooked the centers of these little unobtrusive purple five-pointed flowers.
The center is a very simply single French knot, worked with two strands of 725. If the hole you left when making this flower is very very tiny (or non-existent), you can also just use one strand of floss. You just need a nice little yellow dot there.

Now, these yellow and coral buds!
These are granitos worked with three strands of yellow 725 in the needle. Then, switch to two strands of dark coral 3705 for the base of each granito.
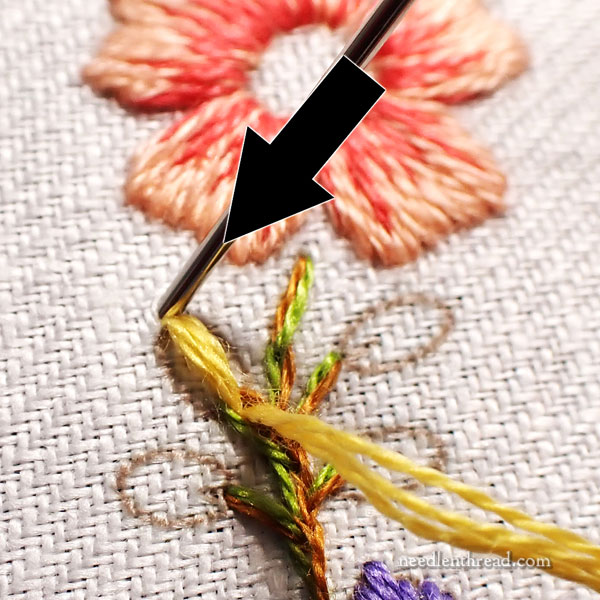
You can find a tutorial for the granito here.
To work a granito (or “little grain”), work repeated straight stitches in the same holes, the distance of the length of the “little grain” that you are making.
Start with one straight stitch in the center of the area you want to fill up, and then work a second one in the same holes, but use your thumb to gently coax it to one side of the first straight stitch. Then work a third straight stitch using the same holes, gently coaxing it to the other side of the center straight stitch.
On these granitos, you’ll likely only need three stitches. If you want a little more build-up, though, you can work four or even five. But since you’re working with three strands of floss at this point, that might be a bit too heavy. Try it and see what look you like best!
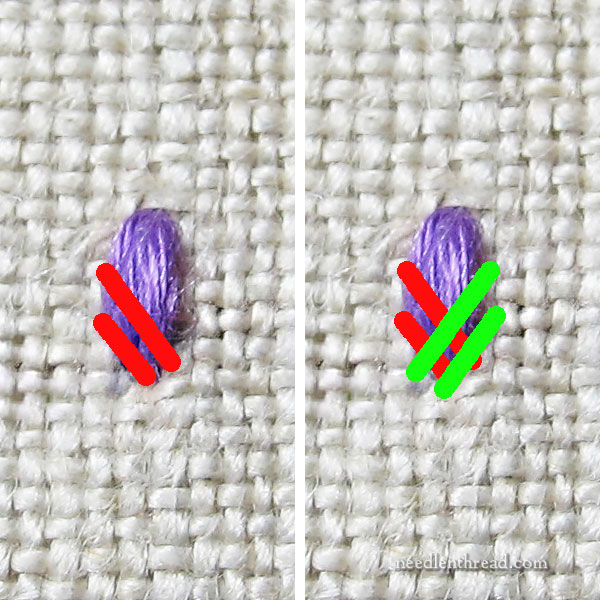
The photo above is to illustrate how to work the base of each granito. The model’s colors are different, but the concept is the same!
To work the base, use the dark coral (two strands). Work two diagonal stitches across the base, as shown on the left in the photo above. Then work two diagonal stitches across the base from the opposite side, overlapping the first two diagonal stitches.
If the coral color does not cover the base completely, you might have to use three stitches on one side or the other, or both.
This method of stitching little buds is quick and easy, and very effective!

For the little purple bunches of buds here and there around the design, use two strands of 3756 (dark purple) and 210 (light purple) to work French knots on the small dots on the design.
Mix up the light and dark, so that you get a nice balanced smattering of shades in each bunch.
You can find a tutorial for French knots here.
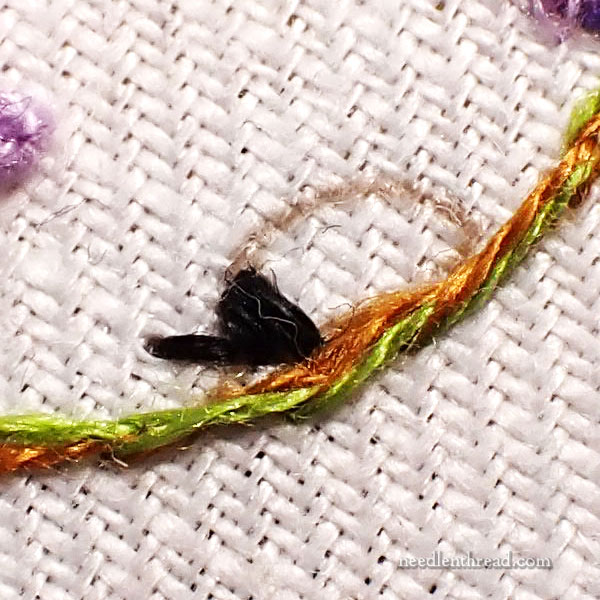
Finally, we’ll work the lady bugs! Start with one strand of black in the needle (use the finer needle), to work the heads of both bugs and the body of the round bug.
Work a few straight stitches to fill the front part of the side-view bug, as shown above.
These bugs are so small that they’re not going to require too many stitches! Just do your best to fill that shape. You don’t want the shape to taper too much towards the front of the “head,” so just keep the stitches pretty much the same length, finishing with one stitch that might be slightly shorter than the others, on the far left (or the front of the head). Use a straight stitch for the little “antenna” (or two).
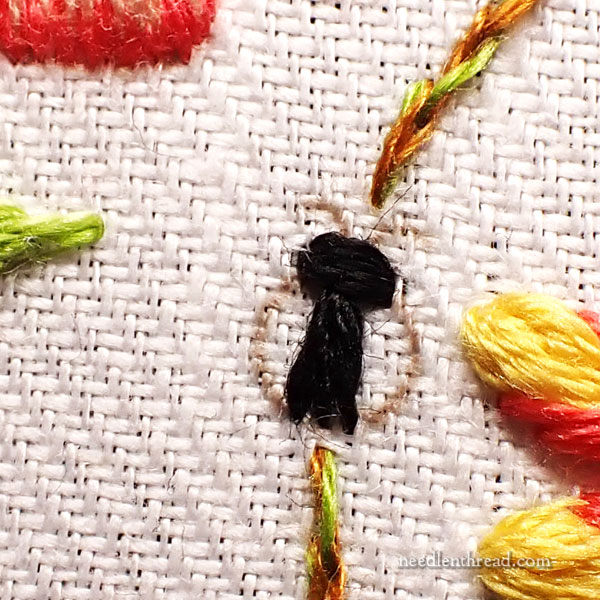
For the round bug, fill the head area with horizontal straight stitches (satin stitch) as shown above, and then work a few black stitches down the center of the body, slightly fanned out, as shown above.
Again, the antennae can be a couple tiny straight stitches.
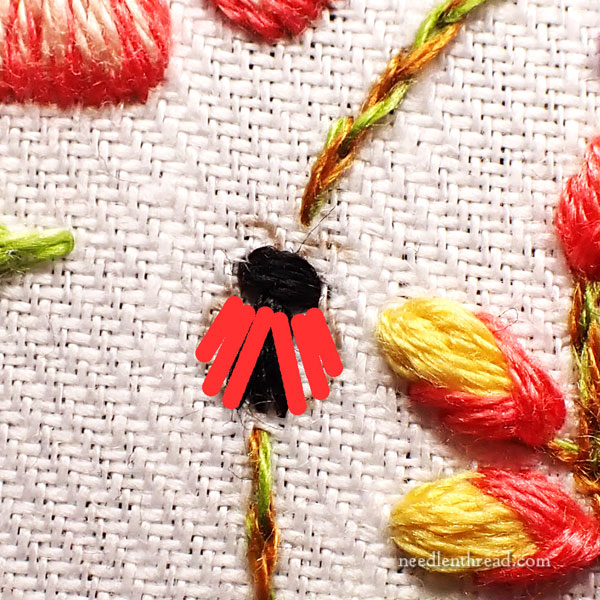
Switch to two strands of red in the needle, and work straight stitches for the “wings” so that they overlap the black patch in the middle of the body and fan out a little, as shown in the diagram above.
You’ll really only need a few stitches on each side – maybe three, maybe four. It really depends on your tension, and how careful you are about keeping the strands of thread smooth and parallel.
Keep in mind that these bugs are so small that you’re not necessarily going for absolute accuracy here. You’re just going for the concept of the lady bug. They don’t have to be perfect! Mine certainly aren’t, but when you pull back from the close-up view, there’s no denying it’s a whimsical little lady bug.
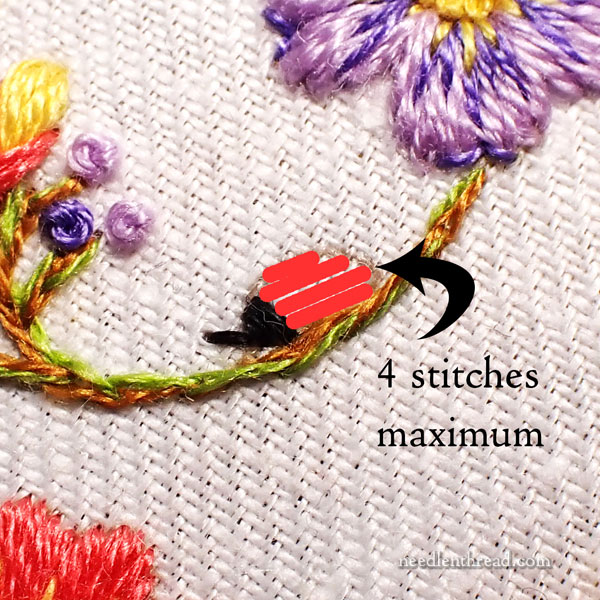
For the side view lady buy, you’ll need about four stitches maximum to fill up the red wing.
Finally, switch back to one strand of black, and, best as you can, work some teeny tiny straight stitches on your lady bug wings, for dots.
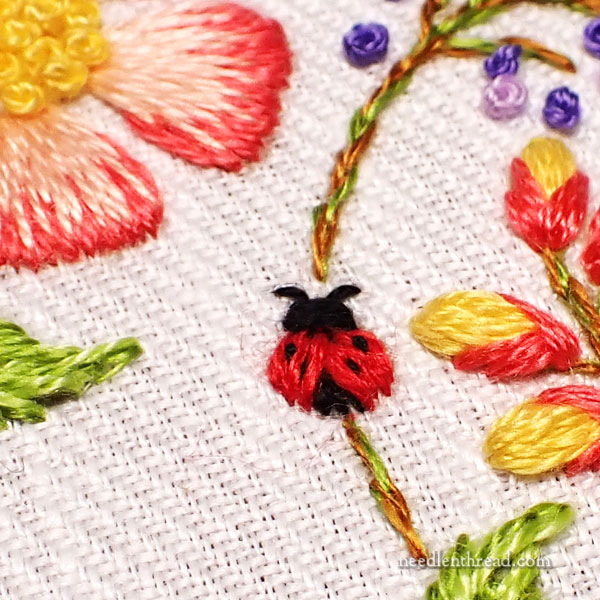
These are definitely a bit wonky in the close-ups, but they work fine! Don’t try to stress out about making perfect round dots are something here – the space is too small and you’re working over other thread. Just do your best to get in some tiny bits of black.
If your block “dot” falls a little too deep into your previous red stitches, work another tiny stitch right on top of the first back stitch, to raise it up a bit. It’ll be fine.
I have a tutorial here on how to embroider a wee lady bug, if you want to take a look at it. However, although it is wee, it is much bigger than these lady bugs on this project – but you can still take a look at it to get an idea of what you’re trying to achieve. Note: don’t try to use French knots for the black dots on the Garden Swirl bugs – they will be too big!
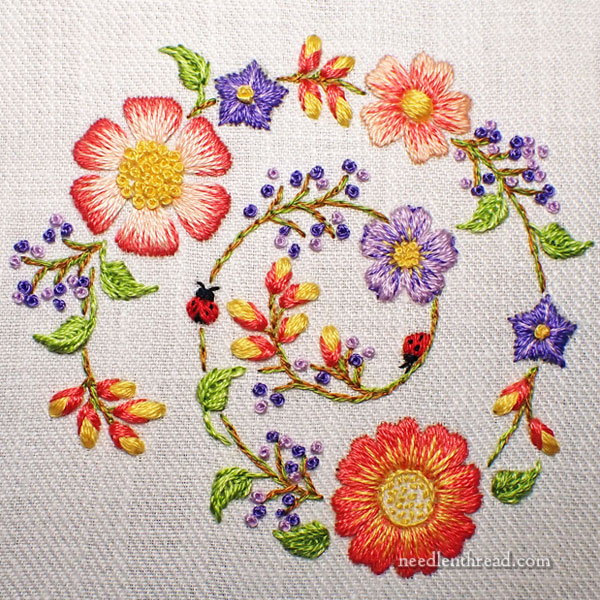
Well, hey now! You just finished the embroidery on Garden Swirl! Congratulations!
Damp Stretch
To prepare for finishing, you’ll need to damp stretch / block the work.
Fortunately, I have a couple articles about this process already written, and you may find them here:
Damp Stretching and Blocking Embroidery – original article
Damp Stretching and Blocking Embroidery – Updated Article (this is how I invariably do it, and the tools I use)
Next week, we will finish the entire project in the box top! Yay!
Looking for More
Remember, you can find all the installments for Garden Swirl available here in the Project Index.
We still have a limited number of materials kits in stock. Once they are sold out, we will not be stocking them again this year, or in this format. So if you plan to do the Garden Swirl project eventually, grab one now!
I want to note that, although the project is spread out as a stitch-along, it doesn’t take that long to embroider this design. You can feasibly finish it in a weekend. This is a quick project, perfect for gift-giving or just for making something pretty for yourself. It’s got enough variety in it to be fun and interesting, and works up quickly enough to be satisfying.
I have really enjoyed stitching this project and I’m looking forward to finishing it for my wooden pin cushion base. The granitos looked so great by themselves that I considered not doing the wrap. But I did and it really popped those buds out. I am loving the whole textural effect of the completed project. Thanks, Mary.
Damp Stretching!!!!! it is a miracle! I pinned my Swirl on to a Felt Ironing mat, misted it and ….like you said the wrinkles and creases just melt away. My usual go to is ironing on the back (on a towel if I have beadwork) but not any more! I am very tempted to go back and reframe some of my finished pieces!
Thank you for the tip