


There are embroidery tools that we treasure because they are beautiful and functional, like the scissors we were talking about yesterday.
There are embroidery tools that we treasure because they’re fun and functional! I particularly like my frog button needle minder because it’s fun, or my clip-on scissor pulls because they’re fun and functional.
There are embroidery tools that we treasure because they are rare and unusual. Think: antique etuis, or hard-to-find, unique tambour hooks.
There are embroidery tools that we treasure because they have sentimental value. I can’t count the number of stories I’ve heard over the years about lucky folks who have inherited needlework supplies from a beloved mother, aunt, grandmother…
And then there are those embroidery tools that we treasure purely because they serve a specific purpose. They aren’t necessarily attractive. They might even be a dime a dozen. But hey, they work, and who’s to scoff at that?
Today, I’d like to introduce you to my eraser. I’ve been using it for years and years.
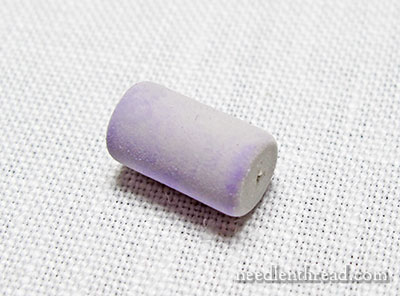
It’s not exactly attractive. It has a strange purple cast to it, adopted somehow from somewhere unknown. It’s about 3/8″ long. It’s just one of these:
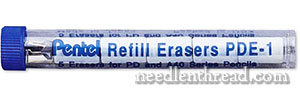
I didn’t buy it for embroidery. In fact, there are Very Few Circumstances where you can use an eraser in embroidery. Try using one on fabric, when you’ve drawn with a pencil – the result is not exactly pleasing. Pencil doesn’t come off fabric the same way it comes off paper!
Gee whiz, wouldn’t it be nice if we could erase our embroidery mistakes? No “frogging” (un-stitching). No picking tiny threads out with tweezers! Just…erase away!
But alas, we can’t.
So, when do you use an eraser with embroidery?
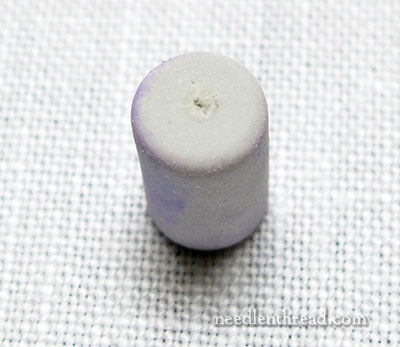
Notice that my eraser has a hole in the end of it.
The hole is from the end of a laying tool, the tip of which is rather sharp. The eraser protects the tip. It also protects anything the tip could poke or pierce. In fact, this is where I can always find this particular eraser – it’s in my tool box, stuck on the end of this particular laying tool.
But that’s not the only place I use it in embroidery.
If you’ve done dimensional embroidery or fiddled about with various dimensional stitches, you might be familiar with these guys:
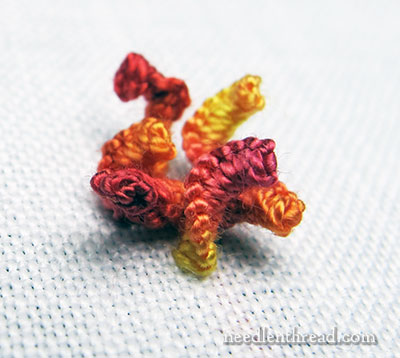
These are drizzle stitches. Drizzle stitch is a terrifically fun stitch, great for adding dimension and texture to surface embroidery.
You can fill the middle of flowers with a bunch of drizzle stitches. You can make grass, seaweed, or growing things with them. Grandma’s hair looks great in grey with drizzle stitch!
There’s lots you can do with this stitch, and it’s worth learning! If you’re not familiar with it, you can check out my drizzle stitch video – it’s an older video, but it’s still clear enough to get the gist of the stitch.
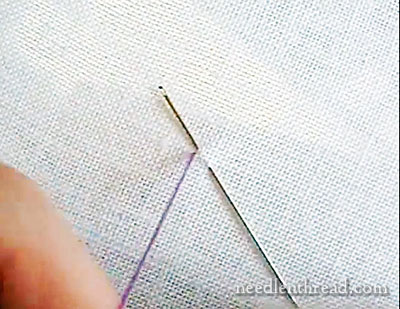
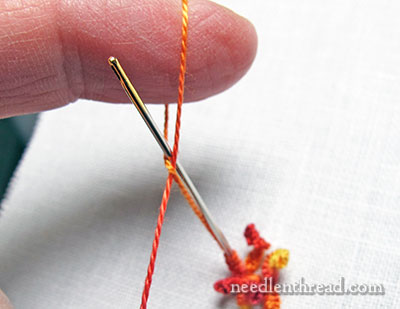
The one thing I never liked about drizzle stitch is the way we’re told to stabilize the needle while working the cast-on stitches.
Normally, in most books, we’re instructed to anchor the needle in the fabric, as shown in the photo above. And this is how I worked it in the video, too, because that’s the normal way to do it. (And because it’s a lot easier to record a video with it anchored flat!) It works fine, but is there an easier way?
I always thought it would be nice to eliminate that step of having to pull the tip of the needle out of the fabric without disturbing the wraps.
Why can’t we just cast the stitches onto a needle that’s sticking straight up in the fabric?
Well, we could, but the needle needs stabilizing, or it moves around too much.
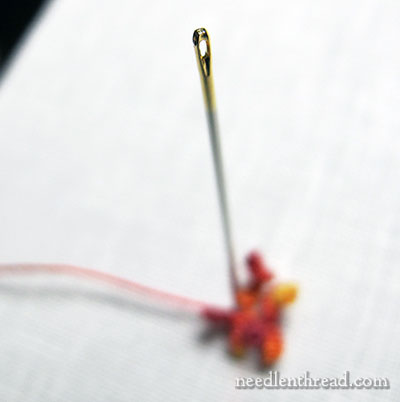
Enter: the Eraser.
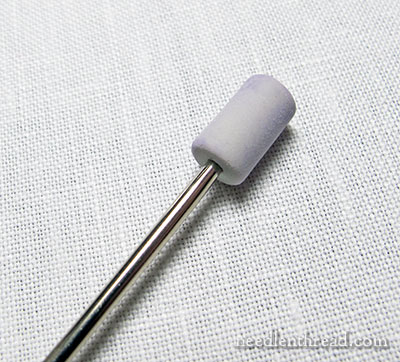
If you stick your needle straight down into the fabric where you want your drizzle stitch to go (which is right next to where you brought your working thread to the surface of the fabric), you can just stick that little eraser onto the very tip of the needle on the underside of the fabric.
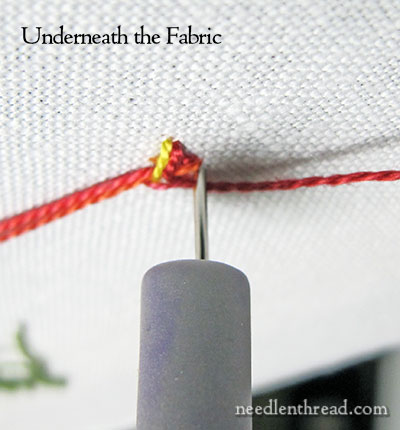
The hole from the laying tool (or a stiletto, or any sharp thing) makes it easier to situate the eraser onto the tip without having to look at what you’re doing.
On the back of the fabric, your needle is stabilized by the eraser while you work the cast-on stitches. You can use both hands to work the cast-on stitches and you can grab the eye of the needle while you tighten and pull the cast-on stitches down onto the needle. The needle won’t slide out of the fabric to the front – the eraser will stop it.
You don’t need any special eraser, either. If you have one of your kid’s brand spanking new school pencils (do they still use pencils in school?), you can just cut the eraser off and use it!
So, there’s a tip for your drizzle stitching!
Guess what stitch I’m playing with this week? Riiiiiiiight. Drizzle stitch! It’ll show up again a wee bit later!
You can find heaps more tips & techniques for hand embroidery here on Needle ‘n Thread, including tips for beginners and beyond, under Tips & Techniques. Browse through the list! You never know what handy tidbits you’ll come across!
Brilliant!!!! Once again, you’ve made me a better stitcher! I’m nominating you for a Humanitarian Award. You’re a gift to us all. Thank you for showing up here every day and sharing what you know. You rock!
Aw shucks, thanks, Susan!
Loved your post on your sky diving adventure, by the way! My knees were jellyfish the whole time I was reading it. You make everything – even death-defying experiences – look fun!
Mary,
Necessity is truly the mother of invention. Two good uses for erasers. My tekobari has a very sharp point — this looks like a great protector.
Also – I’m not familiar with the drizzle stitch. Looking forward to learning more about it, and experimenting.
Thanks again!
So right, Joanne! I think I use “repurposed” embroidery tools every day – things that really weren’t originally intended for embroidery, but come in oh-so-handy. Like tape, pencil erasers, left-over jars…
Good Morning, Mrs. Corbet! Once again, you have once again, with wonderful wit, elegantly demonstrated why you probably have the best blog on the web! You always post something that I learn from, you’re always entertaining, and cheerful. Warmth, Generosity, and Happiness just flows from you over the virtual world!
With this eraser trick you might have helped me circumvent the CP problem with the Drizzle Stitch! I will let you know!
PS You know, I don’t think they use pencils in school anymore…
I hope it helps you with the drizzle stitch, Kristina – it’s a fun stitch, and it would be nice if you could manage it without its being an aggravation. 🙂
I’ll probably try it out later today!
Genius! Love muchly!
Mary, such ingenuity. I am dazzled and am thinking where else one could usefully use an eraser other than for erasing. It needs some thinking time to search the old brain filing system.
Hi Mary,
I was first introduced to the drizzle stitch when I took some Brazilian Embroidery classes. They have a small pin cushion called a “Drizzle Hat” to stick your needle into. It is basically a small pin cushion on a wide base to keep it stabilized. But I also like your idea. I have long lost the protective tip to my stiletto. I will have to borrow your idea to keep the tip protected.
Thanks, Barbara La Belle
Looking forward to seeing the drizzle stitch in more detail!
You must have inspired the idea for the little rubber things that look like your eraser that can be used the same way (anchoring the needle, protecting tips)! My mom gave me a couple of them a month or so ago.
You know, I’ve never tried the drizzle stitch. I love the way it looks when it’s been stitched, I’ve just never tried it. I should try it sometime.
I’m currently not working on any embroidery project because I’ve been so busy with school. Maybe I’ll be able to start a new project and squeeze in some stitching soon.
Thanks for the tips with the eraser. Your advise always comes in handy!
Sarah 🙂
Dear Mary
What a great idea for an eraser such a nifty technique, but your are always giving us your devoted readers great tips and techniques that we wouldn’t have thought of in embroidery projects. I must remember this technique next time I try the drizzle stitch I can’t wait to see the drizzle stitch project that you are working on. Thanks so much for your efforts in showing us and helping us with embroidery techniques I really appreciate it.
Regards Anita Simmance
I admit, I have never used an eraser in any embroidery. I do have one in my tool box, but only because it is in the top of the mechanical pencil I have in there. I rarely use a pencil to draw patterns on fabric, but I do keep a pencil in there for paper use (color number lists etc. Your point-protection tip was great, though what I use for a laying tool is a LARGE needle (you can put yarn in the eye) hangs out in a plastic M&M tube with my tweezers, so I don’t think it needs an eraser to protect it.
Some interesting ideas here.
I saved a length of flexible plastic tubing I once had for giving saline solution to my dehydrated cat and have been cutting off pieces of that to use on my laying tools. Nearly indestructible, that stuff. Washed it well before using.
When doing the drizzle stitch, most BE stitchers will drape the fabric over a pincushion and stick the needle into that. Both the fabric and needle are supported, and both hands are available to do the stitch. Only works if you’re not using a hoop, although I suppose you could lean the hoop up against the pincushion. I stitch BE in hand, so I use the pincushion technique.
Carol S.
Sorry to reply to my own post, but I also have to say that I’ve never seen a drizzle stitch instruction that says to put the needle in at point A and out at point B. Maybe because I’ve only seen BE instructions, but all of them say to put the needle through the fabric and anchor it on the back in something, like the pincushion I mentioned above. Taking the point of the needle out of the fabric without disturbing the stitches would be a pain. I can see why you wanted to find another method!
Mary your a genius !!!
Mary, Thanks for sharing this new technique. I’ve never tried this stitch before but I will play with it today. I am working on very small flowers to fill in a small garden scene. The drizzle stitch might work in my garden. It will be fun to play with.
Blessings on your day,
Victoria W
Drizzle stitch has always intimidated me and reading your post today now gives me the courage to tackle it. Thanks once again for your invaluable information!
Mary you are a genius. Thank you. I have always made drizzle stitch by anchoring the needle vertically – but then it digs into something and that something is usually my knee! I cast my mind around for something to plug the needle into but the eraser didn’t make itself known to me, lol.
So thank you, yet again.
Mary, you may be the momma of invention.. I love “simple” solutions where possible. I learn much from you and don’t often enough thank you for your insights. Many of the tasks seem overwhelming to me and reading your blog is making me want to try new things, again! Now I need to find an eraser. I sew more than embroider and when I need a stiletto, I usually use the point of my seam ripper. It’s always handy and I don’t have two tools to track.