


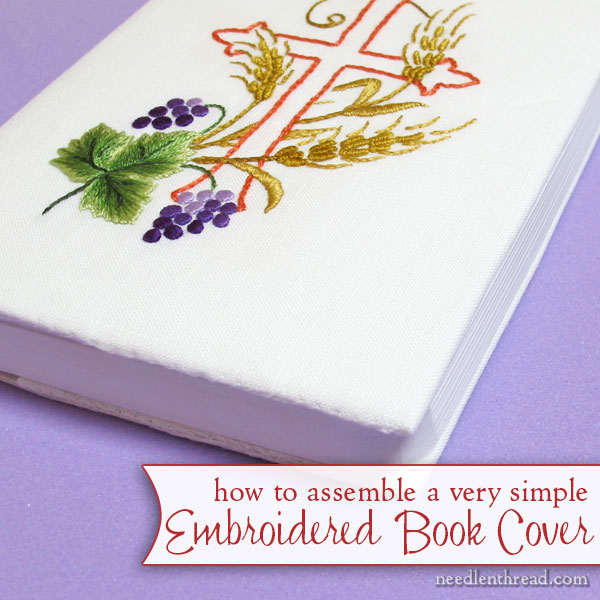
Yesterday, I shared the embroidery process for this embroidered book cover with you, and today, I’ll show you the really (and I mean really) simple way I put it together.
There are certainly more complicated ways to go about making an embroidered book cover, but this way is fast and very easy. It isn’t perhaps the most “finished” of finished book covers, but it is finished enough to serve for a long time.
Here’s how I did it!
This assembly process for an embroidered book cover can be applied to any type of book, really. Notebooks, journals, bibles, prayer books, sketch books – you name it, you can cover any of them with this method!
You can certainly get more elaborate, too, in the finishing. With more time, for example, I would have added a decorative edge to the cover, using the Palestrina stitch worked on the edge.
So whether you go simple or decide to dress it up a bit, if you’re looking for a way to cover a book and you want to keep it simple, try this method!
Prior Proper Planning
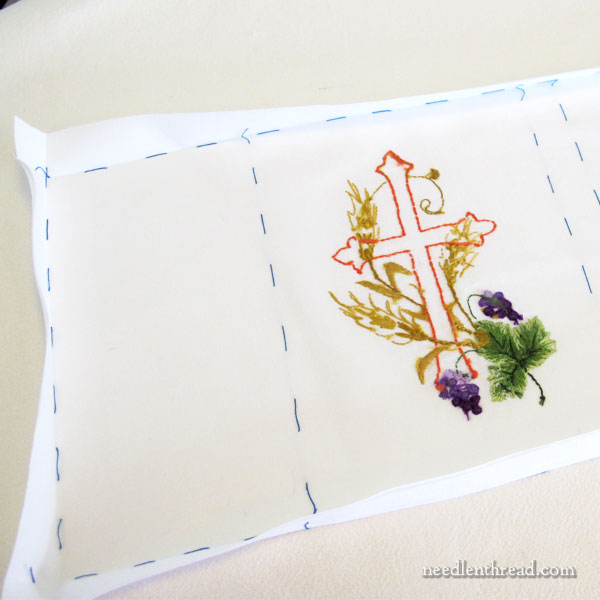
You might remember that, in the set-up process for this embroidery project, I mentioned that I basted in the layout of the book cover. This isn’t absolutely necessary – you could skip this step altogether, as long as you’re a good judge of space – but I find it helps to baste the cover layout, to ensure a good fit for the cover and to guarantee the embroidery is centered.
What lines did I baste in, precisely?
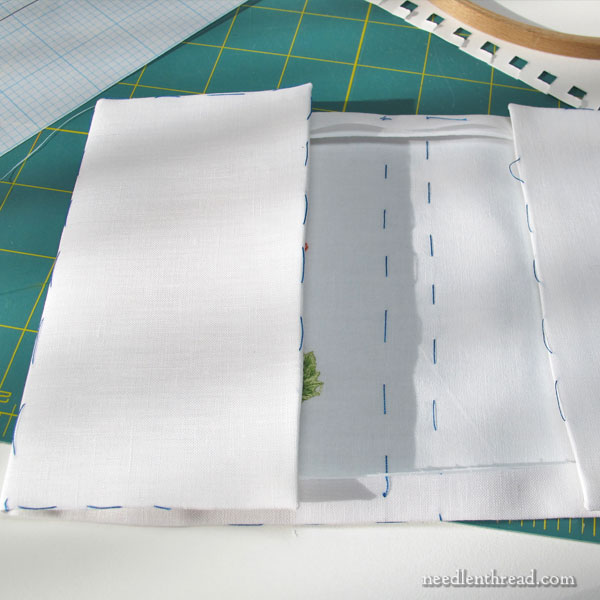
A diagram might be helpful:
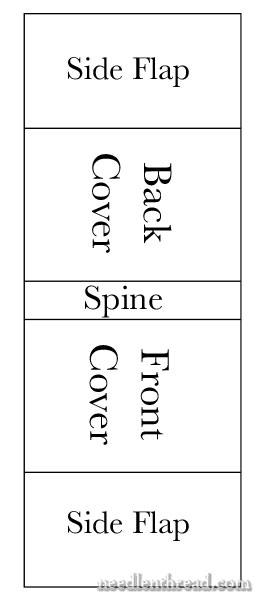
I basted the spine, the front and back cover, and then two side flaps on each side of the cover that are at least half the width of the cover. In this case, since my book has a flexible cover, I made those two side flaps even wider, so that they were just about an inch short of the width of the cover.
To determine the layout for your particular book, all you need to do is measure your book parts.
I find it useful trace the parts of the book on a piece of graph paper (8 squares / inch). This way, you can get a very accurate layout, squared up, and measure the parts of the book from there.
Or you can just trace the graph paper layout onto your fabric, using a very light pencil on the wrong side of the fabric. Then you can baste right over those pencil lines.
And if you want to test the book cover fit first, you can cut out your paper pattern and fit it to the book, to see how well the fabric version will work.
Making Up the Book Cover from the Embroidered Fabric
Once the embroidery for the front cover was finished, I washed the piece and damp stretched it to dry.
Especially when you’ve been working in a hoop, thoroughly soaking the piece and then damp stretching it will guarantee that the hoop wrinkles disappear and that your fabric is flawlessly flat. Of course, make sure your embroidery threads are colorfast, or you could end up with a serious disaster!
When the fabric is dry (or at least dry enough – in this case, it wasn’t perfectly dry, but the little ironing I did took care of that), head to the ironing board, and take a good pair of fabric scissors with you.
Trim the excess fabric within half an inch of the outside basting lines, all around the cover.
Then, with your embroidery face down on a padded cover (you might want to read this article on ironing embroidery and the padded cover I use), fold and iron along the outside basting lines, all around the cover.
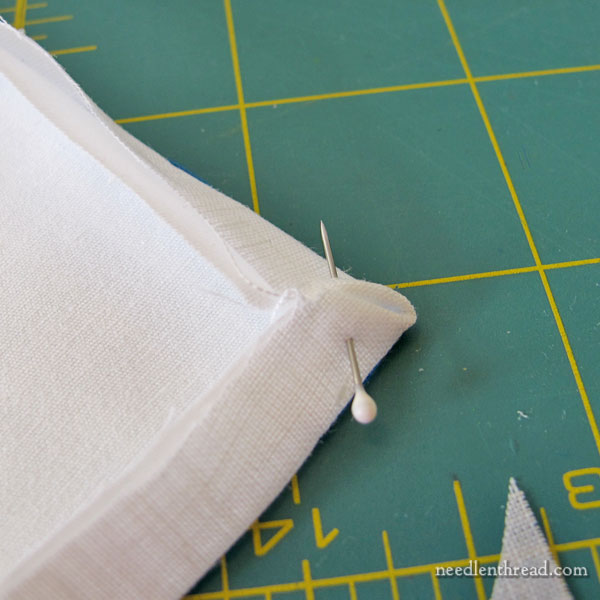
Then, it’s time to miter the corners. If you’ve never mitered a corner, it’s really easy! Here’s my article on how to miter a corner – it’ll take you step by step through mitering corners.
I’m working with two layers of fabric on this particular book cover, but that doesn’t really matter. Treat them as one layer. They’re still basted together, so it’s easy to work with both pieces at once.
With the corners mitered, head back to the ironing board, and iron in the side flaps, so that you have a nice crisp fold where the side flaps fold in.
When you look at the cover so far, face down, it should look more or less like the photo above.
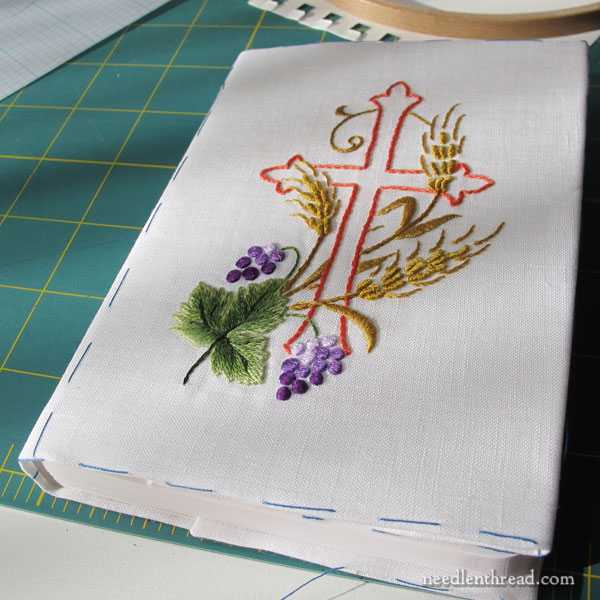
At this point, test your layout. Put the cover on the book, with the crisply folded flaps hugging over each cover. It should fit, if your basting was spot on!
In this case, it fit quite well, so…forward!
The next step – which I forgot to completely photograph, was to remove the basting stitches.
Definitely remove the basting threads before you sew up the cover!
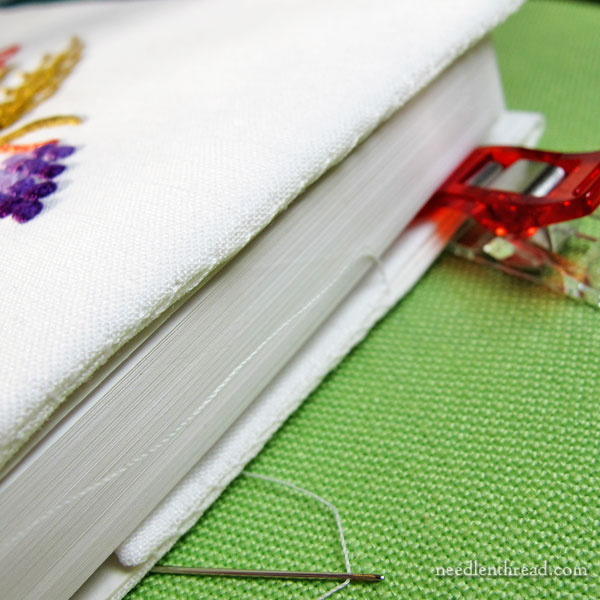
Then I used these handy-dandy mini wonder clips by Clover to hold the cover completely in place while sewing.
Then, I simply whip stitched the cover onto the book, using a white sewing thread. I find it’s best to whip stitch with the cover on the book, so that you can make any little adjustments as you sew, to ensure a perfect fit.
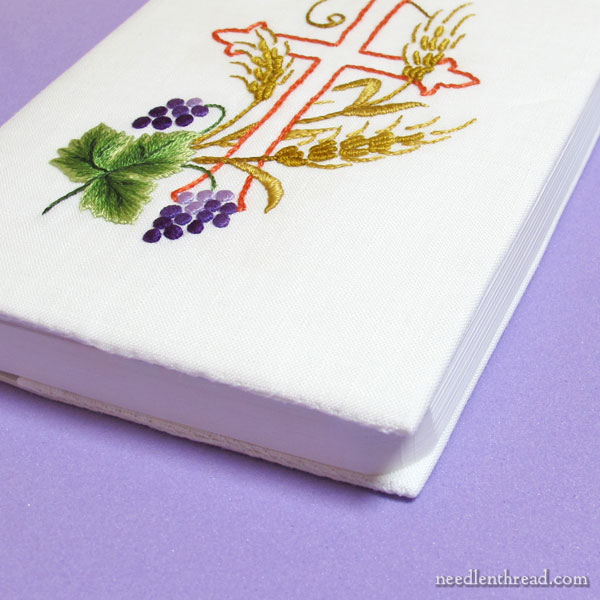
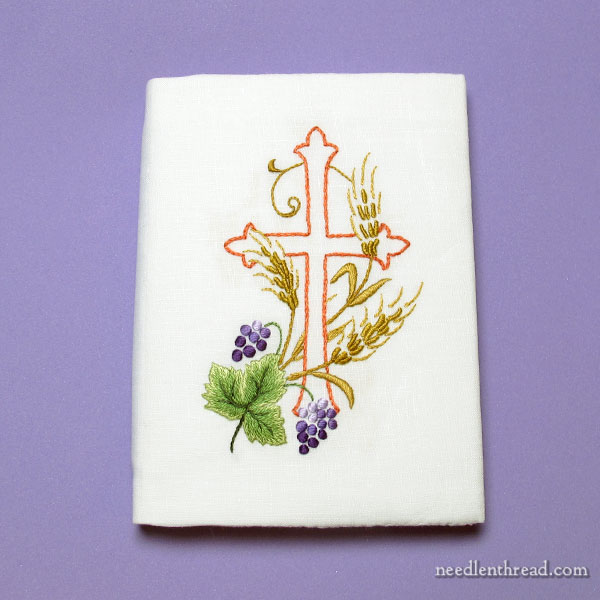
And here it is, all sewn on! Very, very simple way to finish a piece of embroidery into a book cover!
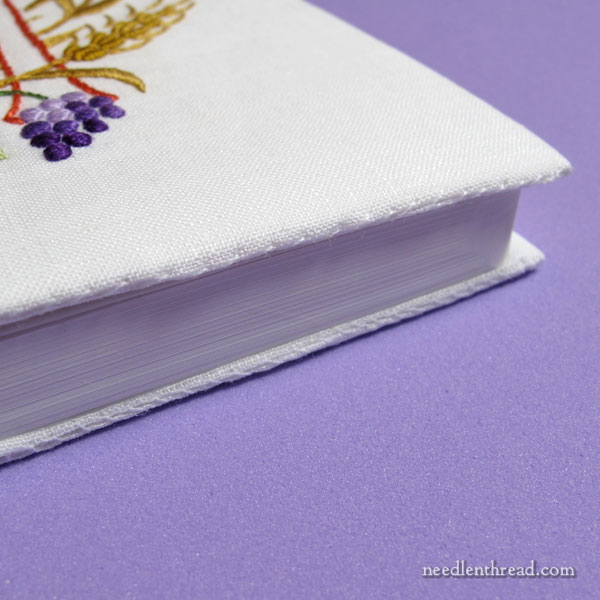
The whip stitching is practically invisible, but you could cover it further with decorative stitching along the edges, if you wanted to.
And there’s the finished cover from above.
Incidentally, if I were re-doing this, I’d only use two colors of purple on the grapes. The light purple gets a little lost.
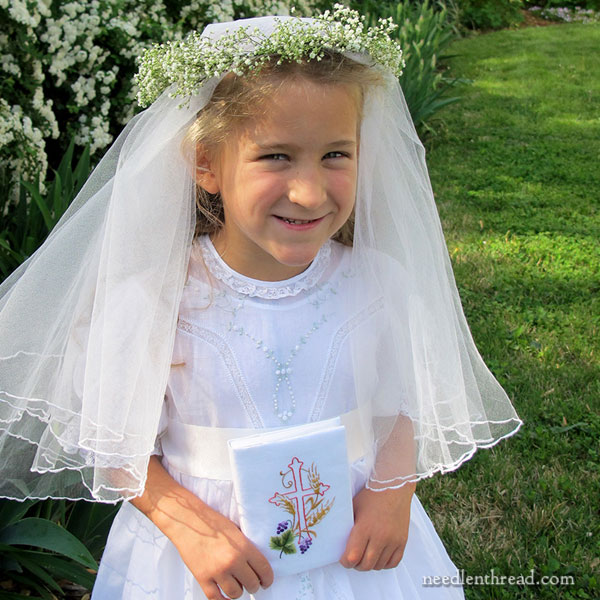
And did she like it? She did indeed!
And thus ends The Adventure of the Super-Quick Book Cover.
And now, back to our regular programming…
Book Cover Articles
You can find all the previous articles relating to making this book cover through the following links:
The cross, grapes, and wheat embroidery pattern
Setting up the project and choosing colors
The embroidery on the book cover
Finishing and assembling the book cover (this article)
Thanks for the clear instructions.
You have inspired me, after I get better at embroidery at some point, to make a prayer book cover for myself and my sisters. I think it would make a nice Christmas gift for them at some future point.
Simply lovely–thanks for sharing a terrific tute!
So cute! Both your Niece and the Prayer Book are adorable. Mary I am interested in the scissor you used. It look very nice with a short and very strong blade. Can you tell me about it. and where I can purchase one.
Thank you,
Sandra
Hmmm. I don’t see any scissors in this post, so I’m not sure what scissors you’re talking about. If you’re referring to the post on colors and set-up, those are Premax ring-lock scissors. If you scroll down this page: http://www.anitalittlestitches.com/premax.html you’ll find them. ~MC
Just lovely for a darling girl! What a nice present the book cover makes. I’ve done one, for a medium Moleskine notebook, but I made the kind that slips on and off. It’s probably a bit looser, so I’ll have to try your method. Thanks so much for the instructions.
This slips on and off, too, Cynthia – if you’re making one for a stiff covered book, you’d just make the inside flaps a little narrower, to give you more room to manipulate the sides out of the cover. But if the cover is flexible, you can make the flaps wider, like I did here.
Lovely to see the book in action with a beautiful little girl!
Oh, your niece looks lovely!
You did a good job too, Mary! 😉
I have covered a few photo albums this way. 🙂 Exact same folding and basting pattern too. One of the more pleasant covers I did for a great-aunts 90th birthday three years ago. She told people not to give her any gifts “to dust” as she said, so I was asked to embroider an album (fat, fat) cover and the rest of the extended family provided photos. They asked me (no one else embroiders or sews) just two weeks ahead (don’t you love it when that happens), so it is not incredible. It has her name and a wreath of lazy daisy flowers with a spray of other flowers in the center. It was about four days of stitching, a day of sewing and then we mailed it to the organizer. The following week was photo collection and organization at her end of the country. She loved it, despite not wanting anything. Photos of as many family members we could find went inside. I think it was 9 or 10 generations of photos for her in one album. 🙂
What a wonderful gift!
Thanks Liz. 🙂 She thought so.
Thank you! Your instructions were excellent and the final pictures are inspiring. I will keep this project in mind for a friend’s daughter who will be taking her First Communion soon.
This takes me back. I still have the rosary given to me for my First Communion a looooong time ago. Oh, can a rosary be embroidered, as in Stumpwork?
Dear Mary
The finished book cover is beautiful and so is your niece I’m so glad she liked it. The design looks lovely on the Bible photograph above and the colours of the thread you choose really blend well. For future reference I will definitely use your instructions and tips and techniques on how to make a book cover. Just a question would you whip stitch the edge if you were adding a decorative edge. Thanks for the instructions and tips and techniques on how to a make a book cover this will come in useful when I embroider a book cover.
Regards Anita Simmance
Mary, Your niece looks so cute, and the cover looks great. I hope to make one for my grand niece in a few years. Thank you for the clear instructions.
Love it Mary! And you can tell that she is really your niece :). No spoof child on a blog run by a professional team of embroidery gohst writers, LOL.
Hi Mary,
Beautiful book and recipient! (and such clear instructions – as usual) One question: Won’t the raw edge on the inside of the cover fray? The photo just under the mitered corner shows the inside and I didn’t see any mention of finishing the raw edges that runs over the spine of the book. I’m sure this would be handwashed, but I would think that the raw edge would not fare well.
Love the blog!
Carrie “PlaneNut”
I should have read all the posts before making my post. I see you asked the same question. 🙂 Often I fold over twice to make a small finished edge but then I realized that thick of seam might show through. But a raw cut edge could get messy over the years too. I do hope Ms. Mary can answer this one.
It looks lovely, and so does your niece. I love her smile, and I bet she’s really proud of her Aunt Mary’s fine work. Congratulations.
Mary what a beautiful job you did on your nieces prayer book. She looks adorable in her communion outfit and your book makes her gown look even more adorable. God bless you
You have now inspired me to take my mother-in-law’s prayer book and cover it and set aside for future generations. She treasured it while she was alive and it deserves the beauty of a cover .
Thank you I think I am one of your biggest fans. I own all of your publications and look forward to each and everyone. Have a blessed day
Hi, Linda – well, you could always serge the edges, and I probably would have, if I had a sewing machine (sold it!) or a serger. But I wasn’t going to take the time to do it by hand. The allowance is half an inch, and neither fabrics are high-fray-frequency fabrics, and with hand washing and all, I don’t think it’ll be problematic.
It’s beautiful and she is absolutely precious!
What a cutie she is!
Beautiful, Mary! So glad you got it done on time. It was worth it just for the smiling photo of your niece!
Beautiful ….and the that little girl looks so sweet .
Nice work on the cover! I think most, if not all, book cover instructions I’ve seen have you sew the pocket right sides together and then turn. It seems like that would allow too much opportunity for sizing errors. I like the step of stitching them while on the book.
In the 4th photo where you mentioned mitered corners, I see the raw edges of the fabric showing after you folded over the edges of the book cover. Did you go on to fold them under again and press them to finish them off and avoid straggly threads from coming loose? I can see where a double fold would add bulk and maybe a long lump under the cover. But cut edges might fray and leave threads dangling. Just wondering.
Love the embroidered book cover! Do you have any hints/advice on how to do this as a bookmark?
Thanks,
Micki
That is a fabulous idea! I can totally see doing this for prayer books. Now I also want to do it for my Kindle cover, too!
Mary, what a lovely book cover! It was so much fun seeing the precious little girl holding it. What a treasure that is for her. Thank you, as always, for your terrific instructions!
Ann H
Mary, you must be psychic! I am working, not on a communion book. but on a blank book for a daughter’s Mother’s Day present. (Sound backward? Not at all, she’s a great mother for my grandchildren, a credit to her upbringing, I’m sure.) We have a thing about blank books, she and I, and now I have cross-stitched some cute owls and am going to construct a book cover. Thank you so much for your instructions. I also loved the embroidery. Blessings, Charlotte