


How about a little bit of Stitch Fun?
Today’s tutorial comes about following an ongoing conversation with a fellow embroiderer, wherein we enthusiastically discussed the various merits of chain stitch …. and its almost infinite variations.
At one point in our discussion, I proposed that one of my favorite variations was the knotted chain stitch.
There then followed a short altercation in which we drew our chain stitch swords. I defended the point that knotted chain stitch and crested chain stitch are not the same stitch. I won that skirmish.
And then I sallied forth to demonstrate the merits of knotted chain stitch and to defend its worthiness for renown.
There is, after all, more to the stitch than initially meets the eye. To win a little recognition for this particular chain stitch variation, first, we’ll walk through a tutorial on how to work the knotted chain stitch (with a very simple embellishment), and then, in a follow-up article, we’ll look at a couple ways to make the stitch a little more accessible for wider use in free-style surface embroidery.

The knotted chain stitch is a chain stitch with a small knot to one side of the start of the stitch.
I’ve written a tutorial for knotted chain stitch before (you can find it here). I’m not sure which tutorial will work better for you, but this one is a little more in-depth and demonstrates a simple embellishment at the end.
Knotted chain stitch may look, in some regards, like the crested chain stitch, but it is not the same stitch. You can find some pictures of the crested chain stitch here along with a video tutorial.
While I like crested chain stitch (I don’t think there’s any embroidery stitch I don’t like), I can do more with the knotted chain in regular surface embroidery applications because it is slightly more compact. I’ll show you exactly what I mean in the follow-up to this article, where we will manipulate the stitch a little.
So, if you want to learn the stitch, let’s go!
In this tutorial, I’m working on linen using coton a broder #25, which is a non-stranded soft cotton embroidery thread. You can read about coton a broder here, if you want to learn more about it.
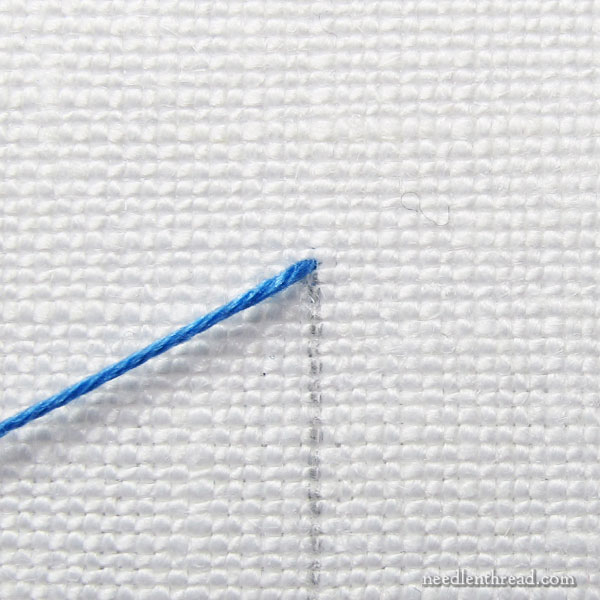
Bring the needle and thread to the front of the fabric at the top of your design line.
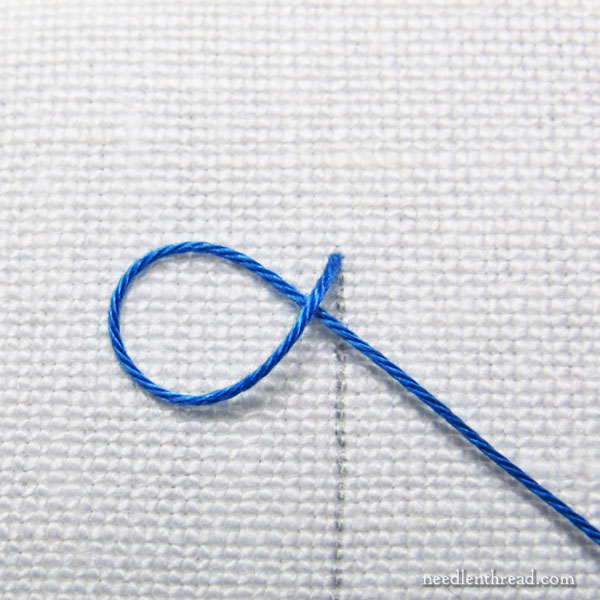
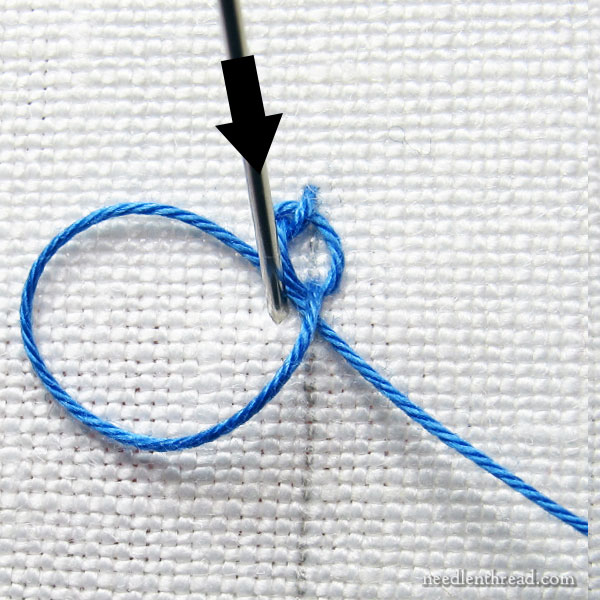
Create a twisted loop on the surface of the fabric to the left of the design line, in the configuration shown above.
The easiest method to do this is to hold the working thread in your right hand, bring your index finger of your left hand up behind it so that the thread is resting on it. Roll your index finger forward towards you so that the loop forms in the thread, and then place the thread on the fabric in the configuration shown above.
The method of making that loop in that particular configuration, by the way, is the same method you use to cast a thread onto the needle when working cast-on stitch. You can find a video for cast-on stitch here, if you want to see what I mean.
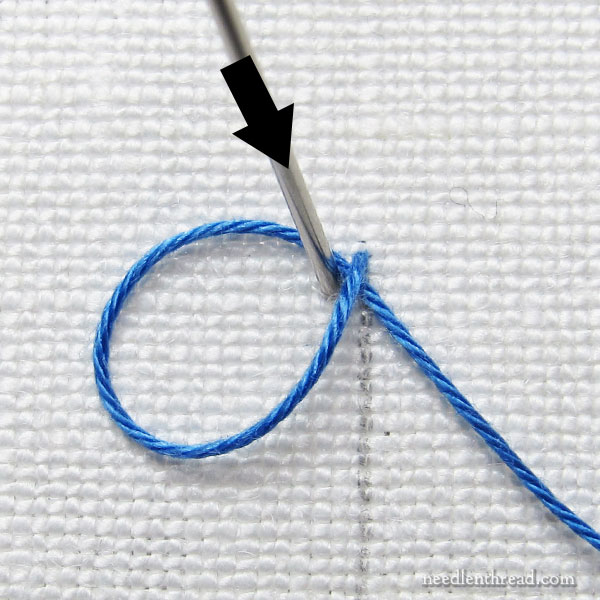
With the loop on the fabric, take your needle down into the fabric just inside the loop, just to the left of the design line, and slightly down the line (just a smidgeon) – as shown in the photo above!
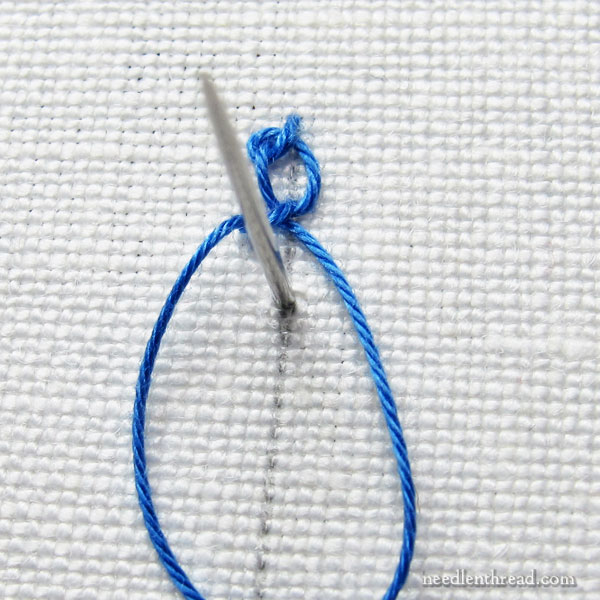
Pull the working thread to snug it up around the needle, and then pull the needle to the back of the fabric slowly, leaving a small loop on the front of the fabric.
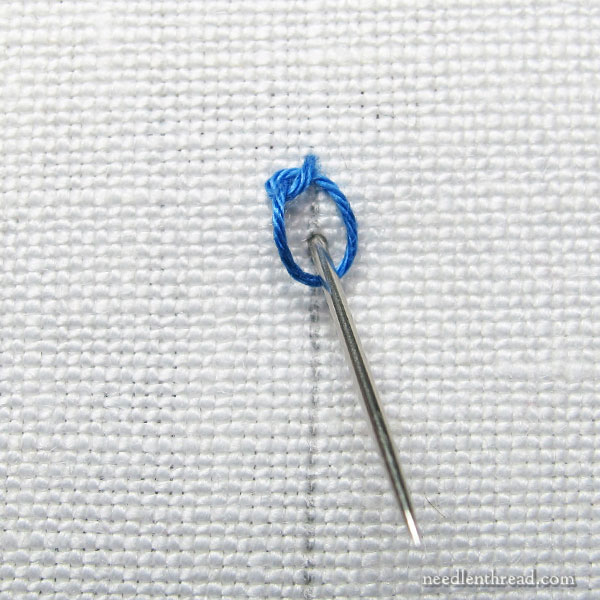
Move down the design line a stitch length (however long you want your chain stitches) and come up inside the loop of working thread that you left on the front of the fabric from the last move.
Pull the whole working thread to the front, and pull through in the direction you’re stitching (down the design line) to tighten the chain stitch around the working thread as you normally would when making a chain stitch.
Now, on to the second chain stitch.
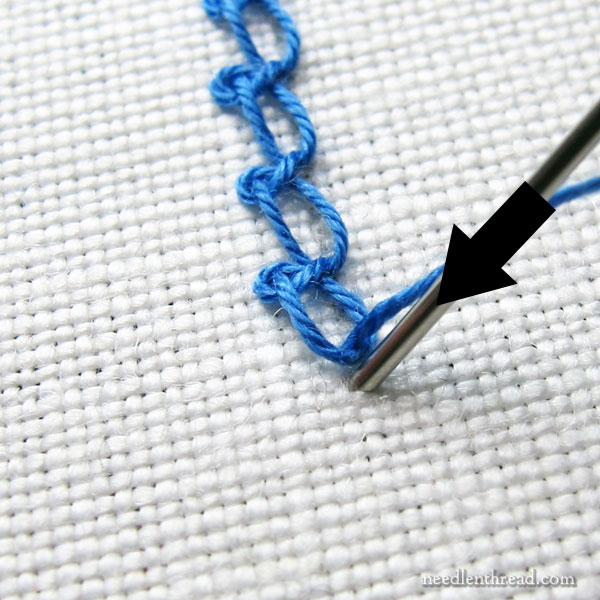
Loop the thread like you did before and lay it on the fabric to the left of the design line.
Pass the needle into the fabric just to the left of the line and just past the end of the first stitch, as shown above.

Before you pull the needle through, pull the working thread to tighten the loop around the needle.
Once it’s snug, pull the needle and thread to the back, leaving a small loop of working thread on the front for the main chain stitch.
Move down the design line and bring the needle and thread to the front of the fabric on the design line and inside the small loop of working thread.
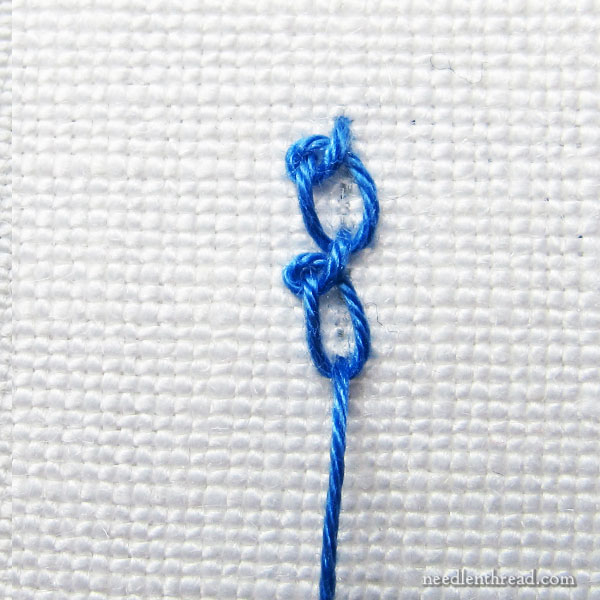
Pull the working thread in the direction you’re stitching down the line, to tighten the chain stitch.
Proceed in this manner all the way down your design line.
When you get to the end of your design line, anchor the last chain stitch loop with a small straight stitch right over the loop, just as you would end a regular chain stitch line.
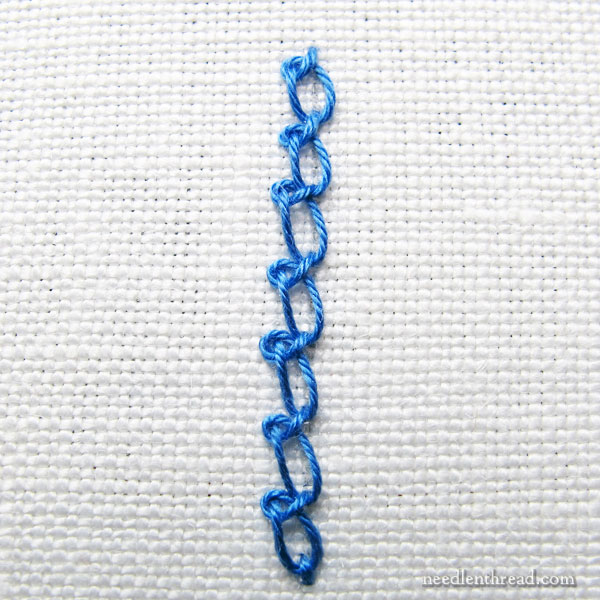
This is a completed length of knotted chain stitch.
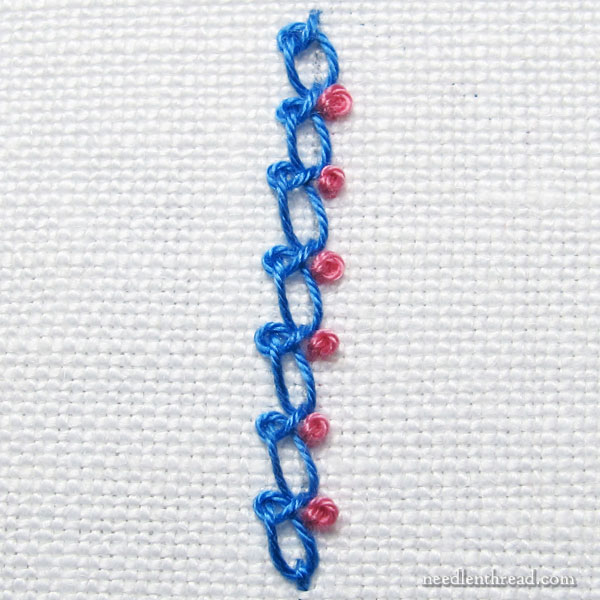
And, to dress it up a little bit, I added French knots down the right side in a contrasting color. They aren’t properly part of the knotted chain stitch – they’re just for dress-up.
Otherwise, I suppose you’d have to call it knotted knotted chain stitch. Or maybe knotty knotted chain stitch.
What Next?
Next time we have a little Stitch Fun!, I’ll show you some ways I manipulate this stitch to make it a little more usable in regular surface embroidery projects.
In the meantime, feel free to add the knotted chain stitch to your repertoire of embroidery stitches!
What can you use it on? Well, I used it in my Stitch Sampler Alphabet for line stitches on some of the monograms. It’s fun to dress up and add embellishment to.
You can also use it in crazy quilting, to decorate seams.
Remember this little sampler needlebook from this past summer? It’s a fun line stitch for band samplers and similar projects, too!
Looking for More?
If you’re looking for more Stitch Fun! – embroidery stitch tutorials that add a little fun to your needlework – you’ll find a whole list of Stitch Fun! tutorials here. Take a browse! You never know what you’ll find that will bring a little zippity-zang-zang-zing to your embroidery!
Hi Mary,
Thanks for the tutorial on a very lovely stitch that I hadn’t seen or heard of before.
I’m a leftie – would I reverse the direction (and therefore the knot side) for this stitch, or would that then not properly be a knotted chain stitch?
Mary…I did enjoy your statement about the french knots: “They aren’t properly part of the knotted chain stitch – they’re just for dress-up.” Boy did I get a good giggle out of that! Yes, they do look like they are embellishing that stitch…and “just for dress up” really does identify what they are doing! But…giggle giggle… I have not thought of “dress up” since I was a kid! Thanks for sharing a “dress up” idea for my future knotted chain stitches!
Regards,
Bonnie from Buffalo
Dear Mary
I’ve looked at both the knotted and crested chain stitch and there certainly is a difference. They are both pretty stitches and with the added french knot it makes a nice contrast to the stitch. I’m looking forward to further chain stitch revelations. Thanks you for demonstrating to us the knotted chain stitch and for the photos and tutorial. I do hope you have a great weekend with lots of stitching.
Regards Anita Simmance
Soy principiante pero quiero hacer un pie de cama y almohadones quisiera saber si tienen algunos kts. que incluyan todo?
Check Hazel Blomkamp embroidery. She has some kits for footstools.