


Happy Wednesday! Midweek already – I’m not sure how we got here!
Following up on the previous grape embroidery session, it’s time to finish up the last grapes on the bunch in the How to Embroider Grapes series. We’re going to embroider the three final grapes, and they will go very quickly because they’re very simple. We’ve done all but one of the techniques before.
Because one of the grapes involves some goldwork thread, I’ll recommend some reasonable and more accessible substitutes for the sake of the tutorial.
I’d love to do this whole bunch of grapes in goldwork, to tell you the truth. It’s an idea that’s percolating with the millions of other project ideas that are constantly vying for attention in my head.
But in the meantime, let’s just keep it simple, shall we?
The Backstory
If you’re just joining in at this point, this article belongs to a series of embroidery tutorials on different ways to embroidery a bunch of grapes. Additionally, the series on grapes belongs to a broader series on how to embroidery various different things. We’ve done wheat, strawberries, and daisies so far. If you’d like to take a look at the whole series on How to Embroider (Blank), feel free to visit the series index here.
I also post these tutorials in an easy-to-download and print PDF format for members over on my Patreon page, so if you’ve joined me over there, you’ll find all these tutorials (and several other delectable designs and printouts) available for you to download and save. It’s just a small way to Thank You! for your support of Needle ‘n Thread.
Briefly, Grape 15
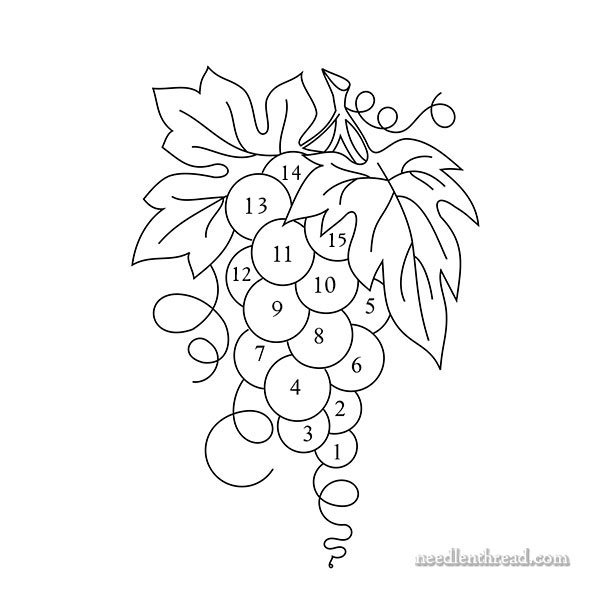
Moving on with the grapes, we are going to tackle grapes 13, 14, and 15, as noted on the grape diagram above.
You can see that grape 15 is tucked away behind a leaf and part of the shisha grape. It is simply a split stitch outline in three strands, using two strands of 906 and one strand of 907.
You’ll see it suddenly show up in the photos. I don’t think any special instruction on that particular grape is necessary – we’ve seen the split stitch before, and you can find a tutorial for it here.
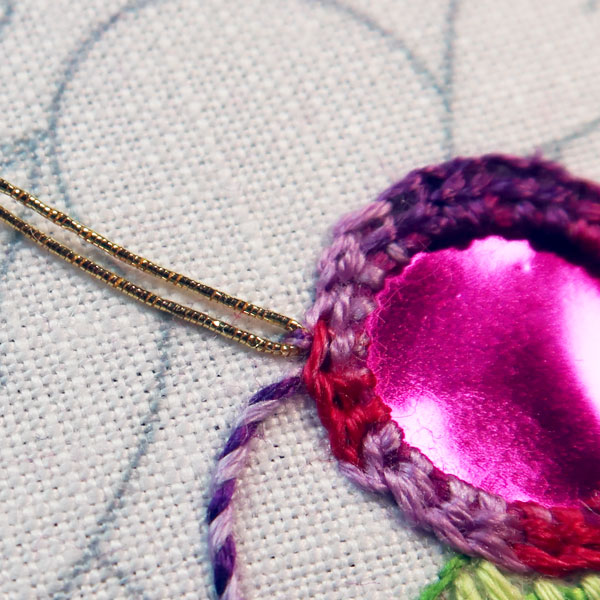
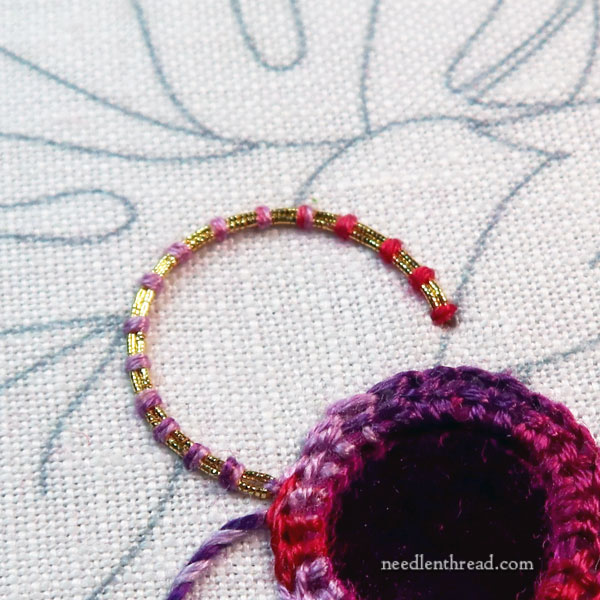
Grape 13 features a couched outline, using #5 gold smooth passing thread. This is a specialty wire-wrapped thread, a real metal thread used in goldwork embroidery. Passing thread is normally couched in pairs, which is what we’ve done for the outline of this grape.
You can read more about gold passing thread here, if you’d like to familiarize yourself with it. You can also see it at work in this tutorial.
For couching the goldwork on this grape, we used 2 strands of DMC 4211.
Start with a small piece of gold passing thread (cut no more than 4″), and fold it in half. It helps to use tweezers to pinch the fold together.
Begin couching over the fold (inside the “crimp” of the fold) right up next to the shisha outline, tucking the fold of the passing thread a little under the shisha stitch. Then, take a small couching stitch pretty close to the fold, to hold the two parallel lines of goldwork thread together in place.
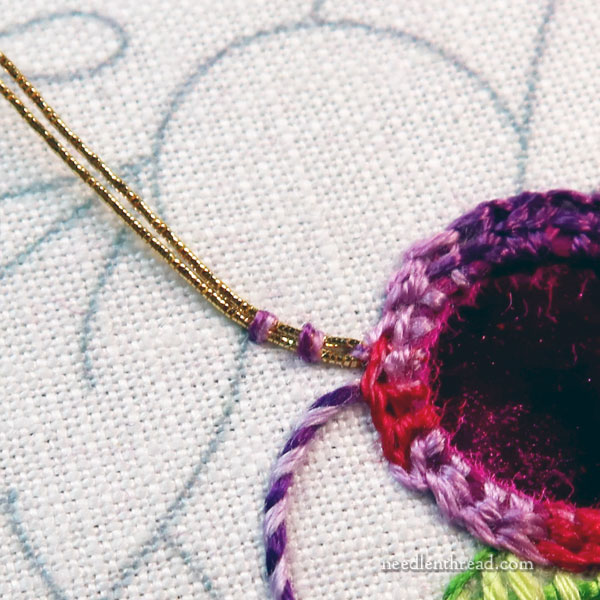
From there, it’s just a matter of couching over the double line of passing thread at regular intervals.
Couching is simply taking a straight stitch over another thread (called the “laid thread”) in order to hold the laid thread in place. You can find a tutorial for couching here.
Normally, the couching stitches are perpendicular to the laid thread.
When using two strands to couch, it’s important to keep those two strands parallel and untwisted. This helps create a very neat and consistent look to the couching.
It’s also important to do your best to space the couching stitches appropriately. You can never go wrong with evenly spaced couching stitches.
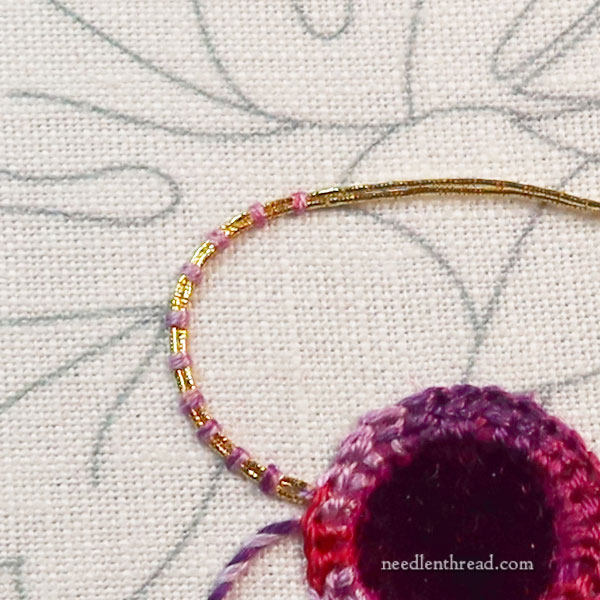
But for effect – for example, in places where you want the couched line to look darker – you might space your couching stitches closer together, and then, where you want the line to be lighter, you might space them further apart.
Whatever you do in regards to spacing, though, you want the couching stitches close enough to bring about a very smooth curve on the outline of the round grape.
When you get to the end of the couched outline, you’ll sink (or “plunge”) the two ends of the gold passing thread to the back of the fabric, and whip over them on the back of the fabric to secure them. You can find a tutorial on how to end couched goldwork threads here. Although they aren’t couched passing thread in the tutorial, the principle is the same.
You can use a plunging lasso to sink the threads – you’ll find instructions for a plunging lasso here. Or you can use a chenille needle with a large eye to plunge the threads to the back.
Remember to plunge one thread at a time, rather than trying to take two heavier threads to the back through the same hole.
Just at the end of the line, take a final couching stitch over the gold, to fix the end of the gold threads to the fabric securely.
Substitutions for Smooth Passing Threads
If you happen to have in your stash any metallic thread that would look good in this project, you can always couch a metallic thread on this as a practice. Metallics don’t necessarily behave the same way as smooth passing thread, especially if the metallic is twisted, but you can experiment with it and it will give you some practice couching a stiffer thread.
You can also substitute any heavier, regular thread. So if you have some perle cotton that works with the colors you’re using, using couching to outline the grape with perle cotton in one or two strands (depending on the weight of the perle).
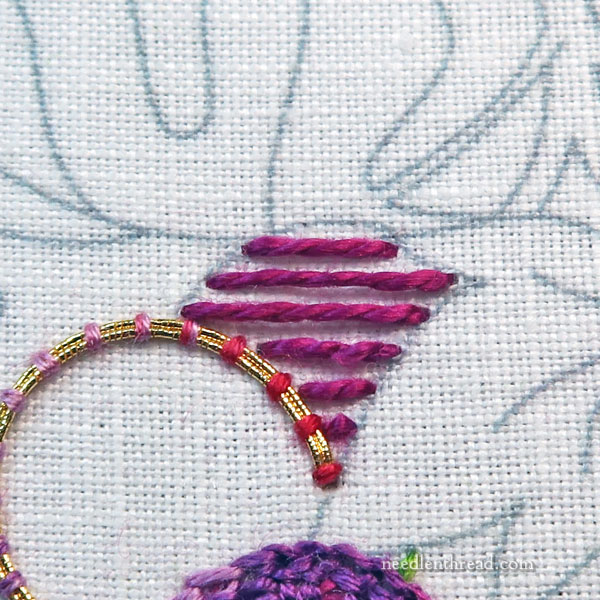
For grape 14, we’re doing burden stitch again, so nothing new here!
We used DMC perle cotton #5 in color #34 for the laid foundation thread.
Then, the perpendicular second layer of threads for the burden stitch are three strands of 4211.
If you are not familiar with burden stitch, we used it earlier in the grape series, and it is demonstrated in this strawberry tutorial here.
Since we are using a variegated thread, we cut and arranged the thread in the needle so that the darker areas of color would be at the base of that grape where it is tucked behind the other grapes.
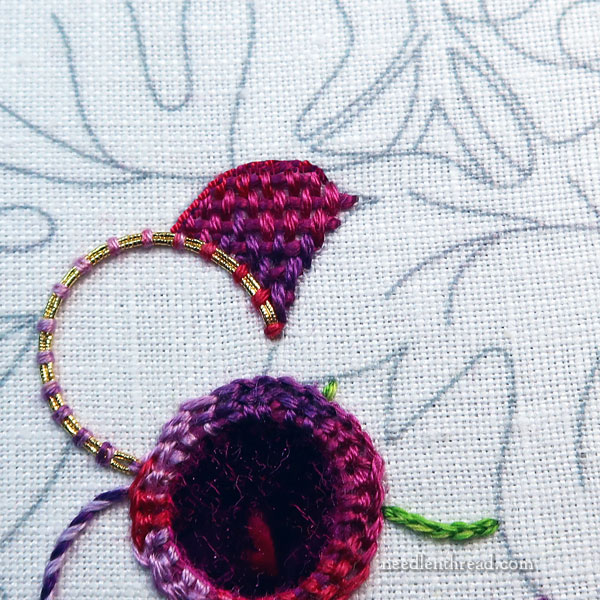
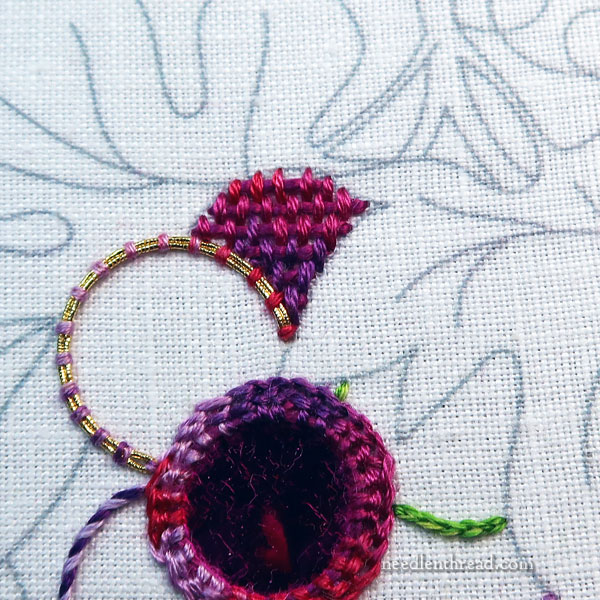
Finally, you can outline this grape with either backstitch or stem stitch, using a strand or two of stranded cotton or using a coordinating perle cotton.
You can see in the photo above that grape 15 – in green split stitch – made its appearance at some point in this process. In retrospect, it would have been a better idea to make grape 15 a filled grape, but that didn’t happen, so we’ll go with it the way it is.
In the upcoming final article in this series on how to embroider grapes, we’ll be stitching the curly tendrils and the leaves, and that will be the end of this particular version.
The grapes may show up again in the future, with a different approach, though. I’ve got another sample of them set up, in the works, but the progress is much slower.
Make it Your Own!
Remember, the point of the series is to give you options and ideas for embroidering your own grapes. You don’t have to embroider the bunch in this sampler-esque fashion. You can select the approaches that you’ve seen, that you like and work the whole bunch that way.
You might even combine approaches.
For example, you might fill all the grapes with burden stitch worked in such a way to accommodate color changes, and then you might outline the grapes with couched gold. It would formalize a very stylized approach, and it would be quite beautiful.
Looking for More?
You’ll find the index for this project and all the articles in it – including the free design and the materials lists – in this Project Index. Just scroll down to the section on grapes!
Members on Patreon will find the downloadable PDF for this installment available on my Patreon page a wee bit later. I am combining this installment with the last installment, into one PDF, so we’ll be covering the tendrils and leaves as well. I’ll have it up for you as soon as I can!
Dear Mary
I like the goldwork passing thread idea for the grape above and the burden stitch which I have come to like through this series and the shisha grape is really shiny and with the goldwork I’m sure it looks lovely. As you say there are lots options with this kind of project and it’s good not to be restricted with one style and thats the beauty of embroidery it’s very versatile. Thank you for sharing with us the last of the grapes in the how to series which I am really enjoying. I do hope to see more of this kind of embroidery in the future.
Regards Anita Simmance