


Today, I thought we could take a very general look at the finished bunch of grapes from the “How to Embroider Grapes” series that was moving along just swimmingly until cataract surgery and recovery upset the schedule.
Fortunately, the grapes were finished before the surgeries took place. Unfortunately, I didn’t have time to edit all the photos. Grrrr. Hindsight is 20/20, they say – I should have taken the time to do a lot more preparation than I did. So sorry!
But, for those following the grapes and working on your own version, today’s article will show you how we finished the project, if you want to work your way through to the end. I don’t think too much details is required for the finish, as it is pretty simple!
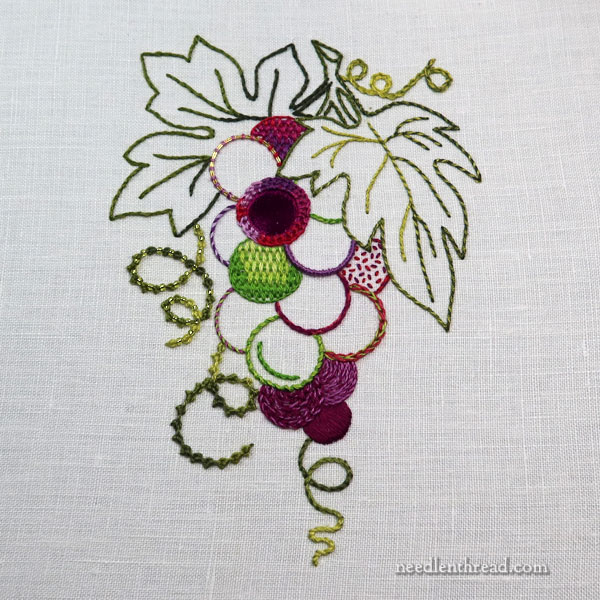
Voilá! The finished bunch of grapes!
After finishing the last grapes, the tendrils came next.
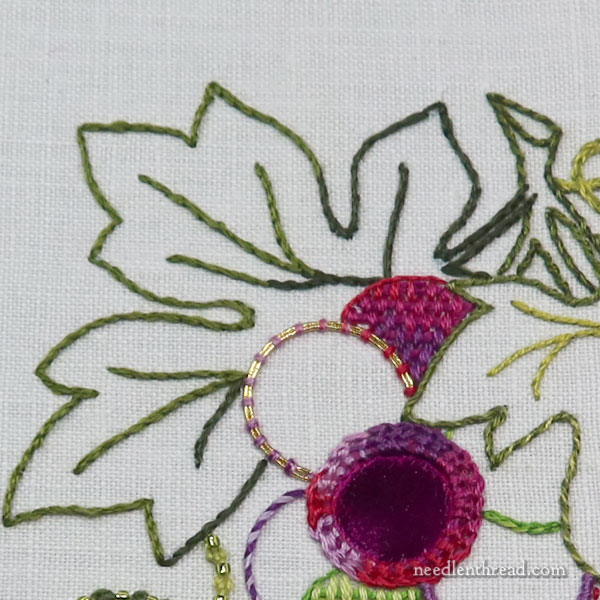
The Tendrils
Anna worked those in a variety of line stitches – chain stitch, stem stitch, Palestrina stitch, and beaded Palestrina stitch.
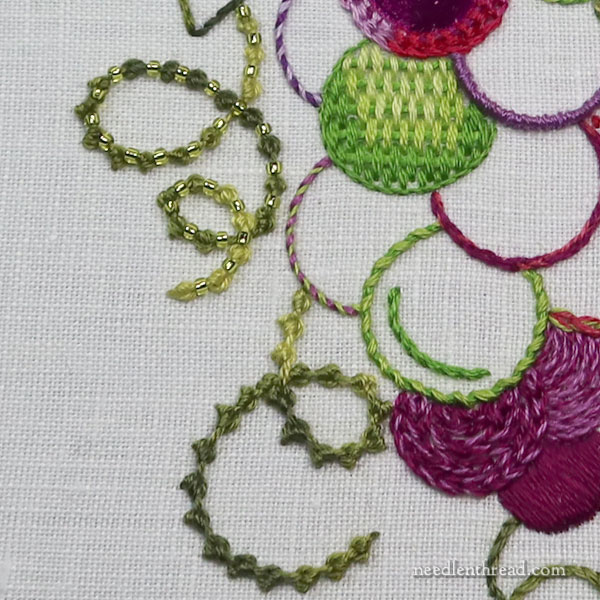
She used three strands of DMC 4066 (a variegated thread), and on some of them, she turned one strand around, to mix up the color placement a bit.
The beads on the left tendril that’s worked in beaded Palestrina are Mill Hill petite beads 42031, but you can substitute any color coordinating seed beads in size 11/0 or 15/0.
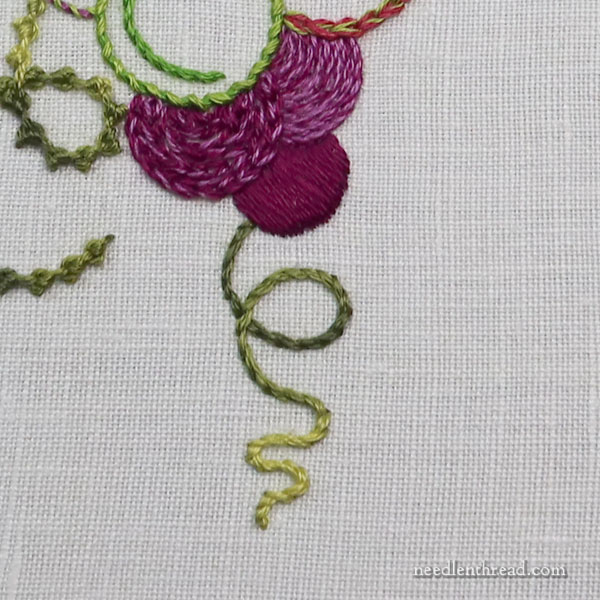
The lowest tendril is stem stitch.
The tendril on the upper right is chain stitch.
You can find tutorials for all of these stitches through the links given above.
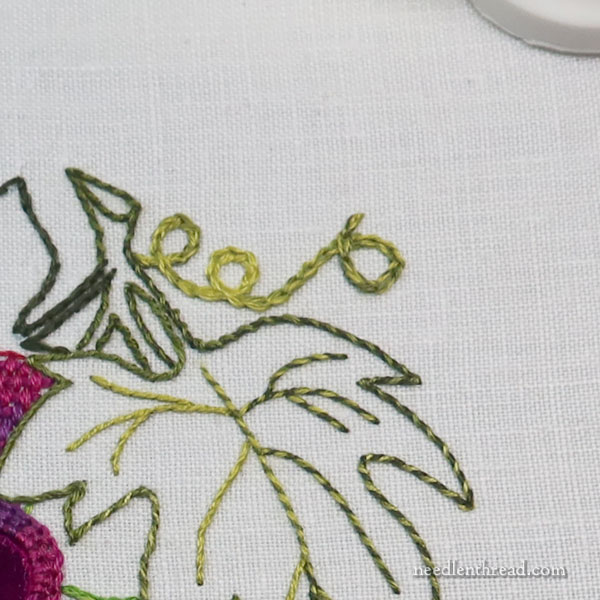
The Leaves
The leaves are also a combination of simple line stitches, using the following DMC colors: 935, 469, 4066, and 166. Mix the colors up to suit how you want the colors to fall on your leaves.
For example, we wanted the stem dark, as well as the leaf on the left, which is behind the grapes. So we mixed up darker colors. For the stem stitch leaf on the left, we used two strands of thread in the needle, mixing 935 and 469.
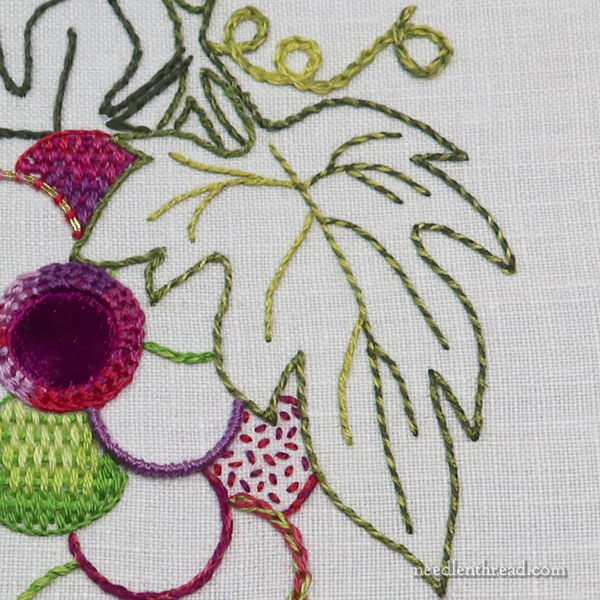
With the front leaf, we used whipped backstitch with a backstitch foundation using three threads. The foundation is worked by combining the sections of shades we wanted out of 4066 with 935, 469, or 166, depending on how light or dark we wanted the foundation. The whipped part of the backstitch is one strand in any of the colors, to either highlight the lighter parts, or slightly darken darker parts.
And that, my friends, brings us to the end of the grapes!
You can find all the tutorials for this project here, under “How to Embroider (Blank)” – which is the index for all the tutorials in this series. So far, we’ve covered wheat, strawberries, daisies, and grapes.
We have one more project before the end of the year. It is definitely different! We’ll be exploring the use of metallics and beads (and regular thread) in a very light and ethereal project.
I’ll eventually publish the printable PDF for this and the previous grapes lesson on my Patreon membership page, for members over there who want to download the project to save it for later or print it in an easily-printable format. Unfortunately, I cannot do the detailed desktop publishing stuff right now, so it will be a little while on that.
Today, instead, I’m going to post another little free pattern over there, though, for members who would enjoy stitching it. I had a lot of requests for my Retro Christmas Angel that I showed you earlier this week, so members will find that little angel waiting for you over there later today, as a Thank You for your patience and because you really are my angels at this point! Thank you for your support!
Have a wonderful weekend!
It is very beautiful.
Dear Mary
I’m glad Anna and you were able to finish the grape project, that must a relief. The finished grape project is lovely and I like the leaves, you must be so glad you have Anna to help you with your stitching, she has done a great job. I do hope your eyesight is improving and you are making headway with the surgery. I do hope you are able to get back to being able to see and stitch it must be so frustrating. Thank you for sharing with us the finished Grapes and for the instructions on threads and the techniques used.
Regards Anita Simmance