


This winter, I decided that my evening needlework project (as well as my grab-and-go, no matter where I go project) Must Be my hexie quilt that I’ve been working on for … oh… almost two years now. Otherwise, the thing will never be finished.
So, in the winter evenings, when it’s dark and cold out and it’s time to hunker down for the day and warm up a bit before heading to bed, I’ve been engrossed with those little tiny hexagons. Even though it’s not embroidery, it is needlework – I’m making a full-size hand-pieced quilt using English paper piecing – so I don’t mind sharing progress occasionally here on Needle ‘n Thread.
For those who are new to Needle ‘n Thread, I’ll share a little bit of the backstory and refer you to previous articles. Today, I’ll show you progress, discuss a few pitfalls, and mention three things that have improved my hand-piecing experience tremendously. I’ll also mention a couple tips on thimbles.
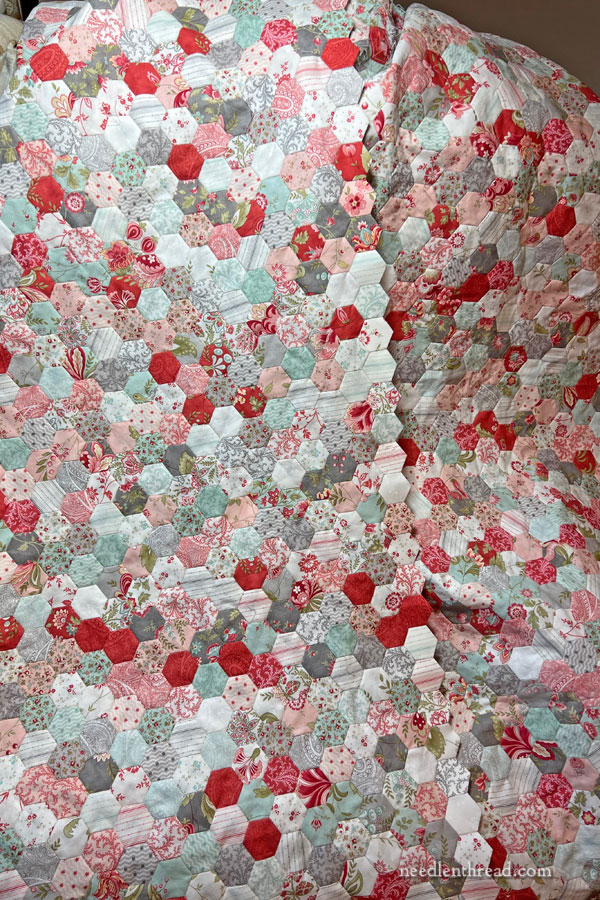
I prefer looking at the progress of the quilt top when pieces are draped over a chair, like they are in the photo above.
The hexagon quilt that I’m making is constructed from 3/4″ hexies (that is, each side of the hexie is 3/4″ long). There are something like 5,170 hexagons necessary for making up the full-sized quilt top. You can read the backstory (and other tips) on this project in these articles, chronologically listed:
The Start of the Hexie Quilt
Hexagons, Happiness, and Organization
Hexies & Traveling
Home with Hexies & a Tutorial
Hexie Updates & More Organization
Hexies in the Hospital
Hexies in the Ozarks
A Note on Fabric
I’m using a line of fabric (that is now defunct) called Porcelain by Three Sisters.
If you find fabric that you like, and you want to make a quilt out of it, you’re pretty much obliged to purchase all the fabric you will need – or you will envision needing – as soon as the stuff comes onto the market. Otherwise, once it’s gone, it’s pretty much gone. Here and there, I might find some small yardage available of some of the prints in the line, but for the most part, it doesn’t take long for the line to run its course on the market.
(Never fear, for this particular quilt, I have plenty.)
Especially if you’re hand-piecing, make sure you love your fabric choices, and that you’re pretty sure you’ll love them even if styles change a bit.
Color trends tend to mutate every two – three years, and even though the trend doesn’t usually change drastically in that short of a period, if you take the micro changes over a couple trend mutations, it doesn’t take long for color palettes to lose their trendy edge and seem dated. So make sure you like your fabric!
On Construction
I’ve learned that I should have thought out my method of construction before I actually start piecing pieces together. This seems an obvious. But I’m not a quilter, and I was super-eager to start sewing things together.
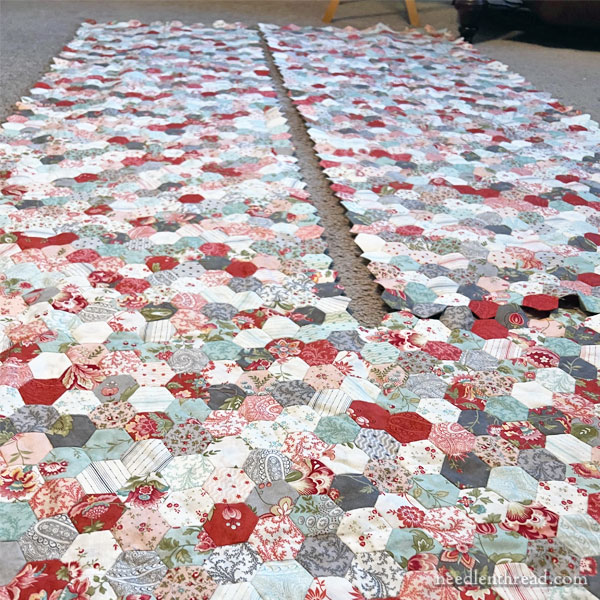
In my eagerness, I ended up with chunks that had to be sewn together in the most awkward ways.
I’ve almost got is solved, and from here out, I’ll be able to work with regular strips of hexies across the width of the quilt.
The Right Thread
Three discoveries have made the piecing of this never-ending project much easier on me. In fact, these three things have considerably relieved hand strain, if nothing else. And they’ve sped up my progress.
The first thing is thread. My quilt has withstood the trials and errors of several different thread types, most of which were just wrong, wrong, wrong. I researched threads for this type of paper piecing, and I took the advice of many different paper piecing gurus online, trying the various threads they recommended.
And man oh man. I had bad luck with all of them. It came to the point that I really hated picking up the hexies because I was constantly fighting with thread.
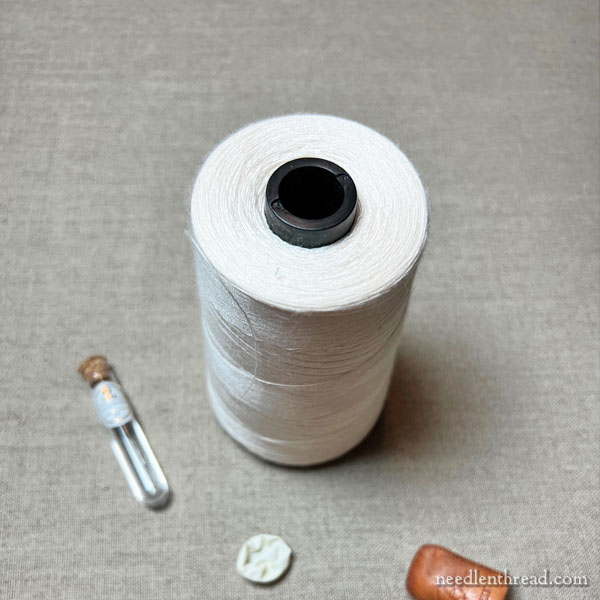
Finally, after using three other types of threads, out of the blue, I tried Coats Dual Duty All-Purpose Cotton Wrapped Poly Core thread, Tex 40, and I rejoiced. It was like being in thread heaven! Then I found it on a cone for a whole lot less than purchasing innumerable spools (through Wawak). I think one cone will probably do it for the entire rest of the quilt.
I’m bemoaning the fact that I didn’t discover it sooner, because I doubt the strength and longevity of some of the threads I was using.
In any case, big difference. And it even makes a difference in the stress on my hands while stitching. I’m simply not as uptight, using this thread.
These Needles!
The second thing I discovered was that all sharps and all betweens and all quilting needles are not made equal.
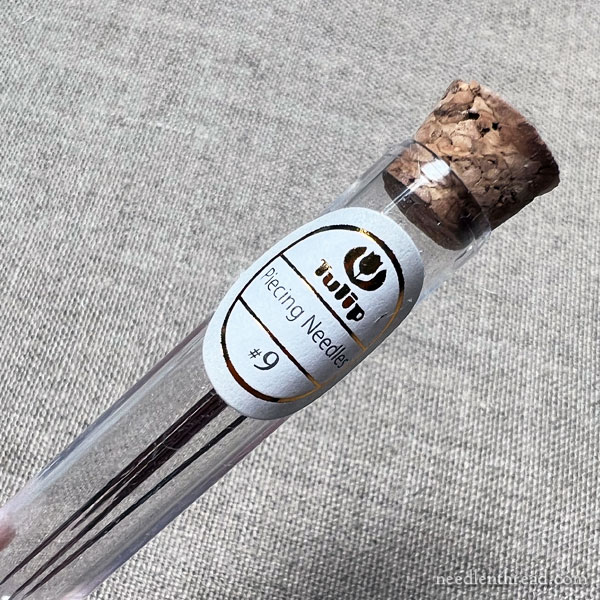
I finally bit the bullet and ordered #9 Tulip piecing needles. Whoa. Huge Difference. Much more comfortable. Much easier to stitch with. So smooth. So wonderful. So happy.
And so much easier on my hands.
I don’t know why, but there you have it.
Finger Cots
I discovered that finger cots are a huge help, when binge-piecing. I have a feeling I’ll be using them more frequently with embroidery, too.
Finger cots are little thin latex-like “gloves” that are made for individual fingers rather than the whole hand. You can buy them for pharmaceutical purposes, in the pharmacy or online.
They’re great if you have a cut on a finger and you need to keep the cut dry. You just cover your finger with one while you do dishes or take a shower.
But they also come in handy for sewing. They’re a good way to provide a little grip on your needle.
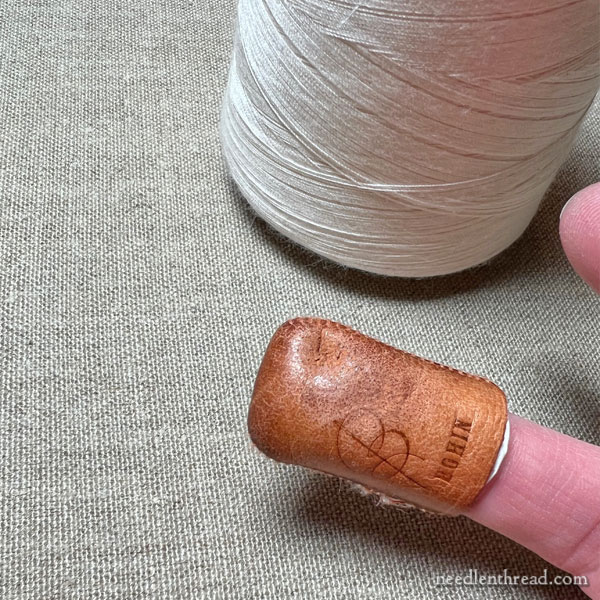
I cut them down a little bit so they aren’t long, and I wear one on my thimble finger, under my leather thimble, to keep it from shifting while I stitch. Especially in cold weather, thimbles can get loose, so the finger cot keeps it in place.
You can see the edge of the finger cot sticking out under my thimble there. (I cut the ring part of the finger cot off, and only use enough of it to fit right under the thimble.)
I also use part of a finger cot on my thumb on my right hand, to help grip the needle easily while I stitch. And wonder of wonder – it also helps prevent the little slit that I get on the side of my thumb, right next to my nail, from always grabbing the needle in the same spot. No more painful little slits! Hallelujah!
(Again, I cut the ring part off, so that the finger cot is just long enough to fit over my thumb knuckle. This keeps the cot from interfering with circulation, especially. You can also just cut a slit in the ring part of the finger cot, to keep it from being tight on the thumb.)
Other Thimble Notes
I use Bohin’s leather thimbles for this project. It’s the only time I really use a thimble. I’m pretty sure I couldn’t do this project without a thimble, and this particular thimble is the most comfortable and easy to manage thimble for me.
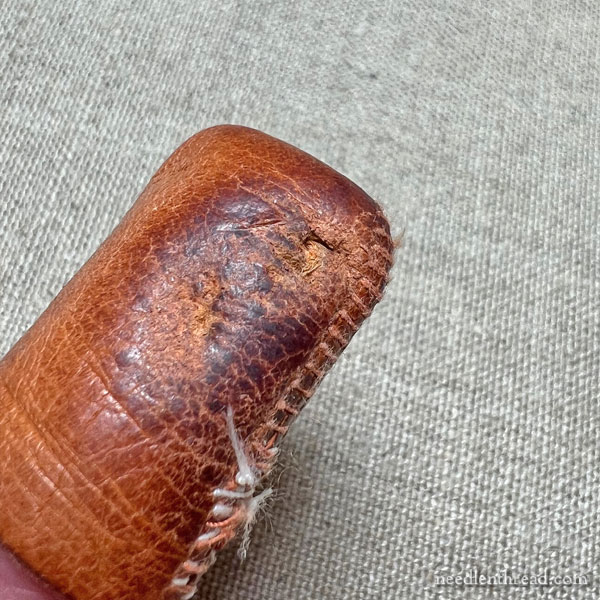
When you use a thimble, you generally end up hitting the same spot with the eye of the needle. After two years of regular use, the eye finally broke through the leather.
But it’s such a comfortable thimble, and I really didn’t want to buy another and break it in, so I just flipped it around and used the “front” side of the thimble on the inside of the finger. Works fine! I’ll use it until it doesn’t!
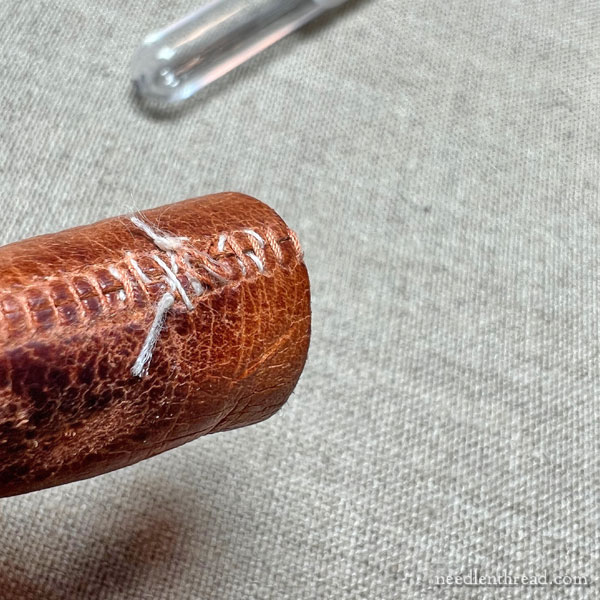
Also, the sides started to fray and pull apart. I sewed them up with waxed sewing thread. It seems (seams?) to be working just fine.
The moral: don’t give up on your favorite thimble too quickly if it starts wearing out!
And that’s where I am with this project. I would really like to finish it this year, but I don’t think that’s too likely. So far, I’ve put more time into it during the winter months. It sometimes gets side-lined in summer. It’s a great portable project, too – it was the perfect totable project when my mom was in the hospital the last couple months before she died. I worked on it a lot then! You don’t have to take huge swaths with you – just enough to sew a strip or two.
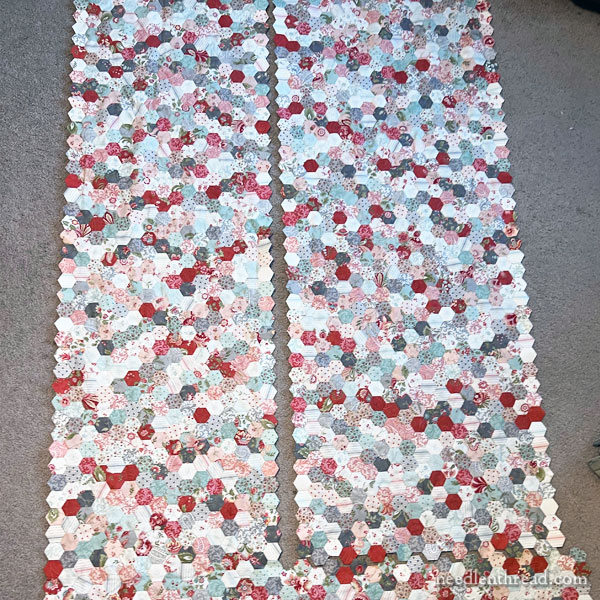
I still love the fabric and the project. I’m not kicking myself for having started it. I’m about 4 rows from half-way done, once I get the pieces shown in the photos above sewn together.
Will I move any faster now? I don’t know. But I am already thinking ahead to how the heck I’m going to actually finish it into a real quilt. That’s something I’ve never done. Hmmm….
Well, I probably have plenty of time to think about that!
I want to echo your “right tool for the task” theme here. I have been sewing since I was a little kid with my Mom in the 1970s. It never occurred to me to think about buying needles. I just went to BigboxRUs and bought them. Some of your posts on needles interested me though, so I went to Needle in a Haystack and got some Bohin needles (and of course a couple of other things, while I was there. . .).
Man oh man! There is a huge difference between the Big Box needles and the Bohins. Embroidery is such a pleasure with the right tools. Thank you!
Your hexie project is turning out beautiful! I have made 2 queen sized hexi quilts and my all time favorite tool is from the fishing department. Macks Pips Leader Caddy
You can thread your needles and you are ready to stitch anywhere. The leader caddy holds up to 20 threaded needles. I also love that thread for handwork. I use crafter’s compression fingerless gloves to help reduce hand fatigue.
Hi, Joni – You have made me very curious. I need to see how that works. If I understand correctly, you thread your needle head of time, and then wind the thread in the “wall” on the side of the caddy, with the threaded needle poked into cork or something on the inside? And then, when you need a new thread, you retrieve the needle out of the cork and pull the thread out, so it unwinds from the side wall holder? I’m guessing that’s how it works?
I only have a few needles – I think six come in that crazily expensive package of Tulip needles (for something like $9) – so I keep using the same needle while the others are reserved in their tube, secreted away for whenever I need to replace the one I’m using. So far, the one I’m using has held up so well, I may never have to switch needles! LOL!
OMG!! I am at about the same place you are with my hexi quilt! I decided on a modified flower garden & (bless your for mentioning it last year) went on a desperate scramble to find another “jelly roll” of my fabric &, after much searching, found probably the last one in creation. *whew*
I added some tiny triangles & diamonds between the “flowers”… BUT that is gonna make the quilting really hard. I didn’t want to cut my beloved hexies to finish it. I want to keep the wonderful jagged edges BUT that means either I make myself insane trying to use a bias trim on all of those angles OR I use a technique called “facing”. (Like you would do with a jacket lapel)
You make the quilt sandwich & do all of the top quilting up to the edge, trim the sandwich & then add more hexies (right sides together) and flip them over on to the back over the raw edge of the sandwich and tack them down on the back. So you would have: top hexie, batting, backing, & another set of hexies just around the edge. There are a few good vids showing how to do the facing. This one has a bunch of different ways to finish a hexie quilt. (https://www.youtube.com/watch?v=7_3mM6MzH9c) (let me know if you want some links & a set of finished pics – I have done extensive internet searches & will happily send ya a word doc with pics & links in it 🙂
I also found some amazing “Limulus” thimbles made of deer skin on Etsy that wrap around my fingers so the tips are open but the sides are protected. I LOVE these & she was kind enough to make some really small ones for my tiny fingers. I ordered like 20 of them for my thumb & pinky. (I use the side of my pinky to pull the thread to minimize breakage at the needle eye so I was getting thread-cuts on the side of my pinky. ) They are deer skin & tend to stretch BUT they also have a grip to them & are very, very comfortable to wear. I also found a needle puller that works with a little plunger to grab & pull the needle thru (better than my teeth LOL).
Have a brilliant day! Vik
Vikkir
Thank you for the tip on the thimbles, I’ve never heard of them so will definitely be looking into that. Like you, I get a sore spot on my little finger right at the crease of the first joint, can’t seem to train myself to turn my hand away from myself when I pull the thread through. I’ve been using little kids ‘owie’ band aids to protect that joint. The have a smooth surface so don’t grab the thread like a textured band aid does.
Happy sewing – Brenda
Hi Mary, I loved the tips/advice in this article. I would love to see a more thorough review of your thread experience so we can understand what was wrong, wrong, wrong! and what was so different and right about the new thread you are using. For those of us primarily using embroidery threads, but interested in expanding our quilting/sewing experience I know it would be a useful discussion. Thank you for your generosity in sharing so much of your experience with us on this site over the years! Kirin
I too would like more info about thread. I’ve been using 100 wt YLI silk on my own 3/4 inch hexie project. It is wonderfully easy to slip through the fabric, but I end up knotting it at each intersection and half way along each side because it’s so slippery that the fabric pieces pull apart and you can see a teeny gap between the pieces. I’m hoping it will not be a problem once I remove all the papers and quilt the thing. But since then I’ve discovered a new thread that grips the fabric better but is still fine enough to melt into the fabric to be invisible. I’ve been using it on my EPP wagon wheel quilt blocks and I love it. It’s an Aurifil 80 wt cotton.
Lovely.It is a nice break from embroidery.I myself really like to explore or add variations when crafting.Nowadays i am more into sewing than embroidery.So i tried coffee dyeing a fabric it was fun and exciting.And a welcome break from sewing.By the way did i mention i really like the fabric and the quilt.Keep it up!!!
What valuable information! Thank you for sharing such important tips! You will save many from having to go through the woes/time/expense etc of discovering what works better.
Morning Mary,
Haven’t been doing much of anything embroidery or quilting related for far too long but your post showed up in my newsfeed on facebook so I had to go take a lookey loo as I’m working on my never-ending hexie quilt right now.
I have a latex allergy, so those cots are a no-no, instead, I cut the fingers off exam gloves and use those. Your thimble is heavier than mine, which is beginning to wear through, I might have to patch it. I have another thimble I can cut apart and I love your suggestion of putting a cot underneath it.
As far as needle and thread goes, I use freezer paper for the templates and baste around that with whatever light thread I have. I use YLI silk thread for the construction though with a #10 sharp. It sinks right into the fabric and most of the time is invisible.
I love the scattering of the different fabrics across the quilt, no rhyme or reason to the placement, it goes where it goes as the next piece when you pick it up from your prepared hexies, my kind of scrappy.
There are a gajillion ways you can finish a hexie quilt, a Goggle search will provide that. Main question is are you going to have a batting and backing or just a pieced backing to use year-round as a bed cover.
I enjoyed the update on your quilt and look forward to seeing more as you get closer to the finish.
Happy sewing – Brenda
I will probably have a layer of batting of some sort in there. We shall see! I have a sister who quilts avidly, and every quilt that she makes is meticulous. I’ll rope her in as my long-distance advisor when it comes time to make decisions on finishing. Pretty sure I have quite a bit of time before I get to that point.
FYI….I used to get “slits” on my thumb or fingers during the winter. Now I don’t. I found that by putting Bert’s Bees Lemon Butter Cuticle Cream around my nails & cuticles at night that, no matter what craft I am doing, I don’t get those slits any more! Yay!
I use their cuticle cream, too – love it!
With regard to sandwiching and quilting the finished top (next year or whenever the time comes), you might consider sending it to a long-arm quilter. Missouri Star Quilt Company do a lot of business that way. I’m too cheap… er… frugal to do that myself, so I usually cram the quilt through my home sewing machine. On the other hand, I usually have more design to the piecing, so the quilting pattern itself is not so important. Your hexi quilt might be a wonderful “blank canvas” for some really beautiful edge-to-edge long arm design. Or maybe there’s a custom quilter in your area you could support. (Of course, you’re also welcome to hand quilt the whole thing, but that might take another year or so, and the strength of the machine quilting can overcome some of the dodgy thread from the beginning of the project.)
Heh heh. I don’t see myself hand quilting this! I will probably look for a long arm quilter in the area. 🙂
Hi Mary, what a beautiful post, as well as inspirational. Thank you.
I don’t get it! I’m doing more embroidery. I’ve done a lot of patchwork, i.e., made several quilts. Our American quilting tradition had to do with warmth in bed. Women sorted their pieces on hand, traded with friends, used the colors they loved, and began cutting patches. These silly color and designer trends are for women with more money than sense! Or who really are saving money by making a huge quick ‘n’ dirty bed cover with matching items in the bedroom. But it seems to me that to take whole cloth and cut it into ridiculously tiny pieces . . . good grief! Wouldn’t larger hexagons have been just as satisfying?
Well, you know what they say. You do you.
Thank you for the update on the hexies quilt. It is beautiful!! Slow and steady hand sewing.
I, too, have a favorite leather thimble – Nimble Thimble. It’s heartbreaking when it wears out and I have to buy a new one. I am a big fan of quality needles – Tulip needles and Clover Black Gold needles; depends on the project.
Yes, sometimes it’s the little tools that can make or break progress on a project. I’ve used a little strip of moleskin on the inside of thimbles that are a bit small. And I’m glad you were wise enough to get enough fabric do to the whole quilt at once. To be working on it for 2 years and not done – that’s not all that long for a totally hand sewn full size quilt, especially since it’s been a grab and go project.
Your quilt will be gorgeous when done!
Apparently the coffee wasn’t doing it’s job yesterday! That should have been used moleskin in thimbles that are a bit large. A small strip around the opening makes it just a bit smaller and gives something for the finger to grip.
Where did you purchase your thread by the cone? Thanks! Love your hints and tips!
Hi, Carolyn – I ordered it from Wawak.
I found an alternative for protecting my fingers. I started with a tin of “Poke-a-Dots”. The tin was sealed with a strip of red electrical type tape around it. The Poke a Dots themselves are a bit too thick and clumsy, but that red electrical tape is the bomb! I cut a wee square of it from the strip around the tin – usually half the width of the tape – and place it over that spot on my finger where I push the needle through the fabric and it works beautifully without hampering my dexterity at all. Once I’ve used up all that red tape, I’ll try some electrical tape from the hardware store.
I have enjoyed EPP for many, many years and I understand how important finding the right thread is. Years ago someone recommended silk thread, but it was prone to breakage. Then I tried quilt shop all cotton thread. It would tangle and fray. After that I tried cotton wrapped polyester thread. It tangled, frayed and stretched. Years ago on a trip to a Mennonite/Amish quilt shop I bought, on a whim, a spool of YLI hand quilting thread. Finally, the thread that works for EPP whip stitch!! It’s all cotton, glazed, doesn’t tangle, doesn’t stretch, doesn’t fray. I have used it ever since.
I also prefer Bohin needles and have used them for many years.
Thanks, Linda – I will look that up!
Wow.what persistence !!!
I’m doing half inch hexagons into flowers using a mixture of bought and scrap fabric, I work on it in phases but it’s been 9 years so far. You are doing way better than me!
I love the fabric collection Porcelain. I have a FQ bundle of the collection. I agree with you Tulip needles are amazing. I use the Tulip chenille needles on my wool applique projects. I don’t use thimbles though. It heats up my fingers. Instead I use thimble pads. Have you tried them? It’s also made of leather. I can hand quilt two lap-size quilts with one thimble pad.
I have tried them, but I couldn’t get the hang of them. Now that I’ve gotten used to this thimble, though (going from never using a thimble to being used to this one), I might have better luck with them, so I’ll give them another try!
Hello Mary! I just found your site today. It is nice reading and looking at the photos. I was guided here by my search for marbelized designs. I am looking for a marbelized design needlepoint chart. I wondered if you knew of any. Glorafilia has a kit but it is not the colors I want. Can you give me any assistance with this? Thanks, Chris
Hi, Chris – Thanks for your comment and your question! I’m afraid I’m not too familiar with everything out there in the needlepoint world. I do mostly surface embroidery, and although I occasional dabble with canvas work, I’m not familiar with the designers and so forth in that niche. Perhaps search out “needlepoint blogs” – you might find someone who writes prolifically about needlepoint who can recommend a particular designer to you. Hope that helps!
Hi Mary,
Since I’m primarily a quilter, I LOVE to see your progress on your hexies! It’s SPECTACULAR! Really a thing of beauty!! Had you considered putting the 3/4″ hexies in the middle, then putting a border around that & putting larger hexings around the outside? It would go so much faster! Just a thought….
Hi, Diane – Thanks for the idea! Well, I already have all the little hexies mostly prepped, so I think I’m in it for the long haul on the little hexies!
I love seeing your hexie blog posts 🙂 love the fabrics you picked!
Thank you, Joni, for sharing about the Mack’s Pips Leader Caddy for holding loaded needles. Works great!!! I would never have found this great new tool. I load 12 Tulip needles with Superior Threads, The Bottom Line 60 wt polyester and I can go anywhere and enjoy working with my hexies.
Thank you so much. I don’t embroider much but I do lots of hand stitching. You solved my needle and thimble problems when I followed you down the hexie road. Especially those lovely long needles. I have been having the thread trouble and sore thumb nail corners too. So now I know what to buy. I always check your Amazon page and other lists to see if there is something to make my sewing life better. I subscribed to patreon to try to repay you a tiny bit for all the help you give me. I look forward to your blog. I love seeing your beautiful work, your studio and knowing how you are doing. I’m not a young person but I know you can learn something new every day. Most of the time it is from you. ❤️
I use 4 lengths of 1×4 wood laid out in the shape of the quilt starting with the backing, then the fill and topped with finished top. I staple each side to the boards and then used carpenter’s clamps to hold the corners together. Stretch the corners until it’s tight enough to do your quilting stitches. As you complete each side, undo the clamps and roll the quilt around the boards till you are facing the unquilted part of the quilt. Continue until quilting is all done. Then apply the borders. Hope this helps.
Im thrilled I stumbled across your site as I was looking for Hexi To Go idea’s!!
I am a self taught quilter and still learning with each quilt I make! Lol
I new I had to have surgery so I was looking for a project that I could do in my recliner for 3-4 months and HEXI’S were perfect. I too need to keep my hands busy at all times!
Any how, I had to laugh when I read about the finger cot..many years ago my family was on a trip and I stubbed my toe on the pavement ending up with a big part of the end of the toe hanging off. My dad stopped at a pharmacy and in 2 minutes had patched me up with what dad called a “toe rubber”LOL
It worked perfectly so I could still swim in the ocean and play in the sand(I was only 10yrs old).
I’ve always remembered that and have used them for various things through life and hand sewing is a big one!!
I’ve made notes of your suggestion and I’m on the hunt for the pencil boxes! I’ve already made about 400 hexie’s and was trying to come up with something to store them in!?
I’ll let you know how it goes!
Thank you for the idea’s.