


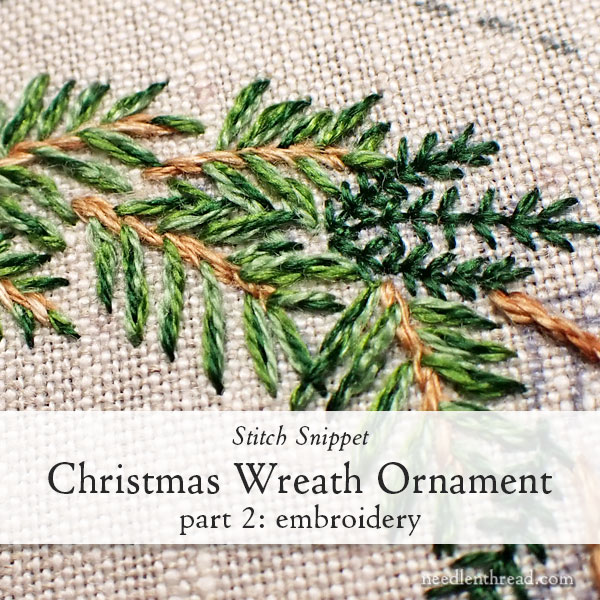
Welcome to Part 2 of our Christmas Wreath ornament stitch-along!
This project is part of the Stitch Snippet Stitch Along series here on Needle ‘n Thread. You can find previous Stitch Snippets listed under Tips & Techniques here on Needle ‘n Thread.
Previously, on this project, we covered the introduction, materials, and transfer information here, plus some additional information here on fabric layout and cuts, especially for those who are using the materials kit that goes along with my new project e-book, Twelve Wreaths for Christmas.
A little bit later today, members over on Patreon will find a new downloadable PDF for the stitch-along. The PDF will cover all the embroidery and embellishment of the ornament (including beads and bow, which can’t cover here in one article due to space). And oh, hey! I’ve also added a new chat feature on Patreon for members in the “Avid Stitchers” category who use the Patreon app on their smart phones. Look for that, if you haven’t seen it yet. It’s in the test phase at this point, but I think it’s worth trying!
Ok, on with Part 2!
Read Me!
A couple notes to help you get the most out of the stitch-along:
1. Please read through the entire article before you start stitching. If you have the Twelve Wreaths project e-book, it doesn’t hurt to refer to the project e-book, too. If you’re a member on Patreon, you can also refer to the PDF that will be posted over there. Any time you’re starting to stitch a project, read as much as you can about it first, so that you have a broad and thorough picture of what you’re getting ready to do.
2. I compiled the photos for the wreaths from various samples that I embroidered. I transferred those samples different ways, to test processes. Some of the samples were iron-on transfers, and because of that, you will notice that the orientation of the design is flipped horizontally. In other words, the greenery travels around the wreath in a different direction, so the image might look “backwards” to you, depending on how you transferred your design. This does not make any difference in the stitching or finishing instructions.
Stitch the Stems
The first thing we’re going to do is stitch the stems on all the larger evergreen branches.
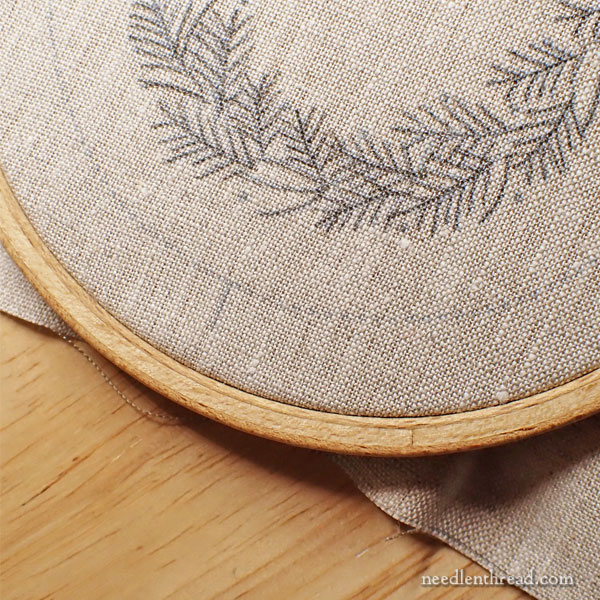
If you transferred the “minimal” design that doesn’t have needles on the dark green evergreen branches, your design will look like the transferred design above. (I used a micron pen and traced the design onto the fabric for this particular sample.)
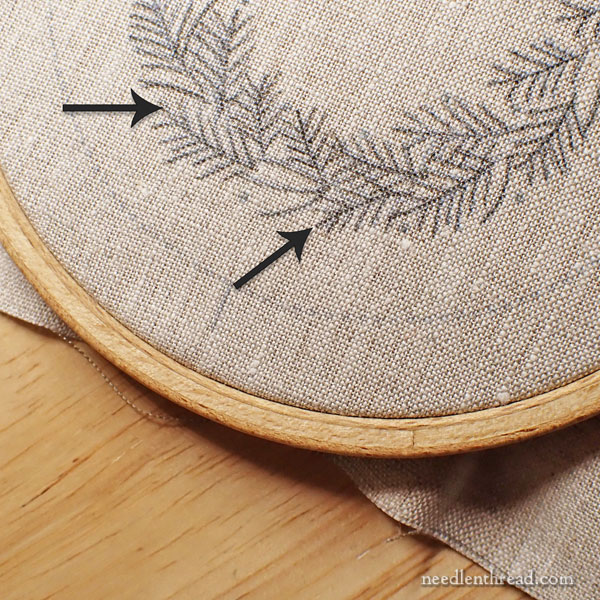
The black arrows above point to the stems I’m talking about – they are the center branches on the larger evergreen elements.
The middle branch on these evergreens is embroidered in stem stitch with two strands of DMC 105 in the needle.
DMC 105 is a variegated brown. To add a little bit of a heathery, woodsy look to the brown, reverse one thread.
So, cut your thread so that you have a nice range of dark to light browns over about a 20″ cut.
Separate out two strands of floss (one at a time), keeping the two strands you’re going to use separate from each other.
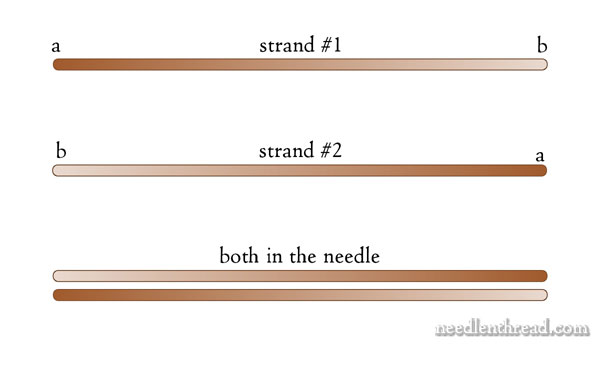
When you put the two strands back together, reverse the direction of one of the strands. The diagram above helps demonstrate how to arrange the threads.
If you want more information on this type of color manipulation with variegated threads, check out this article on stitching with variegated threads.
Start anywhere on the wreath to begin stitching, and move around the wreath from stem to stem in a logical way that avoids carrying the threads very far on the back of the work. You don’t want to carry threads across the middle of the wreath, for example! But you can carry threads from one branch to the next as you work around the wreath.
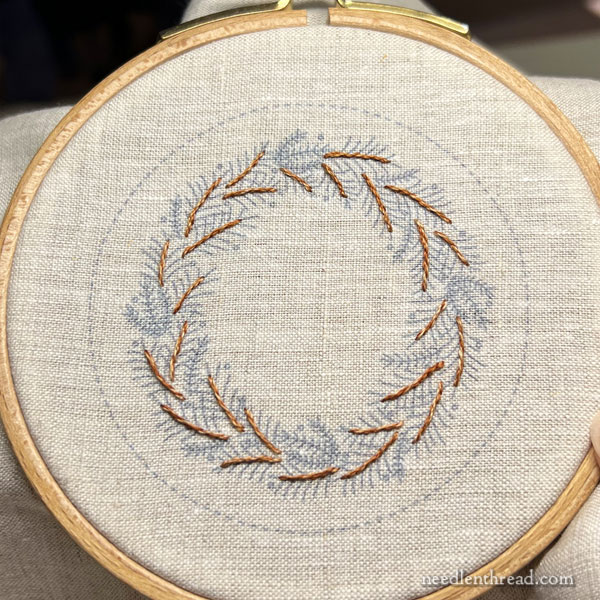
The finished stems.
If you are not familiar with stem stitch or you need a refresher, you can find a video tutorial for stem stitch here. And for even more tips on stem stitch, this article with 12 tips for better stem stitch may be helpful.
The Greenery
You can work the greenery in whatever order you wish. It might make more sense to start all the long needles first, and then to work the small dark evergreen branches while you add the dark green touches to the longer needles.
In the sample I’m showing you below, I started with the dark green branches first, though. You decide!
For the greenery, I used three colors of DMC: 890 (dark); 904 (medium); and 320 (light).
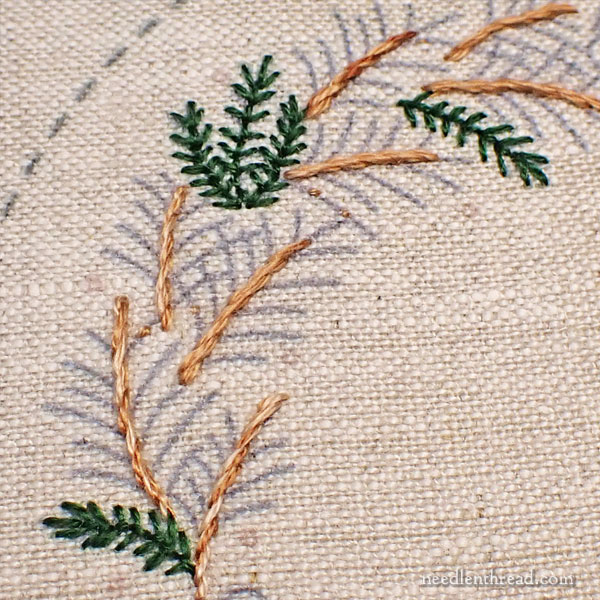
For the dark green branches with the small needles, use one strand of 890 in the needle.
I worked most of these little branches in vertical fly stitch, and I just eyeballed how big to make the “arms” of the fly stitch and how close together to work the fly stitches.
But in some cases, I also worked a backstitch down the center of the branch and straight stitch “arms.”
Either way, the results look pretty much the same at this scale. You can do those branches either way!
Now, carrying the thread on the back of the work between these elements might seem a little more problematic, because the dark green evergreens have greater spaces between them. That said, as long as you aren’t crossing the center of the wreath and you are working in a logical path around the wreath, you can carry your threads on the back from element to element for these branches.
Normally, I wouldn’t advise carrying over longer spaces on the back of the work, but the fact is, you’ll be covering those carried threads with a lot of other stitches as you work the other evergreens, so it doesn’t really matter. The longer carried threads on the back won’t be loose.
If you leave the dark green evergreens for last, you don’t have to worry about carrying, because you’ll be working dark green stitches into the longer evergreen needles all around the wreath. You can do the dark green evergreen branches at the same time that you’re filling in the dark green on the larger evergreen needles.
Now, you’ll pick a place on the wreath to start the lighter green, longer evergreen needles.
These longer evergreen needles couldn’t be easier to stitch, but I’ll share a few tips to help you achieve more natural looking branches.
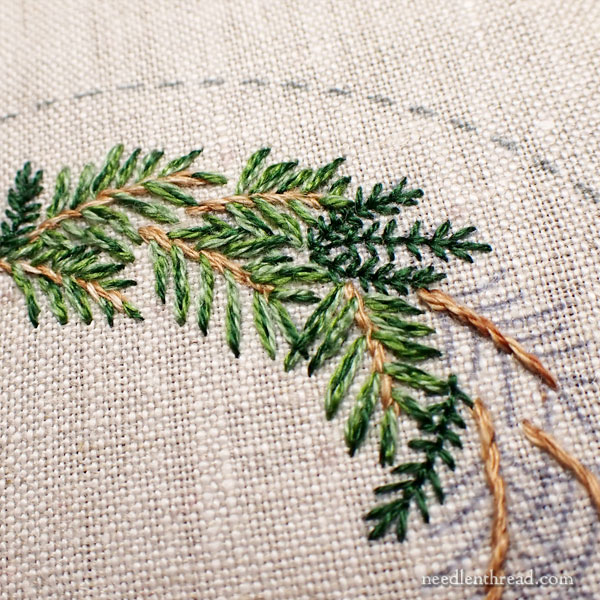
Use one strand of 904 (medium green) and one strand of 320 (light green) in the needle at once.
Using a simple straight stitch, stitch in all the long evergreen needles around the whole wreath.
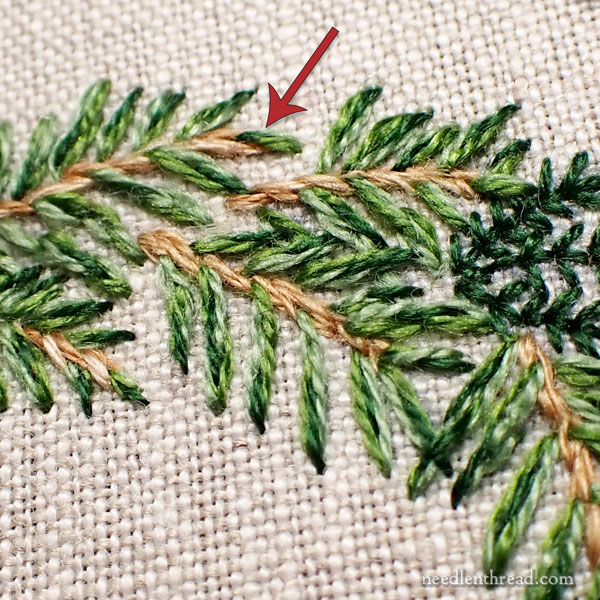
See where the red arrow is pointing? Sometimes, your straight stitches for the needles should work into the stem-stitched branch. If you have trouble coming up into the branch and splitting the stitches, you can start on the outside of the needle (away from the branch) and end the straight stitch by going down into the stem-stitched branch.
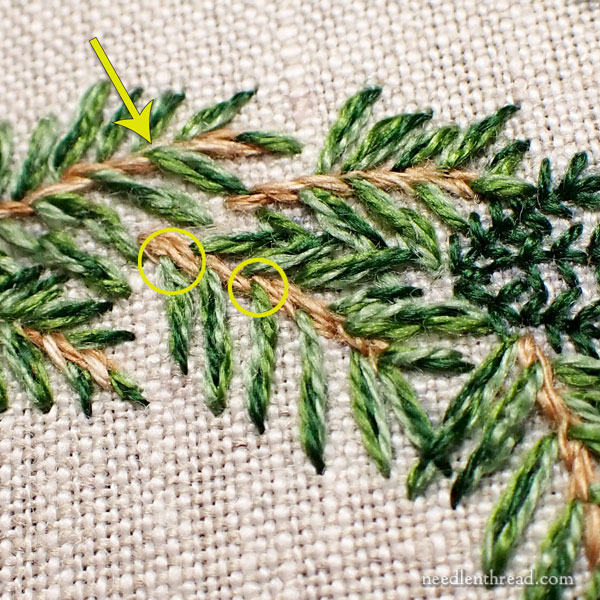
See the circle areas and the yellow arrow? Notice how the stitches emerge from the stem-stitched branch. The idea is to vary where your needles come into contact with the stem-stitched branch. It helps to have some needles splitting that center branch; otherwise, if all the needles are stitched straight out from the side of every stem-stitched branch, the result may look somewhat juvenile.

As you’re filling in all the longer needles around the wreath, don’t hesitate to stitch over other evergreen needles, overlapping them. This will also help the wreath look more natural and less flat. It will give a sense of dimension to the evergreen elements.
When you’ve finished stitching all the lighter and longer evergreen needles around the branch, switch to a single strand of dark green (890) in the needle.
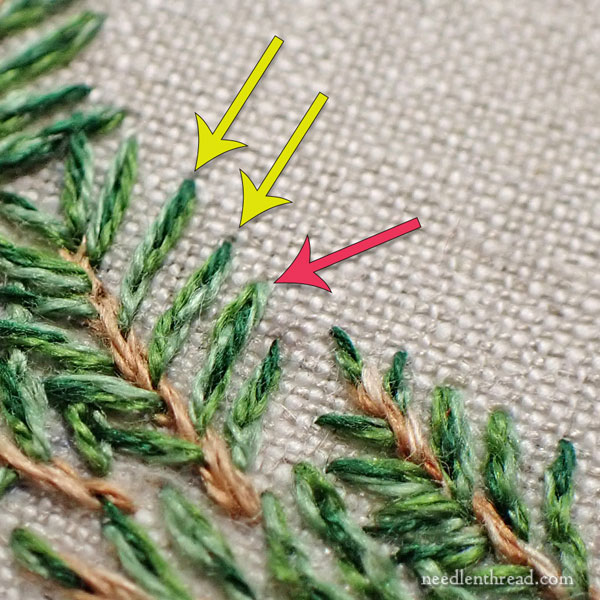
Go over all the longer evergreen needles, adding a single split stitch of dark green into them.
The location of that dark green split stitch can vary. It might be in the middle of the lighter green needle. It might start at the base near the branch and split through just a tiny bit of the needle. Or it might start closer to the outer tip of the evergreen needle and split down just beyond the tip.
In the photo above, the yellow arrows point to a couple evergreen needles with a dark green stitch splitting their tips. The pink arrow points to an evergreen needle with the dark green split stitch worked in the middle of the evergreen needle.
The upshot: vary the placement of the dark green stitches!
Embroidery Recap
1. Embroider the brown branches.
2. Embroider the dark green branches in vertical fly stitch or backstitch & straight stitch combo.
3. Embroider the longer evergreen needles in light and medium green, in straight stitch.
4. Go back and split one stitch of dark green (a single strand) into every lighter green, long evergreen needle.
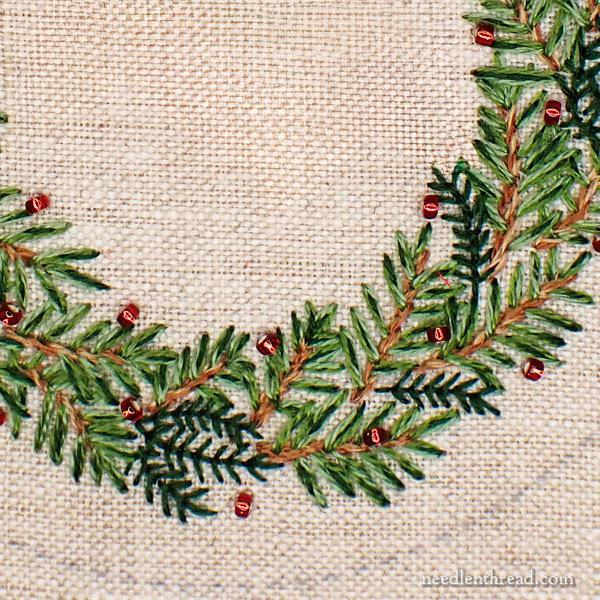
Following those four steps, you’ll create a very simply stitched wreath that looks like it has a lot of variety to it. Because most of the greenery is made up of straight stitches (and therefore very simple1), the whole wreath stitches up very quickly!
So that’s the embroidery part of the wreath.
In the next episode of this project, we will cover the embellishment (beads and bow).
And then we’ll devote one installment to constructing the ornament, and one installment to embellishing the finished ornament’s edge!
Coming Up
I’ll create an index for this project shortly, so that all the articles can be found in one place in case you want to go back to them easily, later.
I’m finishing up a few more wreaths myself this week, so I’ll probably share more photos of those.
We’re working on some ready-to-stitch towels this week, too, so keep an eye out for those! And we’re doing a bunch of organizational work, getting ready for next year. I’ll share some highlights of that as we get things worked out here in the studio.
If you have any questions, comments, or suggestions relating to the tips in this part of the wreath snippet, feel free to use the comment section below!
Dear Mary, I absolutely love your generosity in sharing so much detail. You’re amazing. Thank you.
–Debbie
thanks, Debbie! 🙂
Mary,
I have always made my stitches too large. How large should each stem stitch and the leaves be? I think I’m old enough to not be so juvenile now!
Carolyn
Shoot for somewhere around or between 1/8″ – 3/16″ of an inch on this project. 1/4″ would be far too long for the stem stitches on something this size. 3/16ths might also be a bit long, but for some folks, 1/8″ is too short to manage. So just work in that range somewhere. Stitch length should become almost second nature as you continue embroidering. The size of the project, the weight of the thread, the size of the element you’re stitching – all of that influences the length of the stitch, so stitch length is rarely a set-in-stone thing. You kind of get a feel for it eventually, the more you stitch on a variety of projects with different weights and types of threads and so forth.
Makes for a
Very natural looking wreath
I really enjoyed this blog post, thank you so much for writing it! I’m always trying to find more time for embroidery…ugh, it’s so beautiful! Maybe I’ll use some of these tips in my next project, should I find the time. 🙂
Thank you for the wonderful details which can make the difference in stitching, and thus help in creating a much more beautiful wreath. Awesome!
This Christmas wreath is beautiful! I hope to try soon. Your detailed tips and recap are fab! I’m new at embroidery, so your tips are very helpful.