


Time to move on with the next installment of our last Stitch Snippet stitch-along for 2023!
Today, we’re going to add the embellishments to the wreath that we embroidered on Monday.
If you’re just joining in, you can find all the previous articles for this stitch-along listed here in the Christmas Wreath Project Index, in chronological order so that you can follow along easily!
For members on Patreon, you’ve already received today’s installment in the PDF that was posted for you earlier this week.
Today’s lesson is short and sweet!
Once the embroidery for the wreath is finished, the next step is to dress it up with a bit of bling. I’m a sucker for beads on Christmas ornaments. They add a nice touch of sparkle and they make ornaments extra festive.
On some ornaments (like the pearl wreath that I showed you here, and that you can find in Twelve Wreaths for Christmas), encrusted areas of beading work great! But on our ornament that we’re working on together, we’re going to add just a little sprinkle of tiny 15/0 beads throughout the greenery.
If you have the kit for Twelve Wreaths, then you’ve got a bobbin of Miyuki’s nylon beading thread in there, with a #10 blunt tip short beading needle (John James needle).
If you are not working with the kit and you don’t want to scurry about for supplies, you can use a white or natural colored sewing thread to add the beads, or you can use one strand of red embroidery floss (321).
For those who wonder why I bother with the nylon beading thread, it’s because the thread is quite strong – I don’t have to worry about it fraying or snapping and dropping the beads – and it does not show through to the front at all, even if I carry it across open spaces on the back, even when working on white fabric. It’s not prone to stretching, either, so even if I carry a small distance, the bead isn’t going to loosen up on the front of the embroidery due to relaxed tension over time.
Some folks have expressed concern that the nylon beading thread will cut through the fabric threads or adjacent embroidery threads. I’ve never had that experience, and I’ve used this thread for a long, long time on a lot of projects. Perhaps it might be problematic on fabrics other than linen, but on this linen, the beading thread works great and I have never seen it compromise the fabric (I generally always use linen for these projects) or adjacent embroidery threads.
I would recommend that you cut your nylon threads with something other than your good embroidery scissors. But other than that, I don’t have any reservations about using this type of thread for this type of embroidery. If I did, I wouldn’t include it in my kits. I promise!

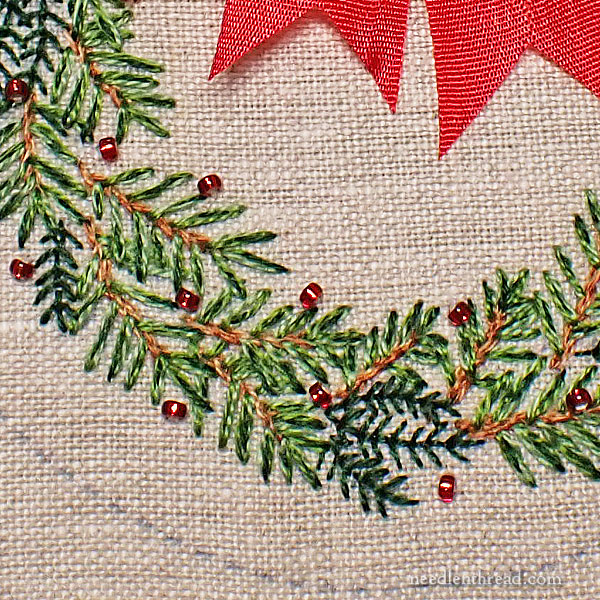
When you sew the beads on, they should be oriented like a tire sitting up on the fabric.
Sew through the bead twice (that’s sufficient, usually, for a 15/0 bead). If possible, try to sew the bead on in the formation of a cross stitch as it passes through the center of the bead. The diagram above will clarify.
As you sew the beads on, make sure that they’re situated in random directions. They shouldn’t all be sewn on so that they’re going in the same direction on the wreath.
The random direction of the beads will help the wreath look a bit more natural, and the beads will pick up light differently, so you’ll get a better range of sparkle from them.

Once the beads are on, move on to the bow!
Tie a bow out of 1/2″ silk ribbon. If you have the materials kit, there’s a 12″ piece of 1/2″ silk ribbon in there, in red.
If you’re not great with tying bows, I’ve got a tutorial here how to tie small, consistent decorative bows.
Once you’ve tied your bow, trim the ends so that they’re about 1.5″ long, cutting an inverted “V” at the end of each streamer.
Then, take your tied bow and hold it up to your embroidered wreath and move it around, to find your ideals spot for sewing the bow in place.
Using one strand of red embroidery floss (321), tack the bow to the fabric.
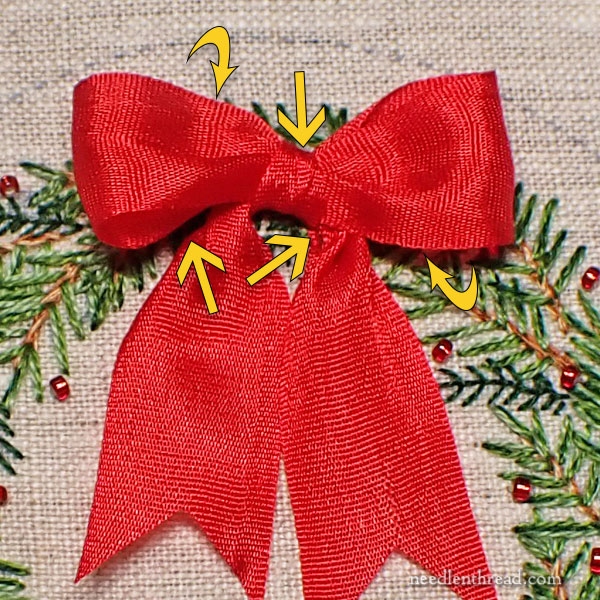
Start by sewing at the knot, passing through the back of the knot with your needle and thread and securing it to the fabric. Pass through the back of the knot at least two times.
Then, situate your loops how you want them, and sew a tiny tacking stitch over the edge of the inside (back part) of each loop. The curved arrows above demonstrate where I sewed my loops. You can’t see any stitches because I sewed the inside back part of the loop to the fabric, at the top of the loop on the left side and at the bottom of the loop on the right side.
Then, if you wish, you can also tack the streamers up by the knot, at least in one spot, just to ensure that the streamers are situated how you want them to be.
The stitches that pass through the knot don’t have to be tiny – you’re just going to pass through the back half of the knot and into the fabric a couple times. But the stitches that situate the bow so that it sits attractively should be really small and just on the edge of the ribbon. As much as possible, you want to make these stitches invisible.
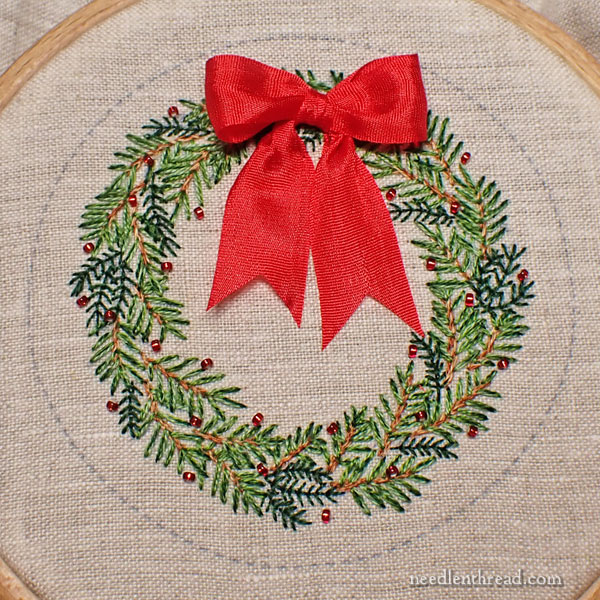
Bravo! You have duly embellished your wreath!
Next week, we’ll make it into a beautiful ornament!
Have a wonderful weekend!
Beautiful!