


Good morning and Happy Wednesday!
Today, we’re moving ahead with the Christmas Wreath Ornament stitch-along. We’re going to start the finishing, which is split into two parts. So, after today, only one more installment and your ornament will be beautiful finished and ready to hang!
If you’re just joining in, you’ll find all the articles relating to this stitch-along listed in the project index here.
If you are a member on Patreon, all the finishing steps will be available in one PDF by Friday. I’ll also be posting a video on part of the finish work (the more complex part, focusing mostly on the edge work) for dedicated stitchers and higher membership levels.
If you have purchased the project e-book, Twelve Wreaths for Christmas, you’ll find step-by-step finishing instructions in that PDF as well. For those who have access to all sources of information on this project, take advantage of them and read the instructions here on the blog, in the PDF, and on Patreon. You’ll gain a thorough understanding of what’s ahead so you know what to expect and can launch in with great confidence!
Be not afraid! This is not a difficult process!
We’ll start by talking about supplies, we’ll do a little prep work, and then we’ll begin constructing the finished ornament.
Come along! Let us do this thing!
The First Preliminary: Damp Stretch!
Once you’ve finished the embroidery of your wreath, you’ll need to damp-stretch it preparatory to finishing.
Please don’t skip this step! I can’t tell you how many folks reach out and ask what they can do about the wrinkles on their finished items, or the puckers, or a crooked finish, and so forth. When I ask if they damp stretched it, the answer is often no, they didn’t think it was necessary. Damp stretching goes a long, long way towards making your finish successful! Don’t skip it!
I go into greater detail in this article about damp stretching. This article also details how to damp stretch your embroidery. And, most recently – while working on the wreaths – I wrote this recap article about damp stretching.
Damp stretching tips:
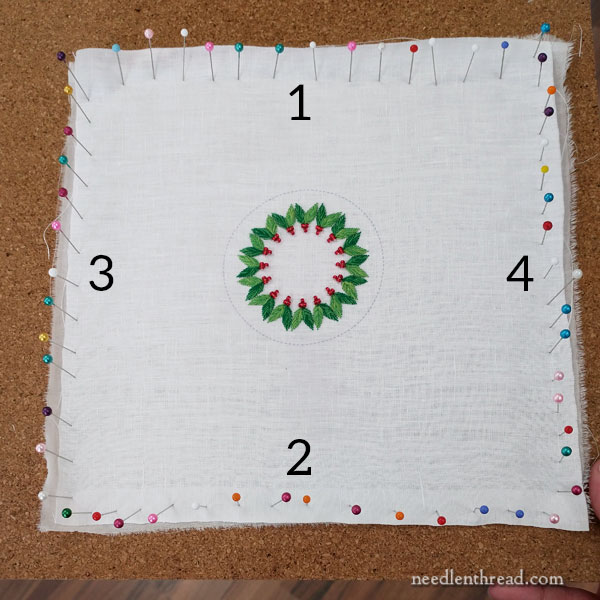
Use plenty of sewing pins. Pin your embroidery out on a surface that accepts pins. I use 1/2″ square cork tiles, but you don’t have something similar, you can use a padded and taut ironing board cover (on your ironing board). You can even use a chunk of styrofoam from shipped packages. Anything that will stay stiff enough and that will accept pins will work. Of course, you want the surface to be clean and I don’t advise using any good upholstered furniture, because you can ruin your upholstery with pins.
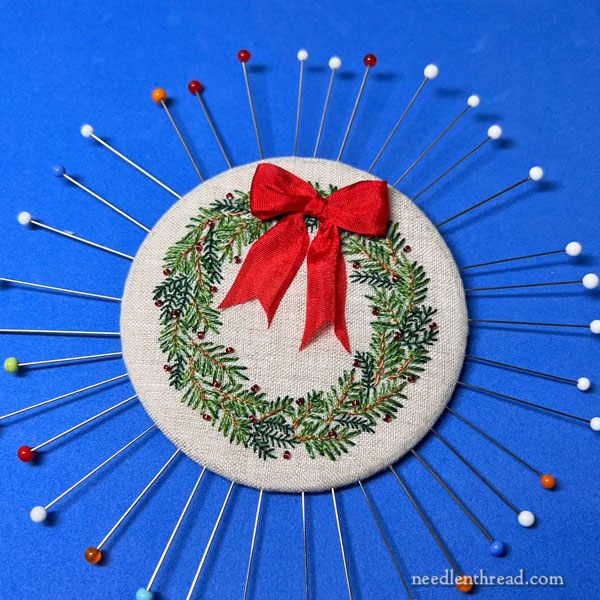
Pin the embroidery, working on opposite sides, as numbered in the photo above. Start the line of pins in the center of the edge you’re working on, work out to one side, and then go back to the center and work out to the other side. Then pin the opposite side the same way, and then to two remaining opposite sides. Mist with a light mist of water and allow to dry. I normally will leave pinned work overnight, but sometimes, I’ll pin in the morning and unpin after lunch. You just want to make sure that the piece is completely dry.
Gather Supplies
While you are waiting for your embroidery to dry, you can prepare the pieces you’ll need to finish the ornament and gather your supplies.
If you have the materials kit for Twelve Wreaths for Christmas, you have these construction parts already:
- Mat board foundation: I used 4-ply archival mat board for the foundation, cut at approximately 3 1/8″ round.
- Low-loft batting: I used Pellon Thermolam Plus sew-in, TP970
- Wool felt: I used red wool felt for this ornament
Additionally, you’ll need:
- Stranded cotton floss in a matching color for the edge and the cord
- PVA Glue (I use Sobo)
- Paint brush
- Clips like wonder clips, or even a couple clothes pins
- Sewing Pins
Prepare the Pieces
Let’s assemble some parts!
In this process, take your time! Especially when we get to the embroidery pinning and glueing part, take your time! Set up your workspace with everything you need close at hand, and give yourself a good 30 – 45 minutes of uninterrupted time.
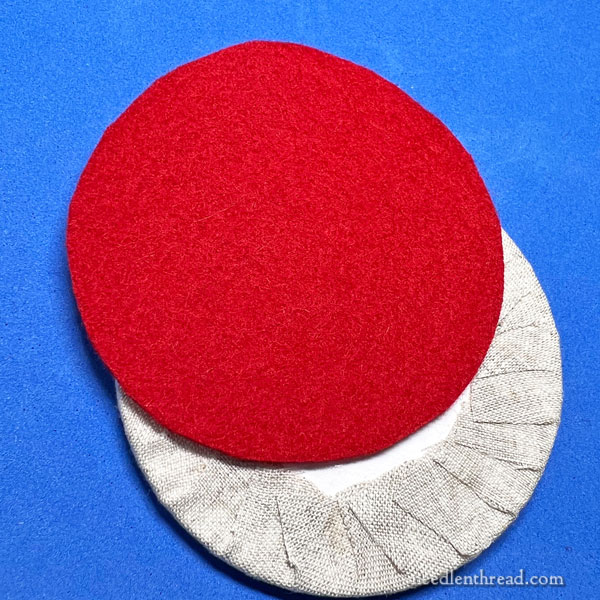
Using the mat board circle as a guide, cut a circle of wool felt that matches the size of the mat board circle.
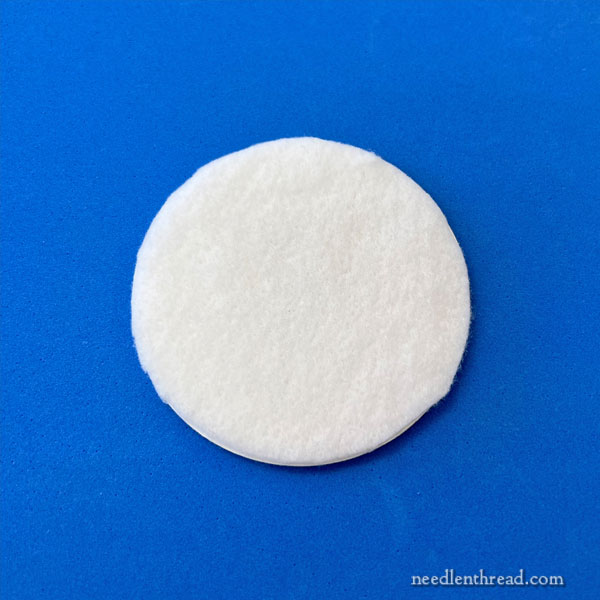
Use the cut out mat board circle as a guide and cut out a circle of low-loft batting.
Use the PVA glue and a paintbrush and glue the low loft batting to the mat board circle. Use just a very thin coating of glue, press the batting onto the board, and set the piece under a book or something flat and heavy, to let it dry.
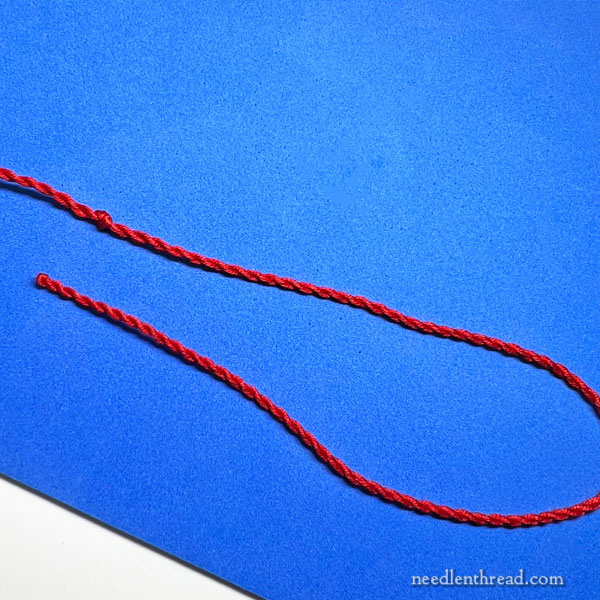
Making the hanging cord.
Use about a yard of DMC embroidery floss (stranded cotton – all six strands as they come off the skein, no need to separate and put back together).
Fold the floss piece in half and twist the heck out of it until it’s very tightly twisted. It helps to tie the two loose ends together and slip the halfway point over a hook or something (or use your finger), and then use a pencil inside the knotted end and twist. Then, bring the knotted ends and the half-way point together and let the whole thing twist into a cord. Knot the cord here all the ends come together and trim off the other knot from the two original ends.
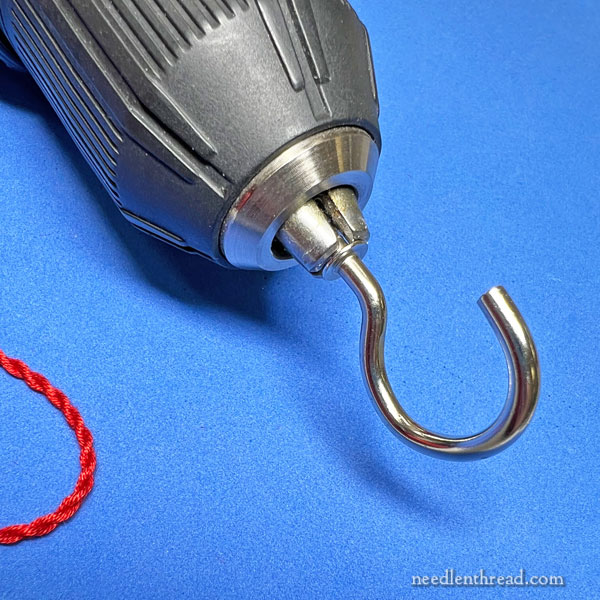
To make this process much, much easier, I use a drill.
I put a screw hook (like a cup hook, only a little bigger) in the chuck on the drill, and I loop the halfway point over the hook. I hold on to the two cut ends and turn the drill on. I let the thread twist until it’s really twisted – to the point that, if I relieve some tension on the thread, the whole thing wants to jump into a twist. Then I hold the center point on the twisted thread (halfway between my hand and the hook) and I bring the hook end and the hand ends together and let the cord twist.
If you get any bumps in the twist, just stroke the cord until the twist moves into place.
Knot together the ends so that you don’t loose the twist on the cord.
Prepare the Embroidered Front
Now we’re going to mount the embroidered linen onto the foundation.
Place your damp-stretched embroidery piece over and the mat board and batting foundation. Place the foundation on the table, batting side up, and place the embroidery over it.
Center the wreath on the foundation piece. This will take some doing. If you transferred the dashed line, you can use it as a guide. If you didn’t, work the embroidery around over the foundation piece until it looks centered.
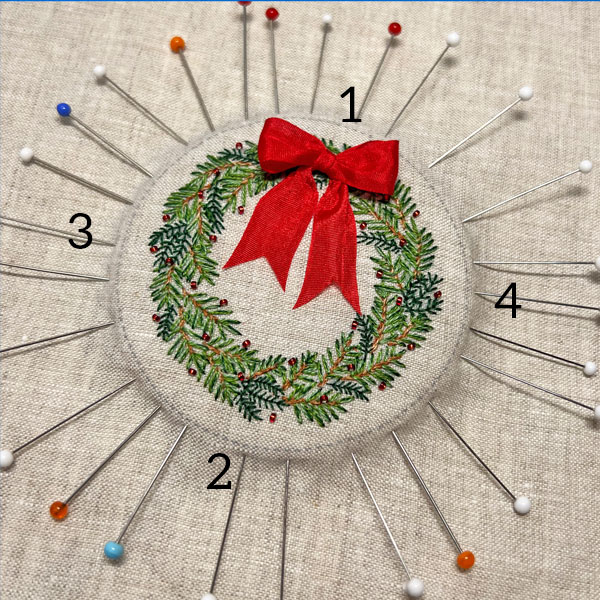
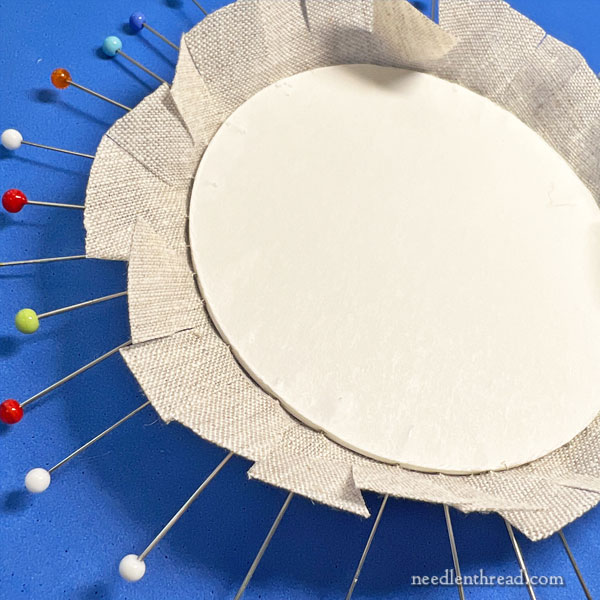
Use sewing pins to secure the embroidery to the mounting board. First, you’ll pin as shown in the photo above, at 1, 2, 3, and 4.
The very tip of the pin should pass through your fabric and just into the mat board. This takes some concentration. You don’t want to stick the pin in too deeply – maybe just 1/8″ or so. And you don’t want it to go through the board and out again. You just want the tip in the edge of the board.
This is the hardest part of this whole process. Take your time and do it carefully.
When you have four pins in, double check your centering. Make any adjustment.
Then, splitting the space between the four pins, add more pins, always working opposite sides from pin to pin.
As you push the pins in, try to gently pull the fabric so that it remains smooth and taut over the batting, but you don’t need to pull it hard. You just want the fabric to gently “hug” the surface of the batting.
Work all around the piece, pinning, pinning, pinning! And always check that your centering looks right. If it doesn’t, this is the time to fix it!
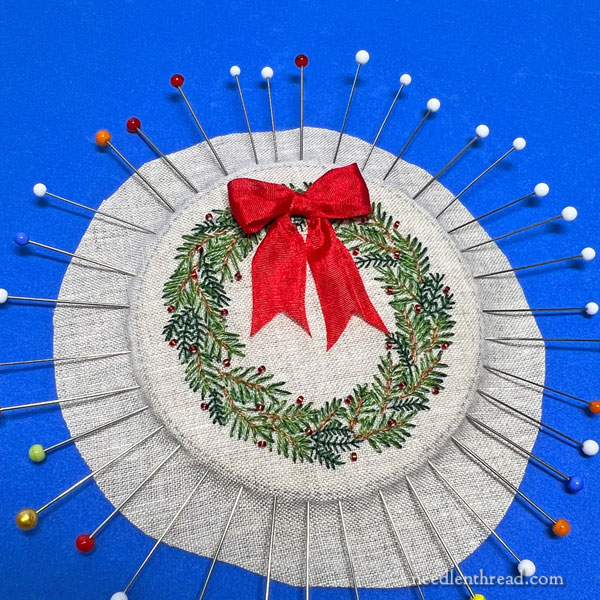
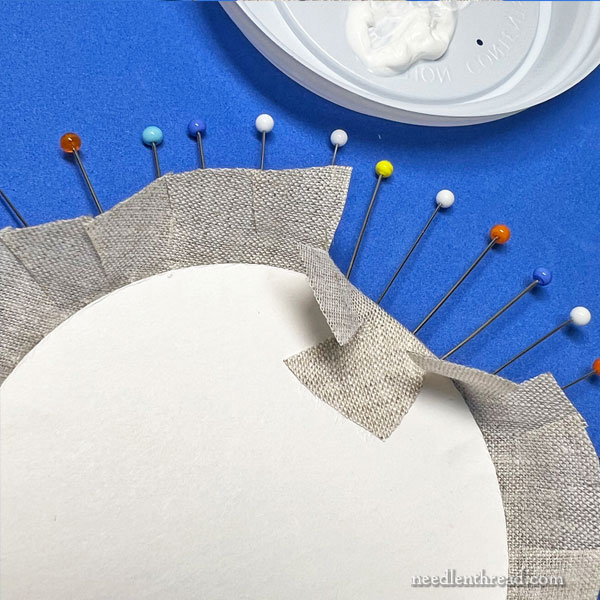
When you’re finished pinning all around and you are satisfied that the embroidery is centered on the board, trim away excess fabric. Leave about 3/4″ around the whole ornament base. You’ll need to cut carefully, avoiding the pins. You also don’t want the pins to come out, so handle the piece gently while you’re doing this.
It doesn’t have to be a perfect cut circle, and you can see in the above photo! My cut is a bit wonky! But you do need to leave enough fabric, so be careful not to cut too close to the foundation board.
Then, turn the ornament over, and snip the fabric all around, snipping perpendicular to the foundation edge, about every 1/2″.
Do not cut too close! The snip should end about 1/8″ away from the edge of the foundation. You want the fabric tabs to fold over the foundation board without the cut in the fabric going up the side of the ornament. So the cut should end far enough away that the side of the ornament will be complete, uncut cloth.
Squirt a bit of glue onto a small dish or paper plate (I used a coffee cup lid) and grab your paintbrush. It’s helpful to have a small dish of water and some paper towels on hand, too, in case you need to dilute your glue or clean your brush.
Paint a smear of glue onto the board, avoiding the very edge of the board, and press a tab of fabric down onto the glue.
As the press the tab of fabric onto the glue, gently push the tab towards the center of the mat board circle. Hold for a few seconds to make sure it sticks well.
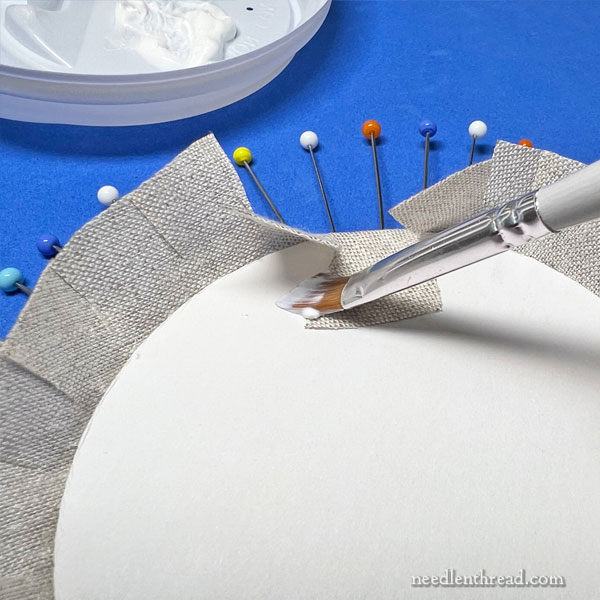
Paint a smear of glue on the board where the next fabric tab will go, again always avoiding the very edge of the mat board. Paint a little bit over the previous tab of fabric, just in case there’s some overlap. Push the next tab of fabric down and towards the center of the mat board circle.
Do this all around the whole piece, glueing each tab down and gently pushing it towards the mat board circle.
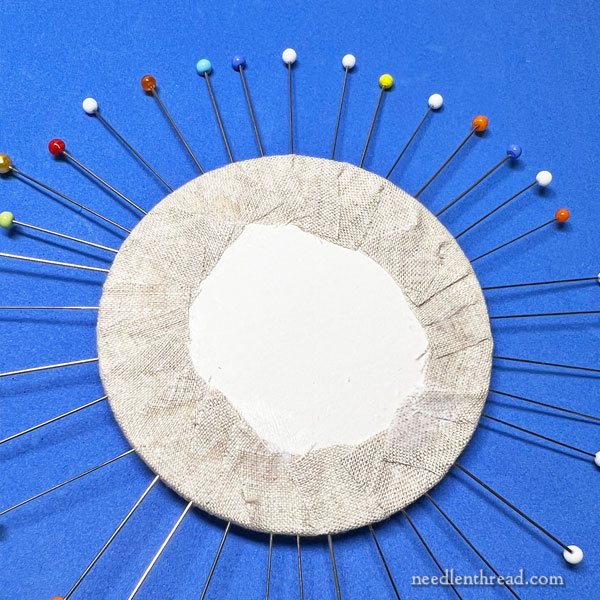
When you’re finished, the back will look something like this!
Leave it for a bit and let it dry thoroughly. I would leave it at least 30 minutes to an hour.
When it’s dry, it’s time to take the pins out!
Carefully remove all the pins.
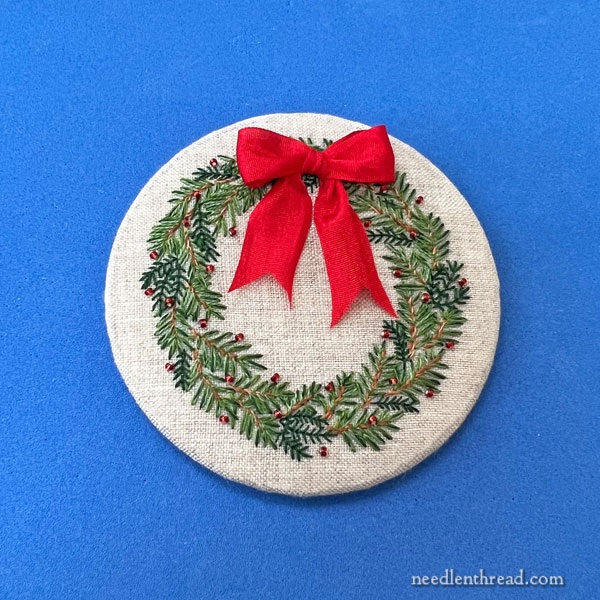
And here’s the finished round, ready to be constructed into the finished ornament!
We will finish the rest of the ornament on Friday!
Remember, if you want to follow along, all the articles for this project are listed in the Christmas Wreath project index here!
Hi Mary,
I love your wreaths and the idea to stitch them for family as Christmas gifts. After reading both the blog and the e-book, and since I live in Austalia I couldn’t order the kit I’m a little concerned about how to cut the mat board in a nice circle. I have experience cutting mat board with a steel ruler and craft knife but this was obviously only straight lines. How did you go about getting a nice accurate circle shape? Do you have any advice? Thanks
Hi, Leanne – Have you checked to see if you can find a circle cutter available in Australia, through craft stores or framing stores or art stores and similar? They make circle cutters, where you can adjust the cutting arm for the diameter you want to cut, and then you turn the cutter (or the piece of mat board) to cut the circle. Even though they leave a small pierced hole in the center of the circle, they still work great and give you a good circle. The other option is to use a craft knife and a lot of patience. Draw your circle onto the board (or find something round like a lid that is the size you want – about 3″ – 3.125″ – and use it as a guide), and then very lightly score the board with the first pass, using the craft knife. Then, with subsequent passes, score a little deeper, etc., until you finally cut through. And finally, if that doesn’t work for you, you can draw your circle onto the board and use heavy duty scissors to cut it out. You can cut 4-ply mat board with scissors. Go slowly and work in long cuts, moving around the circle. and them of you need to trim, you can use the scissors or you can use a craft knife.