


Welcome to the second installment of Twinkle, Twinkle: A Christmas Star Ornament, the current stitch-along here on Needle ‘n Thread.
If you’re just joining in and would like to follow along with this project from start to finish, you’ll find all the lessons for this stitch-along listed here, in the Project Index for Twinkle, Twinkle.
For members of the Needle ‘n Thread Community on Patreon, we have already covered this content in the PDF I posted last week on Patreon. I’ll be posting some video over there later this week, for Avid Stitchers, and our next PDF installment, which will move us a little further ahead).
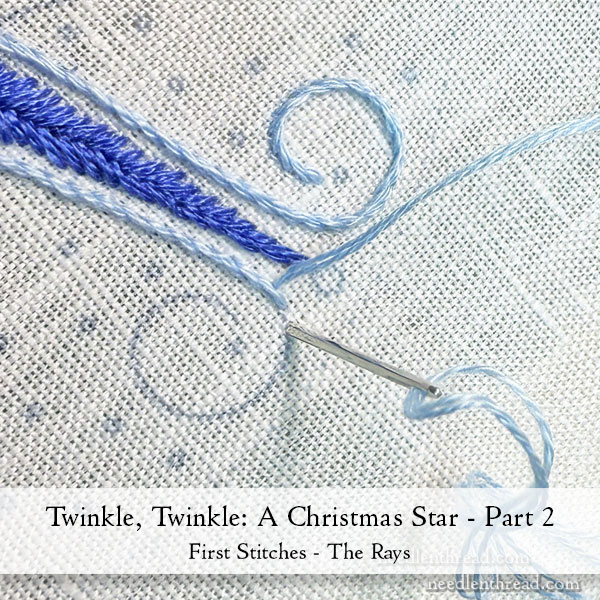
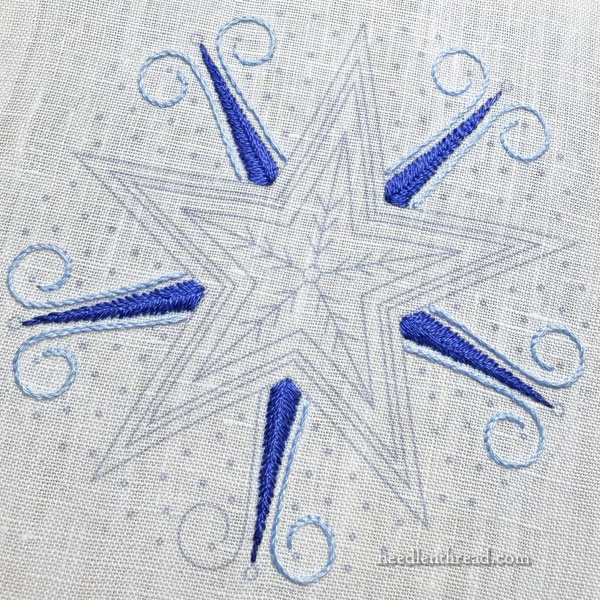
In Part 2 today, we are going to embroider the rays that burst out behind the star.
Order of Work
When working and photographing the progress on this project, I began with the rays because they are farther back in the image, and the star itself seems to sit slightly over them. It made sense to me at the time to work in this order.
After working several version of the design, it became clear that the order of work doesn’t matter so much. Do whatever you’re comfortable with. If you’re not stitching along with the project here on the blog, you can start with whatever elements you want to start with. For example, when I recorded the video for this project, I began with whip-stitched bands on the star instead.
But if you’re following along and eager to start stitching, then let’s start with the rays, because that’s where we are!
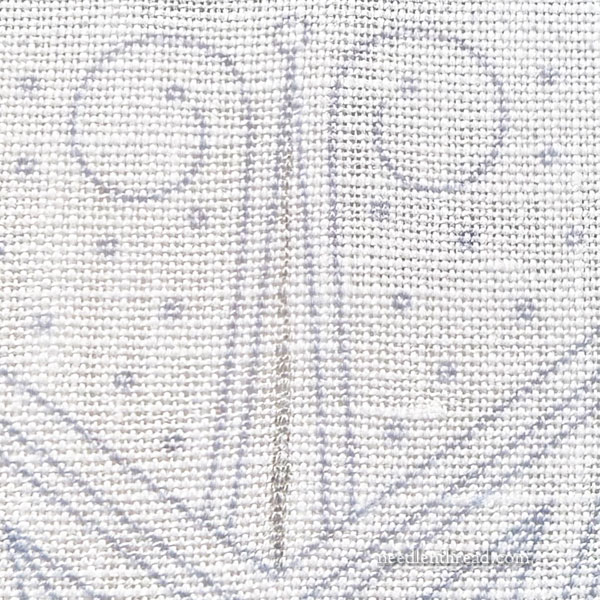
When I stitched this model, I had to hand-draw the center line down the triangular shape of the rays, because it was not transferred to my fabric. Hence, the messy pencil line there.
The triangle shape will be filled using fishbone stitch. If you are not familiar with fishbone stitch, you’ll find a video tutorial for fishbone stitch here. In the video, the stitch fills a leaf shape, but the stitch movement is exactly the same – you’re just following a different outline shape here.
I’m working with two strands of floss in DMC 797 and the #8 crewel needle.
When working a stitch like fishbone using two strands of floss, your outcome will always nicer if you can get your thread to lie flat, with the strands of floss parallel to each other. For one thing, the shape will fill better. And for another, the finished surface will be smoother.
Laying Tool or Railroading for Smooth Stitches
There are different ways you can achieve a flat, non-twisted stitch with two strands of floss in the needle.
One way is to use a laying tool as you stitch. If you don’t know how to use a laying tool – or your not sure what one is – you can read about laying tools here and watch a video on how to use them.
But a quicker, more efficient way – as long as you only have two strands of floss in the needle – is to “railroad” your stitch.
This means that, each time you enter the fabric to finish a stitch, you’ll pass down between the two strands, keeping them separate until you’ve pulled all the way through.
I’ll demonstrate that in the photos below. However you decide to achieve smooth, parallel, untwisted stitches is up to you. But I promise if you make the effort, the superior outcome will be worth the extra work!
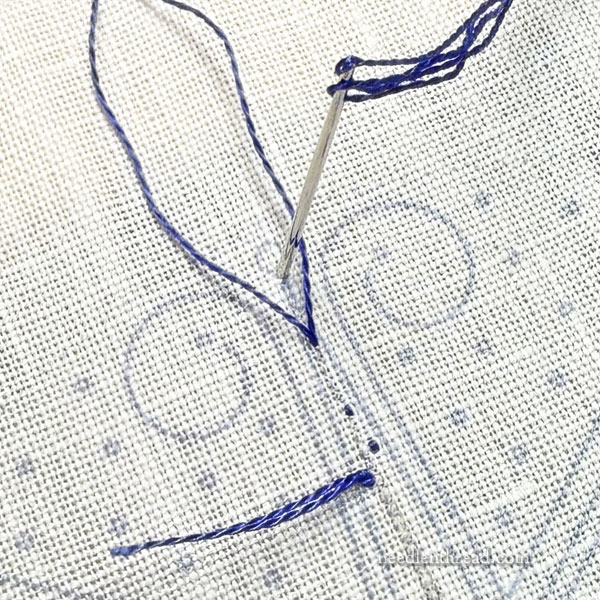
Especially when I’m working with both hands free (my embroidery frame is being held in a stand, so I have two hands free for stitching), I prefer to begin and end my threads, as often as possible, on the front of the fabric, the need for a knot on the back.
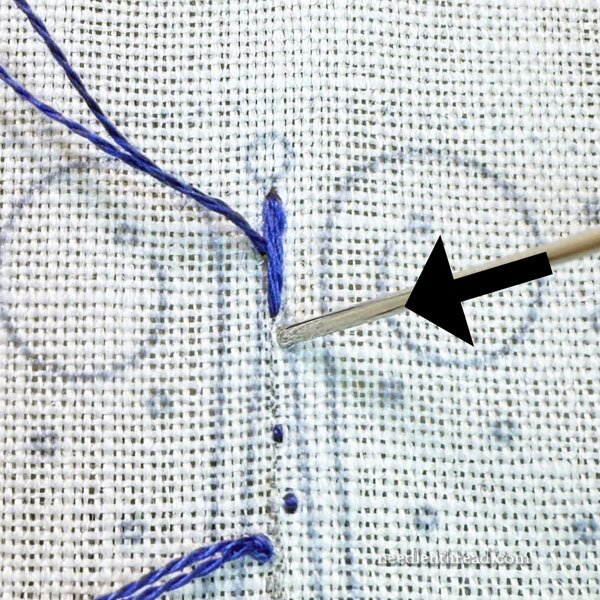
To do that, I’m going to use a waste knot and a couple tiny tacking stitches inside the area that I’m about to fill. Once I’ve stitched the tiny holding stitches, I’ll snip off the knot. The small stitches will be covered with subsequent embroidery.
In the photo above, you can see a couple tiny holding stitches.
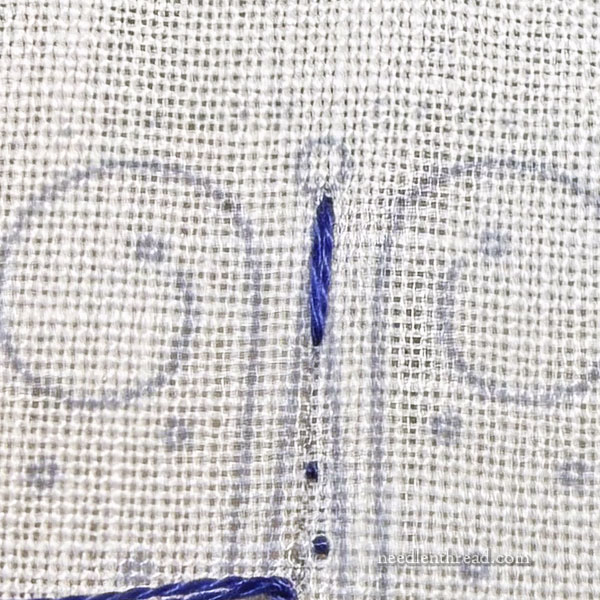
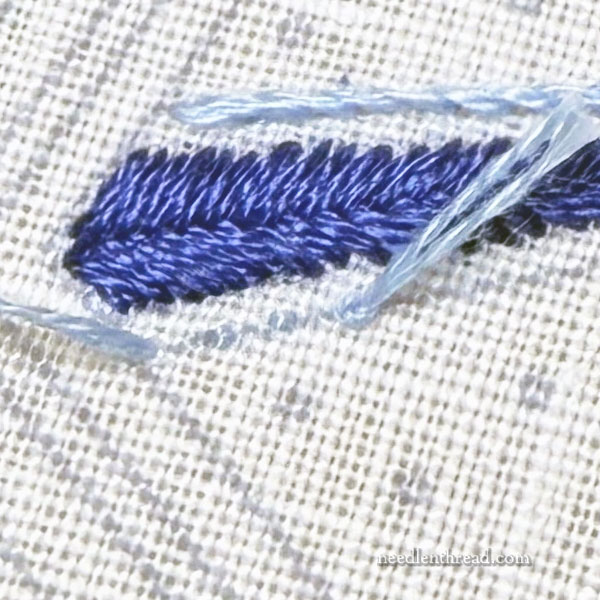
To start the fishbone stitch, come up on the center line inside the shape, about 1/4″ – 5/16″ of an inch below the tip.
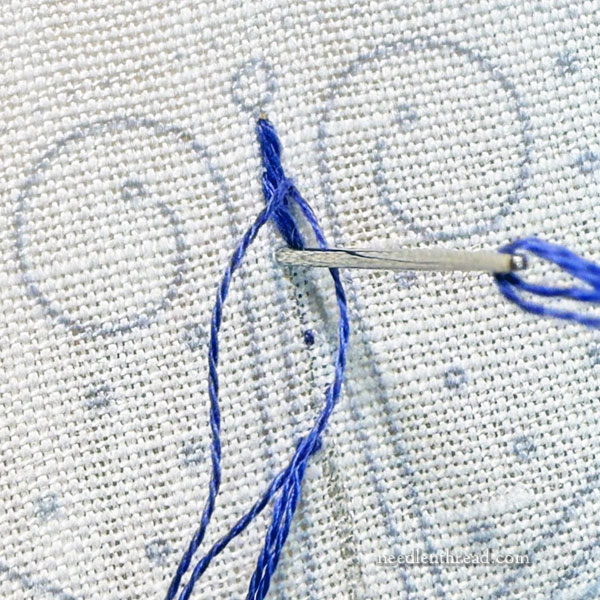
Take the needle down just a hair over the tip. When you take the needle into the fabric to end this first straight stitch, travel down between the two strands of floss that make up the working thread, as shown in the photo above.
This is what I meant above by “railroading,” and it helps keep your strands of floss from twisting together while the stitch is made. You can railroad every stitch, or just when you know that the strands are likely to twist.
There’s the first straight stitch, and, as you can see, the strands are lying parallel to each other. That’s what you want to achieve as you work the fishbone stitch.
To fill the shape, you’ll now bring the needle and thread to the front on the design line, a little lower than the tip and to the side of that first stitch, as shown above.
This second stitch will pass diagonally downwards, crossing over the base of the first stitch on the center line and going down into the fabric lower than that first stitch. You want to achieve a nice downward angle on these first stitches, and then you’ll want to maintain that same angle, as best as possible, all the way down the shape.
Because the tip is very narrow, it is likely that this second stitch will end very close to the design line that marks the opposite side of the triangle. That’s ok. It will be covered.
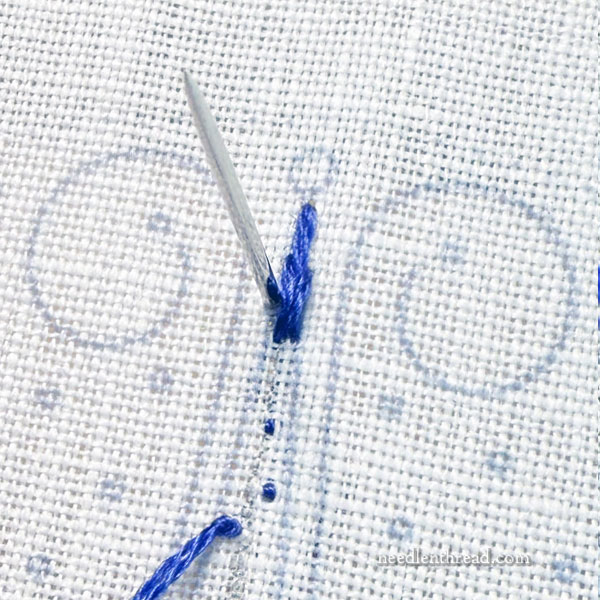
Now you’ll move over to the opposite side of the triangle, just across and slightly lower from where your previous stitch began.
Bring the needle up on the design line and cross diagonally downwards towards the opposite side, once again crossing over the base of the previous stitch.
And again, because the shape is narrow, you’ll end up very close to the opposite design line.
In the photo above, I am railroading this stitch to make sure it lies smooth and untwisted.
Return to the front opposite to where your previous stitch started – perhaps a hair lower if you wish – and now you’ll work the next stitch the same way, crossing the base of the previous stitch and maintaining a deep angle down the shape.
Your goal is to have each stitch lying parallel to the stitch above, without crowding the stitch above, but without leaving a gap.
As best as possible, you want to maintain your angle of stitches as you work down the shape.
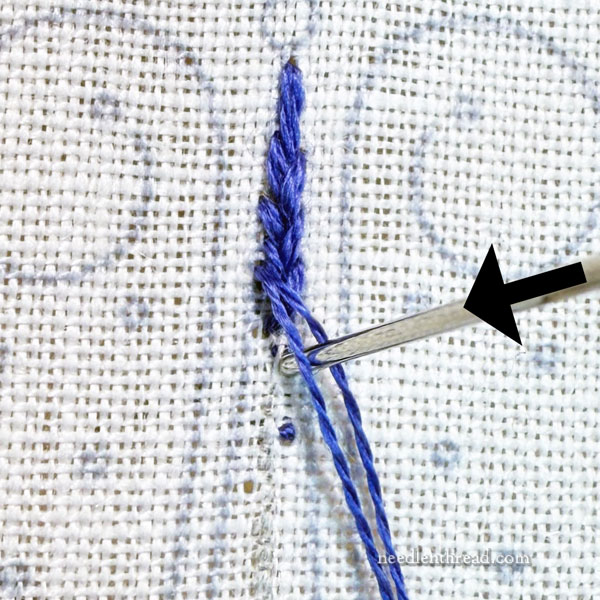
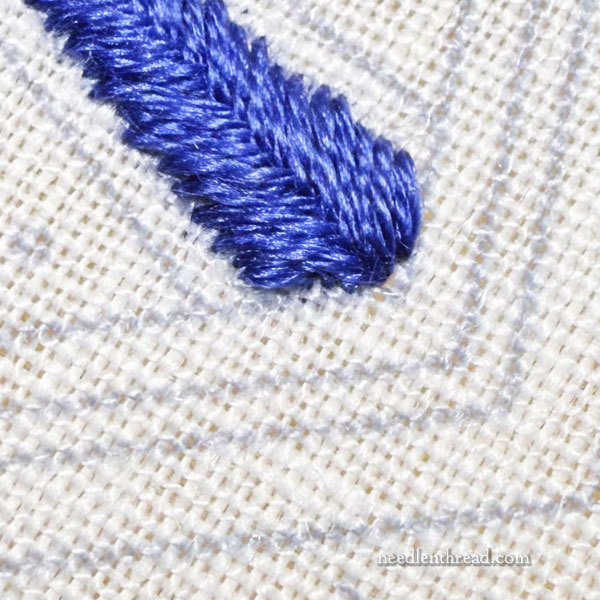
You can see that, at the top of the shape where it’s very narrow, the stitches are quite distinguishable.
As you move down the shape, there will be more room, and the stitches will begin to look a little more like satin stitch, with a slightly overlapping, plaited-looking center vein.
When you get to the base of the shape, it is likely that you won’t be able to bring anymore stitches into the center of the shape, but you will still have some area on the lower outsides of the triangle that need filling.
In this case, just work straight stitches in there – like satin stitches – to cover the gap.
You can see in the photo above – and in the photo below – that my deeper angle that I set at the top of the triangle wasn’t maintained as well as I would have liked towards the base of the triangle. That’s ok – it really won’t be noticeable – but in retrospect, that is normally something I would have corrected, had I noticed it.
I didn’t notice it until I saw it very close up in the photos!
Stem Stitch
Now let’s move on to the curled lines on each side of the long triangles.
For these elements, switch to the lightest blue (DMC 800), and, using two strands in the #8 crewel needle, stem stitch these lines.
If you’re not familiar with stem stitch, you’ll find a stem stitch video tutorial here.
In the photo above, I began my thread with a waste knot again, and worked a few holding stitches – teeny tiny – along the line towards where I planned to start the stem stitch.
When I’m working stem stitch, I like to work from left to right, with the working thread kept below the needle, so I will often turn my work to keep my direction of travel left-to-right.
It is important to keep the position of the working thread relative to the needle the same as you work these curls. Even when you turn around the curled line, make sure your working thread stays on the same side, in relation to the needle.

As I start to work around this curve, I want to keep the stitches close together, so that they don’t look hairy or spiky.
To accomplish this, I shorten the length of my stem stitches while taking the curve.
I do not change the location of the working thread in relation to the needle.
To understand a little more about working the stem stitch, you can read these articles below:
Stem Stitch Curves and Spirals
12 Tips for a Better Stem Stitch
And there we are!
Coming Up Next!
Next time we visit Twinkle, Twinkle, we’ll begin embroidering the star. Hurray!
Remember, you can find all the previous lessons on this stitch-along project available here, in the Twinkle, Twinkle Project Index.
Coming up on Wednesday, we have a little bit of whimsy as we resume the A-Z Archives exploration, looking at the letter H. You will never guess what the H is, I’m pretty sure! I had a Heck of a Hard time coming up with an H, to be Honest – without resorting to a monogram.
And on Friday, we’ll move ahead with Part 3 of Twinkle, Twinkle – working some of the bands on the star – so that you can enjoy some weekend stitching.
Next week is Thanksgiving (!!! already !!!) and at this moment, we plan to have a new Thanksgiving Eye-Spy puzzle for you. Woohoo!
Happy Monday!

Leave A Comment