November 24, 2011
Happy Thanksgiving!
Here in the US, today is Thanksgiving Day. From me to you, wherever you are, I wish you a very … Continue reading Happy Thanksgiving!


I learned to embroider when I was a kid, when everyone was really into cross stitch (remember the '80s?). Eventually, I migrated to surface embroidery, teaching myself with whatever I could get my hands on...read more
Contact Mary

I learned to embroider when I was a kid, when everyone was really into cross stitch (remember the '80s?). Eventually, I migrated to surface embroidery, teaching myself with whatever I could get my hands on...read more
Contact Mary


November 24, 2011
Here in the US, today is Thanksgiving Day. From me to you, wherever you are, I wish you a very … Continue reading Happy Thanksgiving!
November 23, 2011
Last week, we looked at the Millenium embroidery frame up close. The review generated heaps of questions which I’ll try to answer for you. It’s also a good time to follow up a bit on my impressions of the frame, since I’ve been using it steadily for the past two weeks now.

November 22, 2011
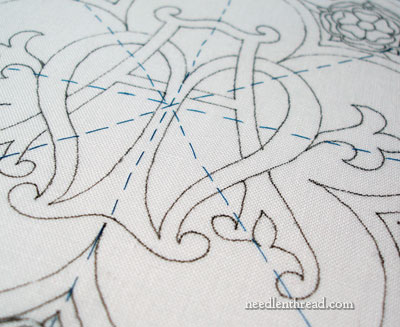
The silver thread in yesterday’s article cries for transformation into a snowflake. After all, here in Kansas, winter’s coming, and so is Christmas. A hand-made Christmas ornament will make a perfect “small” project.
I started playing with the idea of a snowflake design by working out 6 lines on a circular grid. I made little changes and additions along the way, until a design emerged, eventually ending up at something that just might fill the snowflake bill. The embroidery pattern continued to develop until I had a look I wanted, but I kept making adjustments. I thought I’d show you the evolution and then the devolution of the design, sharing my thought process along the way.
This will probably end up looking like one of those picture games – can you spot the differences in the snowflakes?
Probably this isn’t the most efficient way to go about developing a design, but here it is, nonetheless!

November 21, 2011
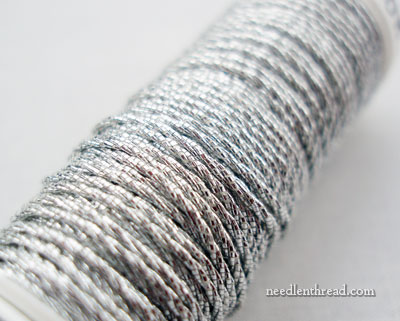
Goldwork can be done with silver threads. In such cases, it’s often called “metal thread embroidery.” But I’m not persnickety – I just call it goldwork. Yes, even when it’s done with silver.
Here’s a silver thread I’m fiddling with these days. It’s a three-ply silver twist.
November 19, 2011
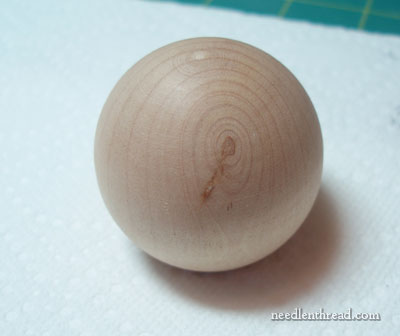
Yesterday, we looked at making your own pounce for embroidery design transfers. Today, we’ll look at the pouncer itself.
There are many, many ways you can go about making your own pouncer for your pounce powder. You can use just a simple piece of rolled up felt, for example. It’ll work fine, and if you have scraps of felt lying about, it’ll cost you nothing.
But since I’ve got three colors of pounce powder, I like to have three different pouncers, one for each color. This is how I made mine.
November 18, 2011
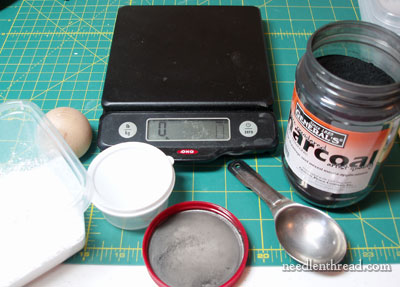
We’ve already discussed using drawing charcoal for a dark pounce powder, for transferring embroidery designs on light fabric. Then we looked at using talc for light pounce powder, for transferring embroidery designs on dark fabric.
But there’s an in-between.
We’ll call it grey. Or, if you’re insistent on the American spelling, we’ll call it gray. Either way, it’s not black. It’s not white. It’s in between.
And this in-between color is nice, because it’s subtler on both light and dark fabrics.
If you want to be completely Pounce-Obsessed, you’ll want all three: white, charcoal, and grey.
November 17, 2011
Day before yesterday, I showed you the Medallion project framed up on my new Millenium embroidery frame (which, as each day passes, I love more and more!). Yesterday, we looked at a built-in cover on the embroidery project, to protect it both during stitching sessions and outside stitching sessions. Today, I’ll show you what I did to ensure that my ground fabric (which is linen) and my lining fabric (which is muslin) don’t shift.
This is something you can do when you’re stitching through two layers of fabric. It’s not always a necessary step – on smaller projects, I rarely baste. But on larger projects that will be framed up for a while, and especially if there’s any chance that down the road I might remove it from the frame before it’s finished, it’s a good idea to do some simple basting to keep things from shifting.