


Have you ever tried to transfer an embroidery design onto dark or brightly colored fabrics and ended up dissatisfied with the results?
Pencil lines and dark ink don’t show up, chalk pencils rub off during the process of stitching, tacking stitches over tissue paper is time intensive and might not deliver the detail you want – all of these are problematic when trying to get a design from paper to darker colored ground fabrics.
A reader recently wrote in frustration, looking for a solution. She wrote:
I’ve tried every kind of chalk pencil out there, but the marks don’t last. I’ve tried white and yellow dressmaker’s carbon, but the fabric surface is too rough. They seem to work better on a smooth fabrics, not bumpy linen. I’ve tried tacking stitches like you recommend for tacking over tracing paper, but the detail isn’t fine enough. What can I use to draw lines on darker fabrics that won’t disappear and that are visible and fine enough for embroidery?
I’m opening the question up for all of you to chime in! Please, offer advice to Stacy!
And in the meantime, I’ll offer this suggestion for those facing a similar dilemma:
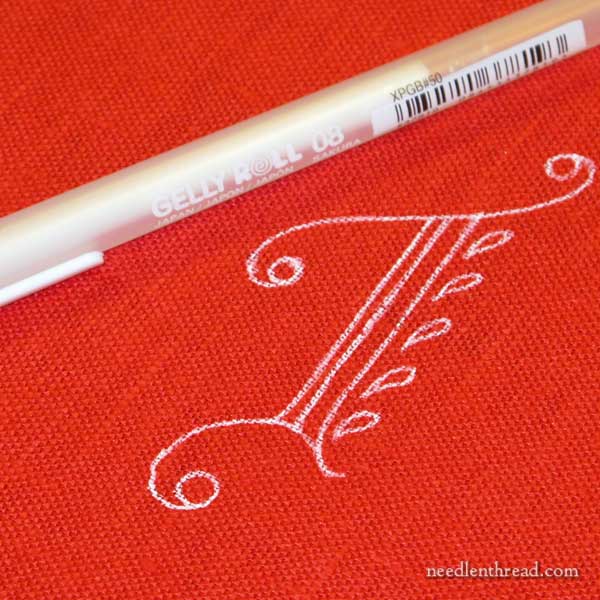
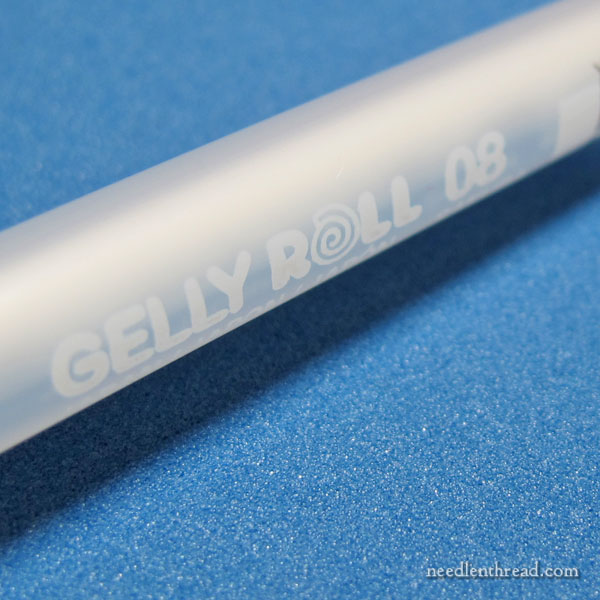
Sakura, the company that makes the Micron pens that I like to use for tracing fine permanent lines for embroidery transfers, also produces the Gelly Roll pens, and in the Gelly Roll Classic line, you’ll find a medium-tipped (size 08) opaque white available, which is great for writing on dark papers.
The white Gelly Roll creates a somewhat-permanent line for embroidery transfers (more below). The thickness and brightness of the line depends on how you use the pen.
Now, the pens are not made for use on fabric that’s intended to be washed, because the gel ink can wash out … although it may not wash completely out, which is where the problem comes in.
So, I recommend these pens for a certain type of use only.
I shall explain:
In the first photo above, on the red background, I used the pen to sketch free hand that letter design. I went over the design twice, to produce a very bright white line on the red fabric.
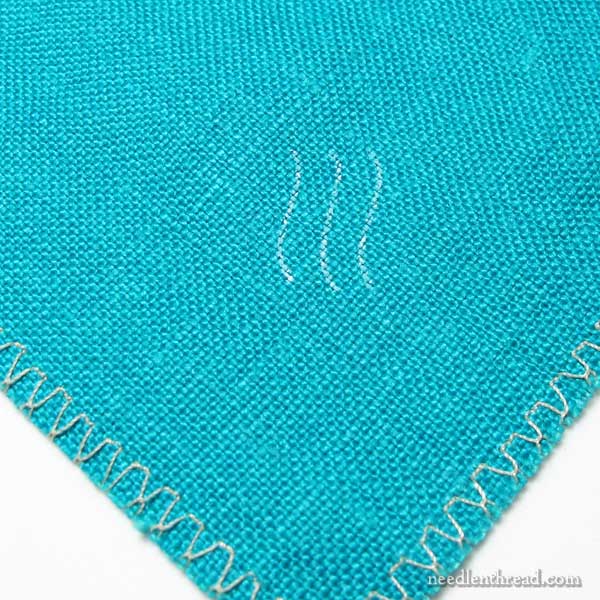
But on the aqua fabric immediately above, I drew three quick strokes, once only, with the pen. You can see that this produced a visible but not heavy or bright white line.
The lines don’t smudge off. While they are not super-fine lines, they are fine enough for an embroidery design transfer. They’re easy to see, even though not bright and heavy. And should you wish to wash the fabric after stitching, there’s not a lot of ink there (on the aqua background) that could cause problems if it runs or blooms. It would pretty much just fade into the background.
On the red fabric, though, that much ink may be problematic on two accounts: 1. It would be difficult to cover with embroidery; and 2. If you wash the fabric after embroidering, that much ink might cause a white glow on the fabric, if you can’t wash it completely away.
So, if you’re going to use the Gelly Roll to mark on dark fabric, use only quick single strokes – enough to make a visible line, but not enough to make a heavy, painted-looking line.
Tracing on Dark Fabric
Now, you might be thinking this is all well and fine, but how do you actually trace on dark fabric?
When I use darker fabrics, I use my LightPad for tracing. I’ve reviewed the LightPad here – if you do a lot of design tracing, it’s so very convenient, comfortable, and easy to have a good, flat, large light surface to trace on!
You can see in the examples on the LightPad review that it’s possible to trace on dark linens and silks, with the right light behind the fabric and design.
With very dark and heavy fabrics that don’t benefit from a lit surface behind them, then prick and pounce is the quickest way to get an accurate design onto your fabric. A white or a light grey pounce powder works well in these circumstances. You can read more about prick and pounce in the following articles:
Making Your Own Pounce, in three shades
Powdered Charcoal for Pounce (and resources)
Talc for Pouncing Dark Fabric
Making Your Own Pounce Tool
How to Transfer an Embroidery Design with the Prick and Pounce Method
Once you’ve pounced the design on, you can use the gel pen to connect the dots, but it is very important to wipe the nib frequently – between every stroke. The pounce powder interferes with the gel, so this part is really important.
Frankly, if I were pricking and pouncing, I’d go the extra step and use a tiny paintbrush and watercolor paint to fix the pattern onto the fabric, instead of messing with the gel pen. But if you don’t trust yourself with a tiny paintbrush, the pen is an option, if you are diligent about wiping it down as you use it.
The Pros and Cons of the Gelly Roll
Pros:
If you’re working on dark fabric that you can see through with a light behind it, the Gelly Roll, if used in single strokes and not sketched over and over heavily, makes a decent design transfer when tracing. It won’t smudge off while you’re working the project. The pen draws a good line that’s visible and not too thick.
Cons:
Remember that the pens are not necessarily made for fabric use like this. It seems to me that they last a lot longer with regular use on paper than they do when they are used on fabric. They can be a little ornery when writing on fabric – it helps to have a scrap paper near by to get the ink flow going smoothly again, and it helps to wipe down the tip of the pen occasionally.
Where to Find
In the States, you can find Sakura Gelly Roll pens through local art and craft stores and chain stores like Michael’s, Hobby Lobby, JoAnn’s and the like. You might be able to find them at some office supply stores as well. Overseas, I’d imagine you can find them at similar places – art and hobby shops.
If you can’t find them locally, they’re available through these affiliate options online:
Amazon carries this 6-pack of white Gelly Roll pens, though they are in and out of stock quite often.
You can also find this 3-pack of white Gelly Roll pens on Amazon.
Over to You!
What’s your advice for Stacy, for transferring design lines onto dark fabric? Please do add your bit below, as I’m sure it will help many of us!
When I’m transferring a design onto a fabric that can be washed, I use Gouache. It is a watercolor paint, which won’t damage the fabric and washes right out after. If you dilute the paint in water, basically make it ink consistency, then paint it on with a fine brush, it works very well. I have had a lot of success with Gouache.
Yes, I like gouache, too, Grioffa! That, or watercolor, work great!
I wonder if ironing the marks would make them permanent? With laundry, it seems many things that could normally be removed are set permanently by a trip through the dryer.
What about using gel pens in a lighter shade of the fabric? Lighter blue pen on dark blue fabric for example. Maybe any laundering residue would fade into the fabric.
Good point, Gail! I’ve done that with other pencils before – chalk pencils, colored pencils, and the like. So, yes, I could see using a slightly lighter shade of the same color on the fabric, too.
The light gel pens and frixion pens DO NOT work on dark fabric. I now have a large collection of those pens and nothing has worked.
Has anyone used the frixion pens? Quilters use them and they iron out. Come in an assortment of colours which show up on dark fabrics though I don’t believe there is a white one.
Hi, Elaine – I wrote about Frixion pens, here: https://needlenthread.wpengine.com/2014/09/embroidery-design-transfer-question-frixion-pens.html I don’t generally use them for design transfer. They’re not archival, and they don’t necessarily thoroughly disappear. They can reappear, which means they’re leaving a non-archival residue on the fabric, which can discolor over time. I guess for small, quick projects that are just meant for fun, they might be useful, but for projects that require a large investment of time and money, I’d not use them, personally.
I use the sewline brand white marker. These markers are great. They are refillable and have different colors you can get. So one pen is all you need. The marks do wear a bit but seem to hold up well. They can be erased when done if they show. The pen has an eraser on the tip. Love this brand
I use one of those pencils too Madilyn, but mine has green leads which seem to work on both light and dark fabrics. I draw or trace the design on tracing paper then prick holes with a pin, go over it with the green pencil and then take away the paper and fill in the design again with the green. It seems to work well and so far I haven’t had any problems with it.
When I attended a class at the Williamsburg School of Needlework in 2014, the instructor (Nicola Jarvis) provided us with a lovely design already transferred on the fabric, which was a dark burgundy silk. I believe the color was called “Wine.” Since it was a goldwork class, she had transferred the design using the prick-and-pounce method, then painted over the lines – with a fine paintbrush and gold paint! Obviously gold paint won’t work in every situation, but the prick-and-pounce and paint method seemed to work very well, and the design stayed perfectly on the fabric while we were working the embroidery.
Hi Mary,
Thanks for all you do!
Two questions:
What color watercolor paint do you use to transfer a pattern? I took watercolor lessons for years as a child, and couldn’t help but notice that some of the greens would stain white palettes and brushes. Are there certain colors to avoid?
What about the fine-line invisible ink pens that disappear with water, found at sewing stores? A quick search for water soluble ink brings up a large variety, but you never seem to consider them–so I assume you have a reason…
Yes, that’s true – there’s a reason I don’t use them: https://needlenthread.wpengine.com/2011/01/erasable-transfer-pens.html Whether water soluble, air soluble, heat soluble – they all have one thing in common: the chemical stays on the fabric, even though it doesn’t appear to be there. And so, over time, they can produce brownish lines or yellow lines (I’ve seen both) and they can even come back (which I’ve also experienced). So I generally avoid those kinds of pens on any kind of embroidery project that I’m planning on withstanding the test of time. Children’s projects (when teaching kids) or quick little sample stitching situations (where the sample is not likely to be kept or where it doesn’t matter so much if anything goes awry) – in those kinds of situations, I might use that kind of pen if that’s what I had on hand. But normally, I don’t. I pretty much just use a pencil or a micron pen (under certain circumstances, with certain preparation) or paint, or occasionally the chalk pencils from Bohin and Sewline, and I haven’t had any problem using this type of gel pen, either, as long as the line is drawn lightly.
Oh, and the color depends on the project and the ground fabric… If I’m doing goldwork on a dark fabric, I’ll use a gold-colored paint (yellowish) or a brownish gold. If I’m doing something on a lighter fabric – like crewel work on twill, for example – I might use a light sepia or something similar.
I have used a couple of products that might be helpful.
My “go to” pen is by Clover and is simply named “White Marking Pen – Fine”. Its marks are removed with the heat of an iron. The catch to using it is that the lines don’t show up immediately on the dark fabric, but they are fine once they appear. It takes 2-3 minutes and they stay fairly well until steamed or ironed off. I have never experienced them coming back once removed.
The second product is by Sewline and is named “Tailor’s Click Pencil”. It is chalk based and draws a good fine line. I have used the blue color on black and wine colored linen. The blue isn’t quite as bright as the white, is bright enough for me, and is easily covered by my thread (2 strands of embroidery floss or one strand of flouche). It also comes in white and pink.
I bought both products from my local small fabric store/quilt shop, but they are available online and Joann’s may carry them.
When my fabric can’t be traced onto using a light table/pad, then I prick my traced or copied design with a needle (size 7 or 8 crewel), tape it to my fabric, and fill in the pricked holes with dots using one of the products mentioned above. Then, remove the pattern and connect the dots.
Best of luck with your project!
I do crazy quilt embroidery and one of my books with crazy quilt designs, ect, used a method I had not seen before. I used it once, and it worked pretty well. They had instructions for tracing your design on tissue paper, basting it on the fabric, and stitching right through it. It was a bit tricky taking the paper off, but it worked. It was a complicated design–a peacock.
I have gotten frustrated because I can’t transfer designs using my lightbox on velvets and other thick fabrics. I’ve never used the pounce method, but I think its time to try that. Thanks for the topic. I am familiar with the frixion pens also. I’m a quilter too.
I realize you’re trying to avoid chalk, but both Bohin and Sewline make mechanical pencils with fairly fine refills. The lines last quite well for my applique projects, and can be erased with a fabric eraser. They have refills in a number of colors.
I’ve been very happy using white acrylic gel pens like these, Mary. (I’ve used various brands, including Pentel Hybrid and Mitsubishi Signo.) They are a quick and simple method for dark fabric, and the line lasts well without flaking. As you say, a light touch is best, and you have to be sure you’ll cover the marked line – once it’s there, it’s not easy to get it out again! Also the ink can spread and clog the fabric if it goes on too thickly, so wipe off any build up on the nib on paper, and make sure your nib is flowing nicely but not flooding (coloured paper makes this easier to check). Ironing the fabric first helps a lot. The only other thing I can add is that they often dry up before they’re used up – once they’ve been started. So keep a spare pen handy but leave it unopened until you need it.
I tried to use white pen to transfer a design to black satin. What a disaster. Maybe the jelly roll pen is better, but the pens I have used go on clear and then turn white in 10 or 20 seconds. You never know if you got the lines until after you’ve moved onto another motif and I couldn’t see the black lines of my pattern through the fabric, so I put it onto tracing paper and winged it lifting the paper and then putting it back down. A disaater. I hate pouncing, but I will pounce next time–only I wonder how well the pounce will stick to silky fabric. Sigh. This was supposed to be a vest for my husband for our wedding and 4 years later he is still asking for a vest. I may have to do the lapels in a lighter contrasting fabric–maybe a grey with some teeth to the weave to asave my sanity.
You have hit on exactly the combination I use for marking black background fabric for applique–lightbox and gel pen. For markings that won’t be covered by embroidery (center or boundary lines or elements you’re not sure you’ll want to keep, for example), you can mark the *back* of the fabric and “transfer” the marks to the front via basting when you need them. In my experience gel pen lasts a long time on dark fabric, even if it is well-handled.
Another approach is to draw your lines on wash-away stabilizing basted to your ground fabric. Embroider outlines and major features right through the stabilizer, then wash it away. There are also dissolving threads that can be used to mark all over a fabric. They wash right out after you are finished. The kind I use is shiny white and very visible on dark fabrics. It does not have a long life as a mark, though, as it tends to vanish with high humidity or a lot of handling.
I have just the thing! Found it at Michaels in the tracing paper aisle. It is called Super Chacopaper 17 X 11″. Fairly spendy, as I recall about $6. But think you can get quite a few designs from it. Traces in white that is removed with a damp cloth. Shiny side goes up.It may come in other colors, but I bought white…just what the doctor ordered. Trace away ladies.
Hi Roberta, thanks for this, although I wonder if I can get it in the UK?
Hey Mary,
I use http://www.amazon.com/Porter-Mechanical-Fabric-Pencil-White/dp/B001UAKL4Y/ref=sr_1_6?ie=UTF8&qid=1427210163&sr=8-6&keywords=fons+and+porter . it produces an extremely fine line that is very visible. also it is ceramic, not chalk. The product description states:
Featuring strong ceramic 0.9mm white lead: specially formulated for dark fabrics and made from water soluble dyes. Package contains one pencil with a soft grip for comfort and ten leads in a reusable storage tube. Dark and white refill leads are available separately.
I like the way it works.
I’ve wondered about this pencil! I’ll have to try it, now. Thanks for posting!
Dear Mary
The Gelly Roll pens seem a really good product to use on coloured fabrics as you have shown above. Transferring designs on fabrics is always difficult especially if it’s on dark fabrics, I once embroidered on purple cotton and it was so difficult to transfer the design I ended up using the micron brown 05 which actually showed the design, but I tried white, yellow black to no avail. So I don’t know what to advise as I’ve not had much experience of transferring onto dark fabrics and I try and avoid them. Good luck Stacy I hope you find something from the comments on this blog and thanks Mary for bringing to our attention the difficulties of transferring onto coloured fabrics.
Regards Anita Simmance
I’ve been using Sulky 8-1/2-Inch by 11-Inch Printable Sticky Fabri-Solvy Stabilizer. I LOVE IT! You can draw on it or print using an inkjet printer. It self sticks to fabric and doubles as a stabilizer. When I’m done, I soak the project in hot water and watch it disolve away:)
I’m sorry I don’t have any advise for you, Stacy. But I do have my own question, Mrs. Corbet: The design I have isn’t a pattern – it’s a picture of a piece of outline embroidery. I know already that it won’t work to trace it with anything laying over the picture. Do you think transfer paper would be a good choice? How reliable is the transfer paper method of tracing embroidery designs? I open to any advise you can give me!
Sarah
Can you use tracing paper to trace the picture into a line drawing first, Sarah, and then, from there, trace it onto fabric? If you have a tracing of the picture first – so that you’re working from clean lines – then using transfer paper or just tracing the design onto fabric will probably work better for you. Transfer paper (like carbon paper) works ok for me, but it does work best on fabric with a smooth surface.
Thanks very much, Mrs. Corbet 🙂
I use a soapstone pencil or tailors chalk.
They’re both easily removed, but don’t immediately rub off from handling. Being able to remove them completely with spot cleaning without having to wash the piece is important to me.
I couldn’t believe my good fortune when I opened your daily letter this morning! I’m just in the process of beginning two pieces from the Secret Garden book, the peacock and the hummingbirds and wish to do it on a black material. I had been searching different sources on the best way to do this. Lo and behold, you have given me the answer. I have two grandchildren who are planning weddings at different times in the next two years and I plan to frame these pieces as wall mounts, so the problem of washing doesn’t arise.
I enjoy your daily emails and look forward to them every morning.
Marjorie
I use stretch and seal. Baste it onto the fabric and embroidery right through it. Tear it off when done. Be ready for some tedious picking to get it off small spaces in the design. I have only used this on simple designs.
I do a lot of quilting and trace appliqué background fabric. I use the Pilot Frixon pen with great results. This pen is a ball point and the ink flows very well. The nicest thing about it is the marks come out when heated. Some have said that the marks will reappear in cold, such as snow or if it’s put into the freezer. This pen comes in many colors and can be used for dark and light fabrics. Just my two cents worth! Thanks for all your wonderful videos and lessons and for making embroidery fun!
I have not transferred very often on dark fabric. I have used a yellow or white chalk pencil or iron-on pencil in the past. I am wondering if a Copic Sketch marker/pen will work. It was a suggestion in one of the Stumpwork books that I used recently to color the edges of a detached piece so the white of the fabric would not be seen. I did use it and there was no bleeding but have not washed anything. Also have handled the piece since and had no marker on my hands after.
Thanks again for all the good info you share with us Mary. Love it!!!
I use the white re-fillable pencil from Fons & Porter to draw or trace onto dark fabrics. I have also used dressmakers carbon to trace then go over it with the Fons & Porter pencil. And when the drawing is just how I want it, then I lightly mist the drawing with hairspray and that keeps it from smudging any more.
Jo
Durham NC
I’ve used a product called Transdoodle. It’s a chalk based transfer paper and the packet comes with several different colors, including white.
It works pretty well, except like all chalk products, it tend to rub off, like you already talked about.
I don’t understand why they can’t make white ink. The Microns or the non-bleeding Sharpies I use all the time come in lots of colors. Why not white?
I haven’t tried the gel pens yet, but Bohin of France makes a nice fine white mechanical pencil that writes on fabric nicely. I does wipe off in time, so for a large piece that I am likely to be working on for a long time, I still stitch the design on using tracing paper and a Japanese running stitch (a running stitch where only a couple of threads are covered on the back and a line as long as the design line is straight (from 1/64th inch(2mm) up to half an inch(12mm)) on the front using a pale sewing thread. It does take some time, but over a nulti-year period it is worth it.
For Stacy : Transfering design on darker material or clothing. I use SOLVY WATER SOLUBLE STABILIZER. You can trace on it or draw on it. And the good thing about it : It dissolves in water. The way I use it is I place the solvy stabilizer over my design, trace the design with a pen, then I place the stabilizer over my material I securite it with a few pins and embroider over the stabilizer when I am finish I tear the stabilizer off and the pieces of stabilizer that I cannot tear off comes off with water. The SOLVY WATER SOLUBLE STABILIZER comes in different weight: Light, Medium, and the color is Transparent. It also comes in sheets or rolls. I have been using it for a few years know and I just love it. Hoping this will help you.
Monique Galipeau, from Huntingdon, Québec, Canada.
Mary, thanks for the info. Do you have a post on which pencils are safe to use for transferring designs?
I use Sulky Sticky Fabric-Solvy. You can draw on it, or better yet run it through your printer, peep off the backing and it sticks to your fabric. When done run product through the washer or do it in a sink with cold water. The water soluble stabilizer dissolves. I buy mine on amazon but I m sur fabric stores would have it although our JoAnn’s does not.
I, too, have tried everything possible. By far, the best thing I have found is my front glass door. I tape the design onto the glass, followed by the fabric, and use plain old white or yellow chalk sharpened to a fine point. I then remove the foot on my sewing machine and run a basting stitch over the design. I also have a lamp that sits on my floor and I merely replace the extension leaf with 1/4″ Plexiglas for working at night. I’ve used this method for years and it’s never failed me.
I have used avalon water soluble plastic and a white gel pen to trace with. Just tack the plastic well onto fabric and once you are finish with the project you can either tear it away or wash it and plastic will disolve
Recently I learned from a Facebook friend a great way to not only trace a pattern but to enhance the embroidery on not so great materials as well as nice fabric.
Kimeko Smalls, will trace the pattern using the gell pens mentioned by Mary. But she will trace the pattern on to a matching sheer silk veil material. Then she pins or sews it, with a basting stich, to the material of her embroidery fabric. After you do your embroidery you simply cut away your waste Veil material. This can also make the fabric look more expensive. I did it on a piece of black fabric, and it made it look like velvet. Too cool!
I use a variant of pouncing the design.
1. I take a piece of clearish plastic, draw the design on it and prick holes all along the design lines.
2. I then make a very thin paste of wheat or potato flour.
3. Put the plastic template where you want your design, make sure it doesn’t move.
4. Take a some kitchen roll or a brush and wipe the plastic with the paste, making sure it penetrates the holes.
5. wait an hour or 3 and see your design outlined in dots.
The dots can be scratched off and is a really good way to mark coloured fabric and velvet.
Tania
Just to clarify.
I have used overhead plastic, template plastic used in quilting and the front page protector of the cheap glue bound books used by my university for their selfpublished classmaterial.
Tania
I make my own templates too but I get x-ray film from my doctor. The seconds and ones where the pictures don’t come out. He usually donates them to schools or charities so really doesn’t flinch when I ask for some.
I’m a quilter who appliques, hand quilts (my latest learning curve) and embellishes my applique with embroidery, so the question of transferring patterns to dark fabric is one I struggle with also. Like several others, I like the Sewline/Fons & Porter pens with the ceramic lead. The lines last well and can be rubbed out with a fabric eraser (not a good idea on embroidery; ask me how I know) or washed out if the piece is washable, as mine always are. (I have no advice for something that can’t be washed.) They also will work with reasonable accuracy on rough fabrics such as linen. I find that tracing the pattern on the back of the fabric (remember to reverse the pattern) and then marking placement with a simple, quick running stitch as I go, works well for me. It takes a little more time, but I can get all the detail I need and I don’t have to worry about removing any lingering marks, just the running stitches as I work. If need be, I will then trace over the basting marks on the front with the ceramic lead pens as I work; that way, no need to worry about them coming off before I’m finished stitching as I am marking only just what I’m currently working on.
Haven’t tried the stabilizers. They sound interesting.
When I want to embroider on dark fabric I use a water soluble topping by Stitch and Sew. Trace the design onto the topping and baste the topping onto the fabric. When finished, I soak the fabric in sink until topping desolves (sp). Viola my finished product.
RE transfering design on dark fabric. If the fabric will tolerate and you are willing, you can use Pellon StickNWashaway sheets (8.5×11 or bolts) onto which you have scanned and printed the design. Peeling off the backing, it has a light self stick surface that holds it on the fabric, but I basted it on too. When the stitching is done, the sheet can be washed away gently in cold water. It worked wonderfully for me with linen threads on linen fabric.
I learned a nifty method from Jenny McWhinney threadpainter extraordinaire! I use solvy – a water soluble interfacing – the fabric kind is best although the plasticy one works – just not as nice to stitch on. I trace the design with a micron pen on to the solvy then tack the piece in place on the fabric to be embroidered. Then I just stitch as normal over the solvy. When the stitching is complete I dunk the whole piece in cool water and the solvy dissolves away – no residue left. Only cautionary note – your threads and fabric must be colorfast and not bleed etc. I have used this method on wool, dark linen, and velvets. I would guess it would work on anything that does not mind being dunked in water.
I use Roxanne pencils. They come in a two pack with one white pencil and a silver one. They aren’t perfect, but they work pretty well for me.
Clover has a product called a White Marking pen (Fine) which I have found to be excellent for using on dark fabrics if I don’t want to use washable vilene or solvy. It is a very fine pen so covering the marks is easy although they will also disappear when ironed or washed. They do not come off as you are stitching. When using this pen it takes a few seconds for the marks to appear as you are drawing so it is necessary to be a little patient – it is worth it though. This is my marker of choice when embroidering onto dark silk fabrics.
i do a lot of very large embroidery designs on dark fabrics with lots of text and I have had the best luck with the white carbon transfer sheets that Sublime Stitching sells. They do not brush off easily and I have used them on a linen weave type fabric and just plain cotton.
I find the FriXion pens are very useful. There is now a .5 one available here in Australia. The only colour is bright pink but it irons out very well on cotton. I did test on white silk and it left a faint discernable line. It just means it best not to make any mistakes when tracing. As yet I not tried it on linen.
Many thanks for your e-mail. I do look forward to it.
hello mary,
i too, have used tissue paper. sometimes it works fine and others, its a nightmare. i think it depends on the texture and quality .
but being a quilter also, i have found the frixtion pens, that are used for fabric to make lines or quilting designs and them to disappear instantly by the heat or steam of an iron. they come in many colours, light and dark . hope this helps, marcella in kentucky
Have you thought about using “Press and Seal” made by GLAD company instead of tissue paper. IN NZ we use it a lot in our Guilds as a means of transferring a pattern, particularly small patterns that are part of the bigger design. You cut off a piece the required size draw on your pattern and stick it to the fabric [and tack if you wish] – one can sew through it and tear it off later. Works well with stumpwork. Cheers Elizabeth
I use carbon tracing paper it comes in yellow, black and white. Its like the old typing carbon. you place it under the pattern on top of the cloth. I use a stylus tracing tool its wood in the middle with a piece of metal at each end. One end has a very fine ball and the other slightly thicker ball. You can use an empty biro as long as it is a small ball. You must use glass under the cloth to ensure a hard surface.
I’m back with another question!
As I said previously, I’m about to begin two embroideries for my grandchildren’s wedding. I would like to use black material. What would you suggest for the best type of material for the peacock and hummingbirds? I would like something sturdy but easily embroidered, not to thick. Would cotton be best or could I use silk or similar type material?
If these are wedding gifts, I’d definitely not use cotton, especially if it is black. I’d go for a good 100% silk satin or silk dupioni or shantung (good quality of both – the cheaper silk shantung and dupionis can be a little flimsy) or a good linen. But not cotton – or at least, I wouldn’t use it for something I was going to put a lot of time and effort into.
I consider myself very much still new to embroidery after about 3 years of occasional time. I find transferring designs to be one of the banes of my existence, the other being threading needles, especially when the eye of the needle is so small a needle threader won’t work!
I haven’t got the artistry to hand-draw designs and a gel pen does not help to TRANSFER the design, as you say. I find carbon paper doesn’t transfer onto all fabrics – linen didn’t work for me, although it’s Ok for some fabrics and I have a choice of colors to use with various colors of fabric. I wish I’d read your article about making your own prick-and-pounce powders, as I’ve just given in and paid out for a prick-and-pounce set. Mind you, I had tried it with crushed tailor’s chalk to no good effect. I bought a gel pen after a course at the Royal School of Needlework, and found the colour wasn’t clear enough for me to stitch with. Tacking the tracing onto the fabric wasn’t very good as I couldn’t tear the tissue paper away very easily – I just lost the design. So far I haven’t come up with a satisfactory answer.
Vanessa, please try the white tracing paper I wrote about at about 10:30 yesterday. A damp cloth or sponge takes off the white transfer. I think you, like me, will be happy with it. I too am a new embroiderer and like things easy!
A yellow I-Denti-Pen might work. They are made to write on fabric and won’t bleed. Unfortunately I don’t think they make them in white.
Thank you for this post, it’s timely for me, as I prepare to transfer a pattern on to a blue silk. I get these pens (and so many others!) at JetPens.com. They sell many Japanese pens/stationary items which are not available at US stores (free US shipping with $25 orders). I’m not affiliated with JetPens, I just love their items, and their customer service and information is excellent. Regarding these pens, I do worry if I can use them on my silk, as I’ll be steaming after the stitching is done (I’ll use the Japanese Embroidery method of finishing).
I still have my Venus Paradise colored pencils from when I was a kid in the 1950’s and 60’s. I sharpen a white – occasionally a lemon yellow or flesh – pencil and use it to draw the lines.
I always presume that the lines will be permanent on any piece I do and draw them as fine as possible. It is rare I make something that will be washed.
There is also white dressmaker’s carbon that can be used.
I have found when using a light box with a heavier dark fabric sometimes it is still hard to see the pattern clearly. If I turn off my overhead light the pattern shows through much clearer.
Mary I worry about using things such as the gel pens. I am concerned that if the piece that I am working on can’t be washed when done, they may have a tendency to rot the fabric &/or the embroidery over time. Is there any way to tell if the product will do this.
Also I am worried about taking my finished piece to my dry cleaners to have a non-washable fabric dry cleaned. How can I tell if my finished piece will survive.
My cleaners suggested that I make a sample piece containing all the things in my piece. ie…fabric, threads, beads, threads, etc. to my cleaners so that they can do a test run first.
This has proven successful so far, in as much as we have found out just what will work & what will not. But seeing as how most of the work that I do is on wearables, I need to know in advance what will work so that the finished piece will be able to be cleaned.
So my question to you is there a chart some where that will tell me just what should/or should not be washed or dry cleaned.
I am especially concerned with the metallic threads that I am so very found of.
I don’t know that there’s such a chart anywhere, Christine.
As for the gel pens, if you’re dry cleaning most of the stuff you stitch, the question of rotting from chemicals is rather a moot point. Dry cleaning is done with chemicals. But if it is a concern for you, then look for “archival” pens, like the one mentioned above. They are less likely to cause discoloration of the fabric in the long run. They’re suitable for long-term, archival use on paper, so chances are, fabric will survive, too.
Christine, I would contact the companies who manufacture the products you use in your work. Off the top of my head, DMC, Gutermann, & JP Coats all have information they can send you or will make available to download, but every company I’ve ever contacted has care instructions available in some form or another.
Hope that helps!
I have had tremendous success with heat sensitive quilting pens. These are pens that mark in different colors (some brands do have white) and the marks disappear when heat (ironing) is applied. Do not leave marked fabric in a hot car, sometimes that generates enough heat for the design to disappear. I also use it to mark where beads will go when I am embellishing.
Oh yes! although this is concerning tracing patterns for design, if you use applique at all in your work, unless the design is absolutely symmetrical, it has to be traced in reverse on the applique material so as to be correct when applied to the ground fabric. I’ve learned by wasting material.
I was in need of transferring a design to navy linen today (which is how I ended up on this page).I covered the back of my printed out design with a very soft white chalk pastel – Schminke if you’re wondering. Then I was able to place it on my fabric and trace over the non-pasteled side with a dull pencil. It was detailed enough that I could then trace the design in white gelly roll pen.
Whatever happened to that tracing paper you could get at the store with the sewing notions to mark darts and pleet lines on material being made into clothes? It came in lots of colors including white and yellow which would work on dark clothes and there was a tracing wheel with little teeth on one end and longer teeth on the other end?
Thank you so much for your generosity in sharing your knowledge. I have found it invaluable to gain an understanding of different methods of embroidery.