


Several years ago, we chatted about organizing and storing beads. If you dabble with beads in your embroidery, chances are, you’re going to acquire some containers of beads along the way, and it’s nice to be able to put them in some kind of tidily organized storage solution.
My bead collection has expanded quite a bit since then, and I’m still using the same storage system. But… I’m using it with some reservations now (I’ll explain below).
So, I thought I’d update you on my bead storage and show you one thing I’ve changed (at a reader’s suggestion) that has worked out well.

Mmmmmm. Mmmmm. Mmmmmmm. I do like beads! I love the sparkle and life that they can bring to a needlework project.
And while I don’t use beads on everything (they have their place!), I like to use them now and then, here and there, on my embroidery.
Some Favorite Bead Embroidery Projects
Some of my favorite projects that involve beads? There are more than I realized!
Well, there’s the Bee-Jeweled Pincushion we just finished, of course.
There’s this Jacobean Sea project that will be coming out in kit form later this year.
There’s my Fantasia in Silk project. Just a few tiny beads on that one, for a finishing touch.
I love this decorative initial touched up with a few beads.
Oh gosh – and of course, these mini Christmas stockings (kits available!) and my Snowflake Designs (which can also be stitched from some of the supplies in the Stockings kit).
Oh! Christmas trees! They benefited greatly from the sparkle of beads.
Oh! This teeny tiny beaded pumpkin!
Oh! I loved working this little teeny tiny beaded bird from Ann’s Orchard.
And if you’re looking for tutorials for embroidering with beads, I have some of those, too.
There are way more beads floating around on my website than I realized.
I will stop now.
Bead Expansion…
Needless to say, once you start incorporating beads into embroidery, you might find yourself occasionally expanding your choices. I did this a few weeks ago, when I realized I didn’t have a good selection of green beads. (A few other new colors seeped in, too.)
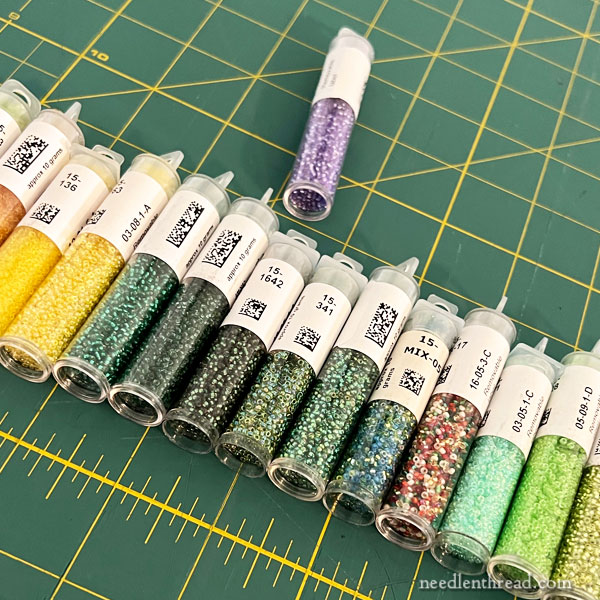
So I bought a few tubes of beads, which lead to some re-organization…
Fortunately, Anna (my niece who works with me) is a huge advocate for keeping things like beads and threads Super Organized. (Everyone needs an Anna!)
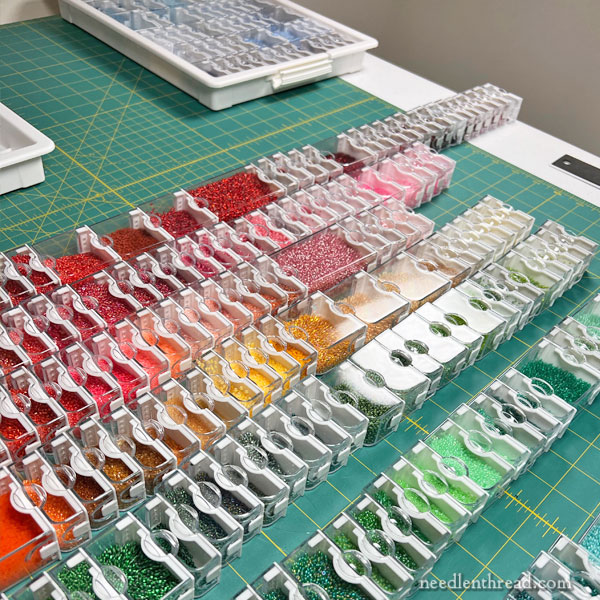
So she was thrilled to tackle the reorganization of the bead trays.
I organize and store my beads in the trays that I talked about in this original article on bead storage and organization.
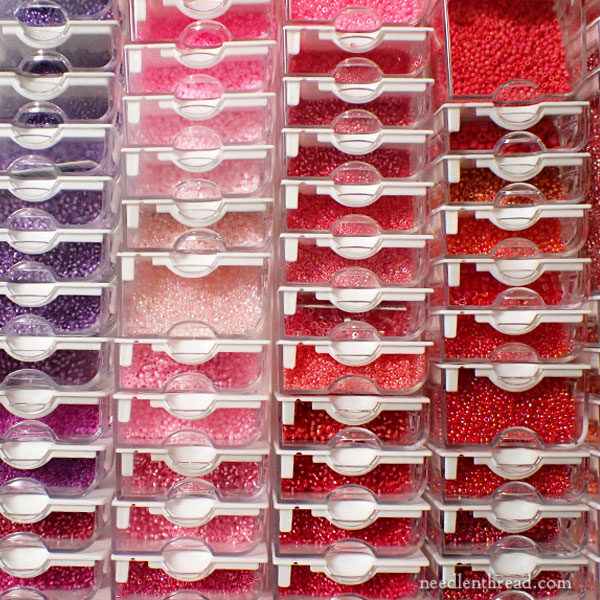
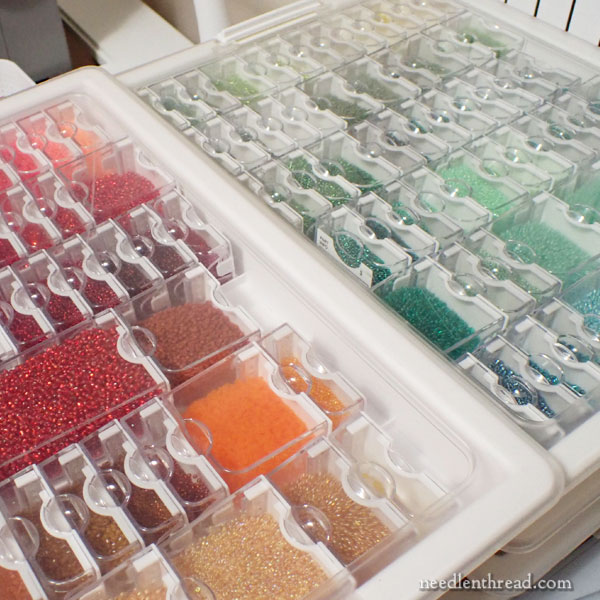
The beads are arranged in the storage trays by color. I don’t organize by size, because, for embroidery, I pretty much stick with 15/0 and 11/0 beads, in either round seed beads or delicas (which are tiny truncated tube beads, the size of seed beads).
Occasionally, I might opt for larger beads for edging and the like, but for the most part, I’m an 11/0 – 15/0 gal!
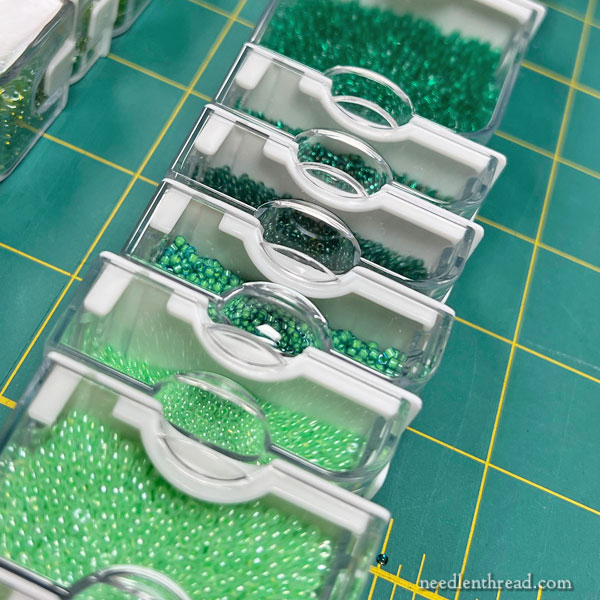
The green expansion!
*Sigh*
The beads go in clear plastic boxes with white snap-on lids. Because the boxes lie in the tray (they’re kept in line by spaced ridges in the tray), you can see the colors of the beads at a glance.
We’ll talk about a disadvantage of horizontal trays below, but for the most part, I like this arrangement a lot.
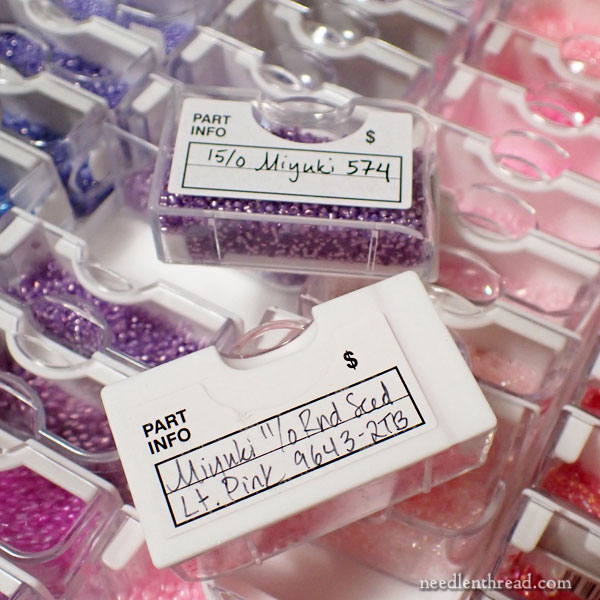
Originally, I believed that the labels for the individual little boxes were to be placed on the tops of the lids.
Initially, this seemed to work out fine, but as the years have gone by, I’ve noticed that the labels are prone to peel back from the plastic lid.
A reader (thanks, Tim!) mentioned in a comment on the original post that the stickers are actually supposed to go on the bottom of the container, according the manufacturer.
So I looked that up, and found this video from the manufacturer that shows that the labels are indeed on the bottom of each container, not on the lid.
And you know what? The labels do actually stick and work better this way! They aren’t in the way when you open the lid; you don’t risk the smudging of the writing or its wearing off over time; and they stick better to the clear plastic than they do to the white plastic lid.
Now, I put my labels on the base of the containers.
I’ve seen some commentary that you can’t see the colors of the beads as well if the labels are on the bottom of the container, because they cover the whole bottom of the container. But I normally look at the beads in the tray, when they’re situated like those in the photo above, so I haven’t really had a problem with that.
They Don’t Make ‘Em Like they Used To
Gosh, did you grow up with your parents saying that? “They just don’t make ’em like they used to!” About everything?
Well, in a very short span of time, it seems they already don’t make these trays and containers like they used to.
There’s a decided difference in the quality of the lids with newer trays. They still work, but the plastic is a bit “softer” or something, and the click to close the lids on the container is not as firm and secure-feeling. In the last tray I bought, there were a couple lids I was wary about, as they didn’t click shut well and hold themselves shut. To be safer than sorry, I didn’t use those containers.
If the quality continues on the downward slope, I’d say look for another solution. There is absolutely no point in a bead storage solution that involves lids that don’t stay securely closed.
Still, I’m ok with mine for now, and the older ones I have, I still like.
The Stack
Another negative point I’ve seen mentioned on the trays is this:
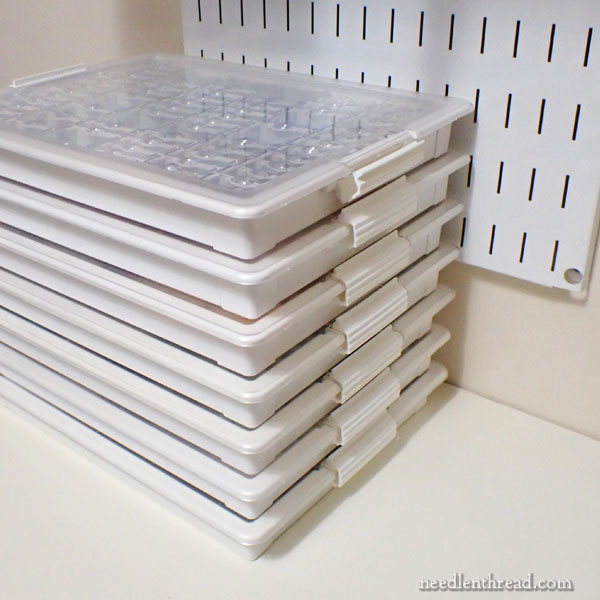
The trays are made to stack, with the bead containers lying horizontally inside them.
Because they stack up like this, you can’t really see at a glance which tray is devoted to what colors.
And so you must unstack to find your color tray.
I can see how this would be inconvenient for someone who spends all their creative time in beading – whether it’s bead embroidery, jewelry-making, or the like.
For me, who does not use beads every day – or even every week – I appreciate that the trays stack and take up a very small footprint for storing that much variety.
But it can be a negative for some people.
All’s Well for Now!
So that’s where I am with bead organization and storage.
I’m a little disappointed in the quality of the lids on the newer trays that have been coming out in this brand recently, but not disappointed enough to ditch the system and start over. It’s not inexpensive to establish a decent storage system for beads, threads, and the like, so once I’ve got one, I don’t like to switch. This will work for me for a good, long while!
I like putting the label on the bottom of the containers. That’s been a terrific solution for keeping the labels in place securely and keeping them free of smudges.
If you’re looking for these trays and containers, I have these listed here on my Embroidery Tools & Accessories list on Amazon. They come in different configurations, with different numbers of containers in each tray.
The link to my Amazon recommendations page is an affiliate link, which means that Needle ‘n Thread receives a small commission for purchased made through that link, at no extra expense to you.
Hi Mary, I like this bead storage too and have been using it a couple of years. I didn’t realize the label went on the bottom so I made my own labels because “they didn’t stick to the lids”. For the question of what’s in each box I put a printed label on the side that you see with a general description; “reds and oranges”, “blues and greens”, etc. I arrange by number since that’s how patterns generally call for them but by color this would work. Labels are easily removed and changed when needed.
Thanks for you column. I really enjoy it.
Gail
Very good article. However, I need to find the beads first. Where do you buy your beads? I made the mistake of going to Joann. The beads I bought wouldn’t fit through my needle. Any advise you can give me would be great.
I purchase seed beads through various sources: Caravan Beads, FireMountain Gems, Aura Crystals, Potomac Beads – it really depends on who has stock of the beads I need.
I love, love, love organization, especially items sorted by color!
To solve the issue of not being able to see which stacked tray is holding which color, I would either use a Sharpie, colored dot, or label on the side of the trays to identify the colors.
I do the same thing with my beads! I went through a phase where I was doing a ton of little Mill Hill projects, and I had so many beads left over. I have the smaller 5″ x 8″ boxes that contain about 16-20 smaller containers like boxes for Tic Tacs. They’re all Mill Hills, so I just write the number in permanent marker on the side of the container.
(catching up on my blog reading after being away on vacation for a few weeks)
I’m glad you found my tip about label placement useful!
I’ve also noticed some lids on my most recent containers not holding as tightly. I’ve found that if you open them, then push the tab inwards pretty hard and hold it for a few seconds, then close it up again the tightness is improved. They’re still a little bit loose, so I’m using those particular containers for a few odds and ends of larger beads, not my 15/0 seed beads, but so far they’re holding ok.
I do a lot of penny wool and I wood like to add some tambour embroidery to it, of course on wool. Do you have any suggestions on books or videos for me? I am having trouble with getting the hang of the tambour tool. Thank you, kate
Hi, Kate – you can find articles with tips on tambour embroidery in this index: https://needlenthread.wpengine.com/2013/11/tambour-embroidery-index.html
I use these exact same containers. I buy the napkin holders, the silver metal ones at dollar tree. Turn them on their side zip tie them together I do stacks of four and place two stacks in each of my cube openings facing eachother. They make the perfect
little shelves for these beading trays to slide in and out .