


Last week, we launched the Cornflowers Scissor Envelope stitch-along here on Needle ‘n Thread, with the first installment covering the materials list, design, and set-up of the project.
Errata Notice
Before we start, I want to draw your attention to an errata notice at the end of this post. Please don’t miss it – it has to do with the materials list and the kit contents! Thanks!
Now that you have your project set up (hopefully!), it’s time to jump into the best part of any project – stitching! Yay!
For those just joining us with this stitch-along, you can find the introduction to the project here, which will tell you what you can expect from the stitch-along. You can find the first installment here. And if you’re looking for a materials kit, you can find that available here.
For members of the Needle ‘n Thread community on Patreon, you have already received the PDF for today’s lesson. I posted it last night, so you should have received notification of it already. You can find it available here, if you haven’t downloaded the PDF yet.
Let’s start stitching!
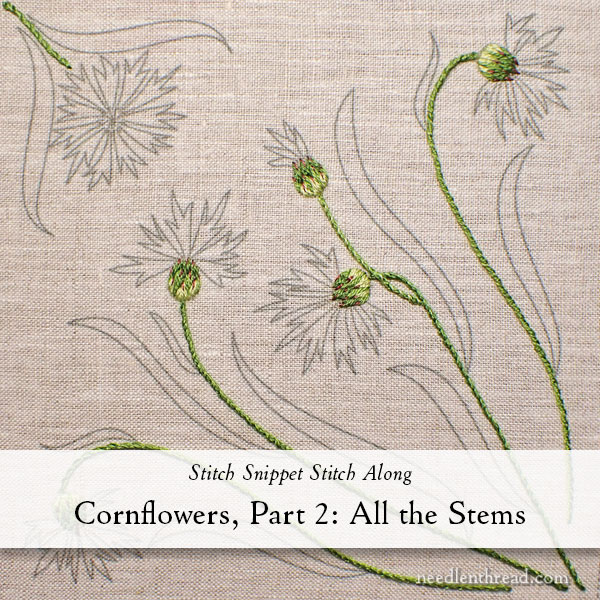
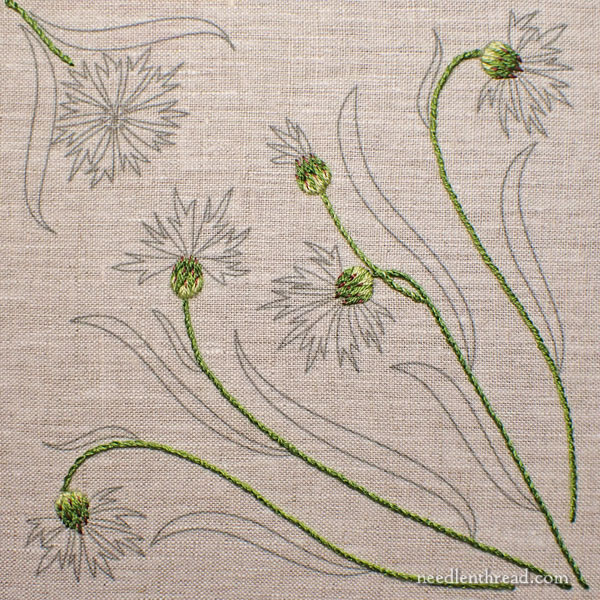
The first items that we’ll embroider on this project are the stems and the little bulbous bases on the flowers (the calyx).
The stems are pretty straightforward!
Stitching the Stems with Chain Stitch
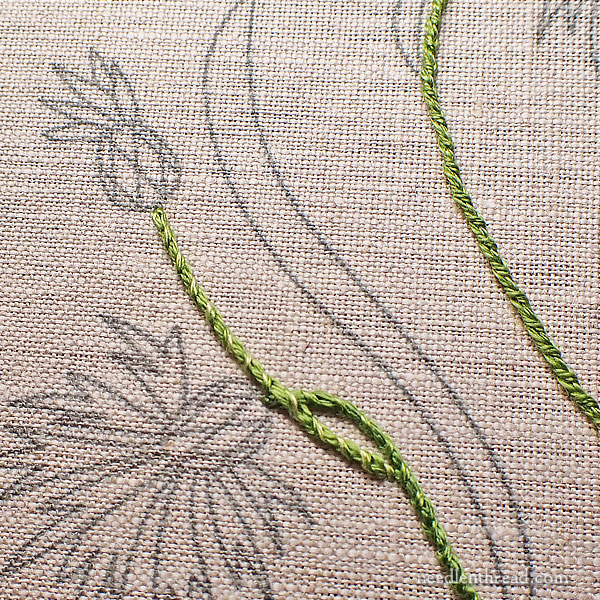
To give them a rounded, heavier look, but to avoid making them too time-consuming, I used whipped chain stitch for all the stems.
Use two strands of floss for the chain stitch foundation and one strand of floss to whip the chain stitch.
You can find a tutorial for chain stitch here. And you can see how to whip the chain stitch here, along with how to change threads in the middle of whipping a line of stitches.
I used different combinations of green for the different stems, according to the chart below.
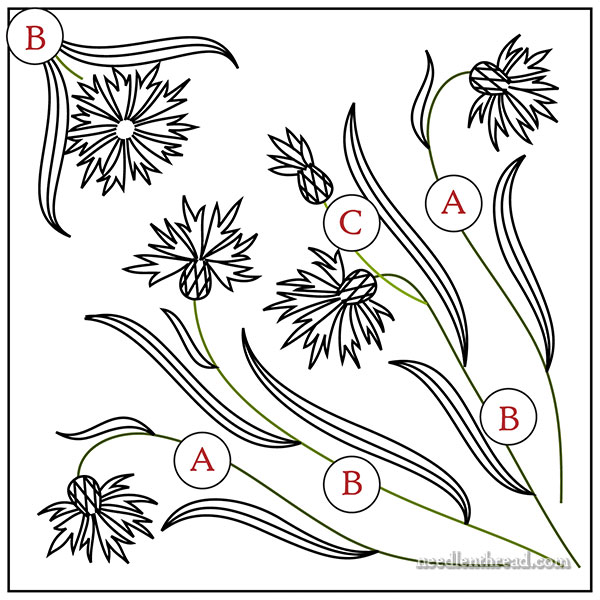
For the stems marked A, I used dark green for the foundation chain stitch (2 strands) and medium green (1 strand) for the whipping.
For the stems marked B, I used 2 strands of medium green for the chain and 1 strand of medium green for the whipping.
For the stem marked C, I used 2 strands of medium green for the chain and 1 strand of light green for the whipping.
You can, of course, mix up the thread shade combinations however you wish.
I tried to think in terms of dark-to-light across the whole design, so on the smaller stem (C) that is near the top of the central flower and more to the forefront of the image, I used the lightest green (one strand) to whip the chain stitch.
The stems are simple and relatively quick!
Here are a couple tips for the stitching and whipping:
1. Try to make your chain stitches consistent in length. Around 1/8″ is just right, but they can be slightly larger if you wish. But 1/4″ is too large – it would draw the line out and make the stem skinnier.
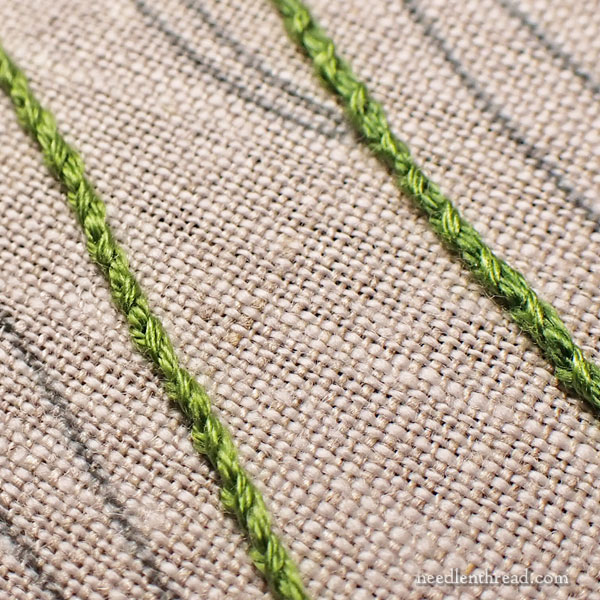
2. Whipping a stitch involves passing the needle under each stitch in the line, always passing from the same direction. If you are right handed, it makes sense to pass under each chain stitch from right to left. If you are left handed, it makes sense to pass under each chain stitch from left to right. On this project, it does not really matter if you start at the top of the stem and work down, or if you start from the base of the stem and work up. Do whatever is easiest for you – or mix them up! It’s ok if the twists on the stems go in different directions!
3. When whipping stitches, it is important to avoid picking up any fabric behind the stitches.
4. When whipping stitches, if you are using a sharp tipped needle (like the embroidery needle included in the kit), you might want to pass the eye of the needle under each chain stitch, to avoid snagging stitches with the sharp tip. Alternately, if you have a tapestry needle with a blunt tip on hand, feel free to use it!
Working the Bulby Bits
The calyx at the base of the flower is not very complicated, either, but because the space is small and all three shades of green are involved, it takes a little more time.
Use two strands of floss in the needle. The “diamond” shapes are each individually satin stitched with two strands.
When satin stitching each diamond, start in the middle of the diamond (indicated in the diagram below with the arrow) and work the first satin stitch down the center. Then move to one side of the center for the next stitch, and for the third stitch, to other side of center.
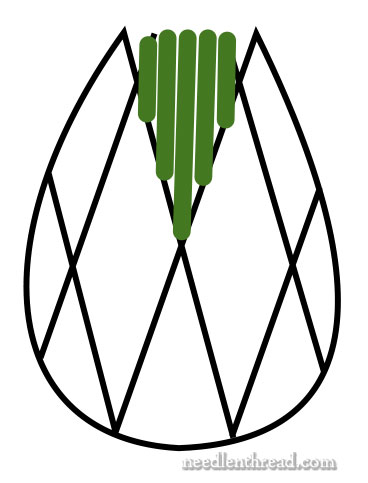
Because the bulbs are so small (and therefore the diamonds are small), it is unlikely that you’ll have more than three stitches in each diamond shape, but if you need more than three, you can work in a fourth and / or a fifth on whichever side needs it.
When you’re filling the diamonds, you don’t need to take the sides down to a tight point. You can see in the photos below how the diamonds look when filled.
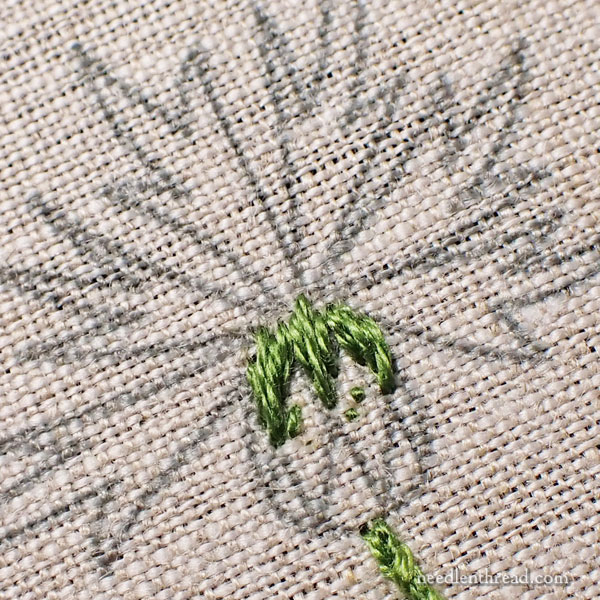
Beginning at the top of the bulb in the darkest green, satin stitch the diamond shapes across the top row.
Again, it is not likely you will fit five stitches in each diamond shape – but just do the best you can to fill them in, keeping the stitches as smooth as possible.

Work the second (middle) row of diamonds in medium green, making sure that the tip of the “diamonds” are between the dark green diamonds and that the shapes are filled in well.
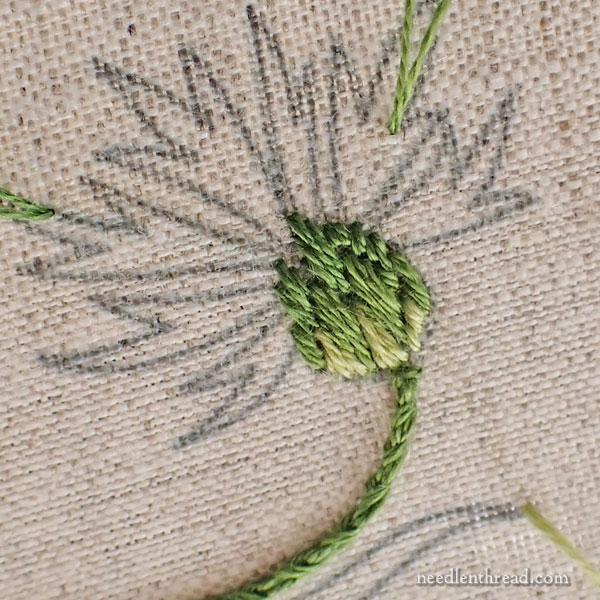
Finally, work the base of the bulb – that final row of diamonds – in the lightest green, as shown above.
Smooth Satin Stitches
There are different ways you can achieve a smooth satin stitch when working with two strands of floss in the needle.
You can use a laying tool to help you lay the stitch into place without the threads twisting on each other. You can see a laying tool at work in this video tutorial.
Another approach – not requiring a special tool – is “railroading” the satin stitch. You do this by passing your needle between the two strands of floss as you enter the fabric. This helps keep the two strands parallel to each other and minimizing twisting.
Add the Tips
Once the bulbs are filled with the greens in this sequence, switch to one strand of burgundy.
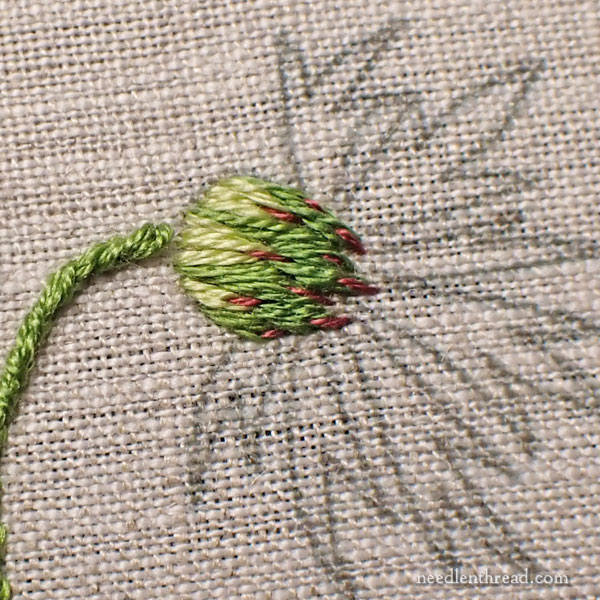
Work a tiny straight stitch at the tip of each diamond.
Work this stitch as a split stitch – come up into the center of the diamond, splitting the stitch there as you pass through, and take the stitch just over the top of the tip of the diamond. On the middle and base rows of diamonds, you may end up stitching down into the row of diamonds above. And that’s fine!
When I worked the bases of the flowers on this piece, I worked all the dark green on all the bases, then all the medium green, and then all the light green. Finally, I worked the burgundy split stitch on all the bulbs.
This sequence or order of work isn’t essential – you can certainly stitch one complete calyx at a time – but I found I was less likely to waste a bunch of floss by switching shades of green while working each bulb individually.
And there you have the stems!
Next, we will tackle the leaves. As far as time goes, the leaves are the more time-consuming part of the project, so we will dedicated a whole lesson to them next week.
Errata Notice
In the materials list on last week’s first installment, a color is missing from the DMC color list. That color is 823, a very dark navy blue.
This color is also not present in the materials kits. When I ordered the kit contents from the first samples I stitched, I did not use 823. It was not until I stitched the final samples that I started using dark blue. I inadvertently overlooked the fact that this color had not been ordered for the materials kits, and the kits were prepped without it (as you can see from the kit photos). Therefore, it is not in the kits, and it was not priced in the kits. Without the dark blue, I regret that you are missing one color for the project.
Unfortunately, I don’t have any of this blue in stock here at the studio, so I cannot sell it in the shop. It’s best (and less expensive) if you find it locally. If you can’t find it, or you don’t have local access to DMC (which is rarely the case in North America), then you can substitute any very dark blue thread, including a very dark blue sewing thread. It is an accent thread in the finished piece, but it does make the cornflowers “pop” and it is necessary for the center of the corner flower.
I have updated the DMC color list in the original materials list in the first installment of the stitch-along.
Huge apologies for this oversight!
Coming Up!
On Wednesday, we’ll do a little housekeeping to make sure we keep this project organized. I’ll publish a project index for Cornflowers, where you’ll be able to find all the articles for this project in one place. In the future, you will find the index listed under Tips & Techniques in the main menu on Needle ‘n Thread, along with the other Stitch Snippets.
On Friday, I’ll have a stitch tutorial for you – completely unrelated to this project, and just for the fun of it.
Next week, we will move on to Part 3 of Cornflowers, stitching all the leaves. I’ll also show you the bare beginnings of another project going on here in the studio – along with some other bits of stitch chatter.
This series is extremely informative! I’m enjoying it, although I’m not stitching it yet. Thank you so much for posting the instructions for the stitch-a-long so those of us who didn’t buy the kit, can learn with you. I’m impressed with the clarity of your instructions!
Thanks so much, Julia! I’m glad you’re enjoying following along!
No problem Mary! I don’t know if I’ll have that specific dark blue, but I recently did a sunset/water embroidery, so I have quite a variety of dark blues and indigos from that – one of them will work perfectly. Always grateful for your teachings. Besides, if you make an error, that just means it’s okay for me to make an error, lol! I am loving this linen in the kit, btw.
Hi Mary,
This is such an impressive project. I hadn’t joined until after the stitching began. I have all the materials in a list and will be putting together my own “kit”. I think my local Joann will have everything, if not I usually go to Esty. Have you released the stitching for the cornflower heads yet? I can’t find it but would like to make them shaded as shown. Thanks for providing such a detailed stitch-along project. As soon as I saw it I knew I had to make my own! I wish I had been in time to join the group but the instructions are so well done I think I can just follow along and make something beautiful. I’m also looking at past projects and would love to make Make the posy tape measure also, but one project at a time works best for me. So something to look forward to once I complete the scissors envelope.
Sue H.