


Lately, in the Stitch Fun series, we’ve been playing with shisha embroidery. Shisha is the application of mirrors or similar shiny objects to the surface of fabric, using embroidery stitches.
So far, we’ve looked at the traditional shisha embroidery method and two variations: one shisha variation with a squared outline and a rather hairy looking decorative stitch, and the other shisha variation with an overlapping, couched fly stitch for the decorative part of the stitch.
All three of the approaches listed above are admittedly a little complex. For beginners, then, who want to add mirrors and sparkly things to their embroidered masterpieces, but would like a simpler approach to shisha, here’s an alternative that works and that is super-duper easy.

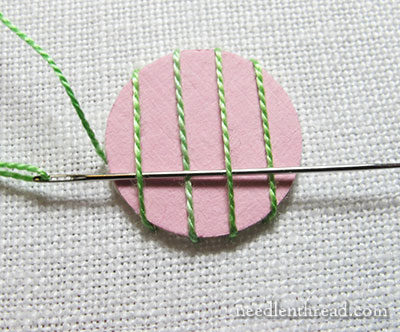
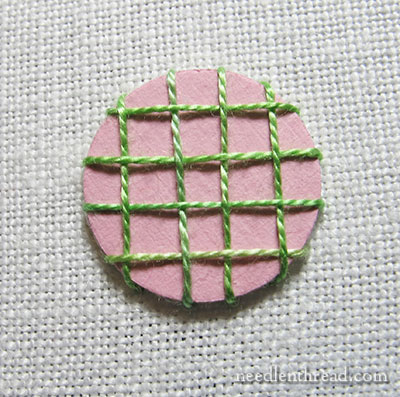
Begin by stitching four parallel, vertical stitches over your mirror or disk – be it a button, a cardboard punch out, a piece of mica, a real shisha mirror, a sequin, it matters not.
Each stitch should start at the top of the disk and end at the bottom of the disk, so that, on the back of the fabric, the stitches are carrying from bottom to top.
I suggest starting just to the left or right of center, and stitching two equally spaced long stitches on that side of the center, and then moving just to the other side of center and stitching the other two, rather than beginning from the edge and stitching straight across. If you start just to the left or right of center, it’s much easier to judge the spacing of the stitches.
Beginning just below center working horizontally, now you’ll weave horizontal stitches through the vertical stitches, passing under and over as you move from left to right. The photo above shows the sequence. Make sure you alternate under-and-over.
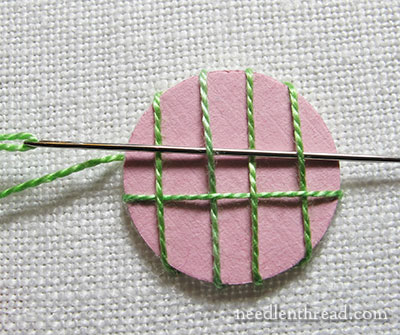
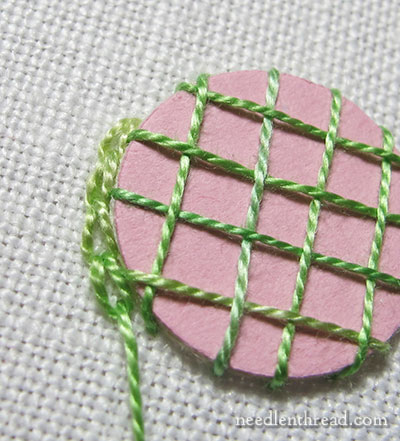
Move just above the first horizontal stitch, to work the next one, spacing the horizontal stitches similar to the spacing on the vertical stitches.
Weave your needle over and under again, this time alternating with the over-under pattern of the previous horizontal stitch.
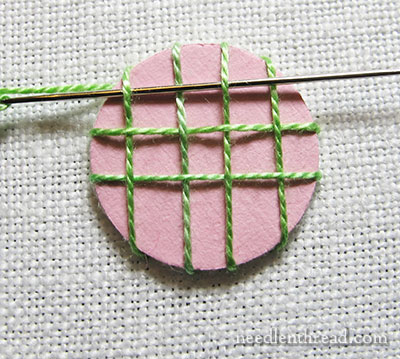
Work the third stitch in the same way, spacing it accurately and alternating the over-under pattern with the stitch right next to it.
You can see in the photo above that there’s one more stitch that needs to be worked at the base of the disk.
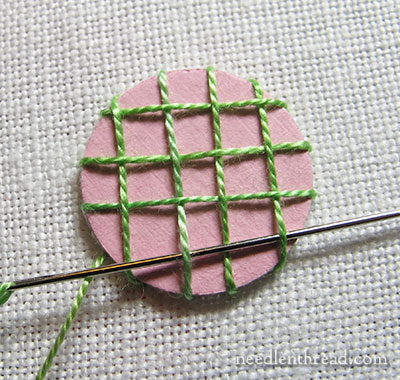
So we’ll work that stitch, weaving over and under, alternating the weaving pattern with the stitch above.
In this manner, we’ve created an interlocking grid over the surface of the disk.
And this is what it looks like.
Now, work a simple chain stitch outline around the outside of the disk, right up next to it.
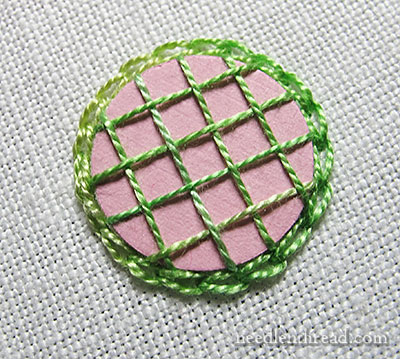
You can leave it just like that, and you have a very simple approach to shisha.
But of course, if you want to, you can further embellish the chain stitch.
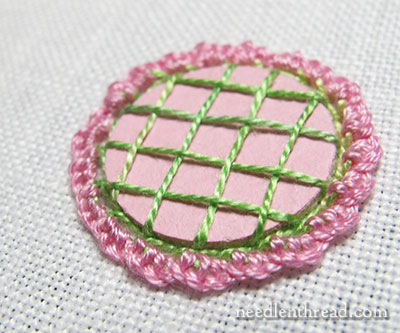
For example, I worked this scalloped buttonholed chain stitch on my chain stitch foundation.
For some reason, it reminds me of a baby bonnet.
You can also whip or lace the chain stitch – any kind of further embellishment you want to do, do!
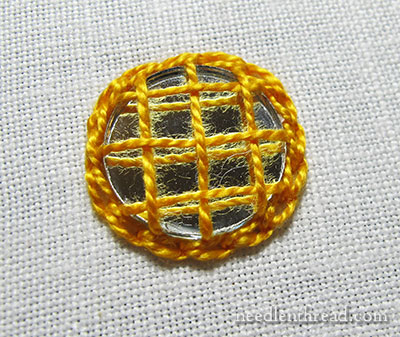
Finally, if you’re working with a heavier thread, and depending on the size of your mirror or disk, you can work as few as three vertical and horizontal woven stitches to hold the mirror down. In the sample above in yellow, I’m working with pearl cotton #5. In the previous sample in pink and green, I used pearl cotton #12. The mirror and the paper disk are the same size.
So there you have the Easiest Approach to Shisha Embroidery Ever! It’s simple, but it works!
If you’d like to see more shisha tutorials and more tutorials on different and fun stitch combinations, feel free to visit the Stitch Fun Index here on Needle ‘n Thread! There are heaps of fun ways to use embroidery stitches, and although there are over 60 tutorials in the Stitch Fun series at this point, we’ve only scratched the surface!
Dear Mary
I really enjoy the stitch fun series and this is certainly an easy approach and lovely technique to Shisha embroidery, you could even embellish the lattice design that would look good. There are so many different techniques to Shisha that makes it such an interesting way to embroider. Thanks for the tutorial can’t wait to start Shish, still embroidering the little things.
Regards Anita Simmance
I must be a traditionalist — the first one you did a tutorial on is my favorite. And someday I’ll be brave enough to try it! I’m wondering if I ought to do a few like this, and then when I’m used to working the mirrors, move on to the complex one …
Can’t resist stating that you’ve really accomplished more shisha application variations than even I’ve seen since the nice 1978 black book by Simpson (Shisha Mirror Embr’y A Contemporary Approach) that I thought was the bible of this technique & Erica Wilson’s 1973 orange Embr’y book that sparked my original interest. Locally since 2006, I do a Shimmering Shishas introduction and your series prompts me to try out some additional samples to inspire California students! Did you know that solvent-based Tsukineko Staz-On inks can color whatever reflective surfaces desired beyond the fiber attachment threads (though I haven’t used up my old resources of rainbow shishas sold decades ago).