Shisha embroidery – or mirror embroidery – is kind of addicting, you know?
You get started with the traditional shisha stitch, and before you know it, variation after variation presents itself – all of them lending to further adornment with more stitches – and the next thing you know, every time you turn around, you’re thinking of some other way to attach mirrors to fabric!
Today, let’s look at yet another variation of shisha embroidery. This one incorporates the cretan stitch over the foundation stitches, to create a spoked, sun-burst-like effect. It’s a fun variation, and it opens up all kinds of possibilities for adding decorative touches.
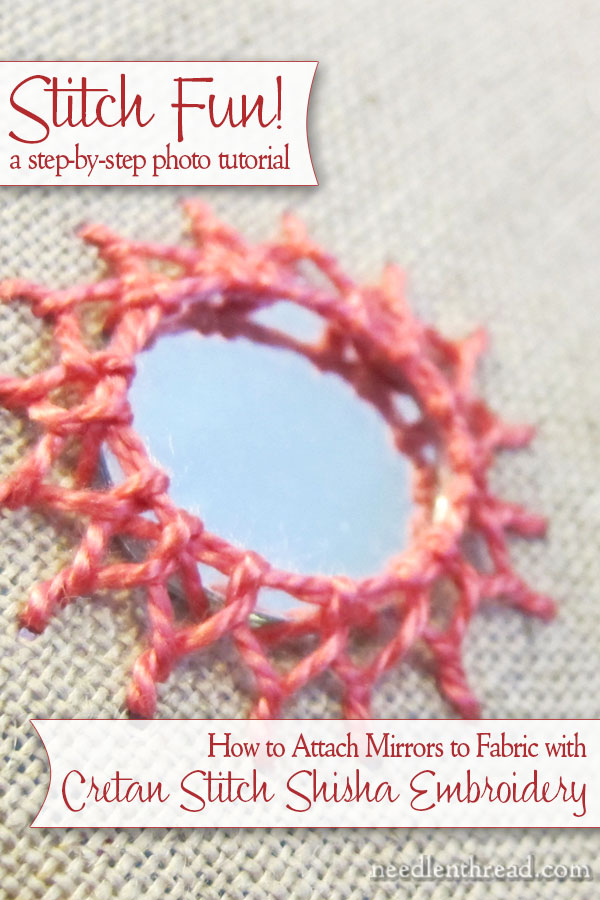
In the photo above, the cretan stitch is used as the decoration over the shisha foundation, to fix a real mirror onto ground fabric.
In the tutorial, I’ll be working the stitch in perle cotton #5, in two colors so that you can easily see the stitches. I’m working over a disk cut from a piece of card stock, since the mirrors used for shisha embroidery are harder to photograph.
I’m lazy that way!
For a needle, I’m using a size 20 chenille needle, which has a sharp point. The sharp point is necessary for piercing the fabric as you work the stitch – just be careful as you pass under the foundation stitches, that you don’t snag them.
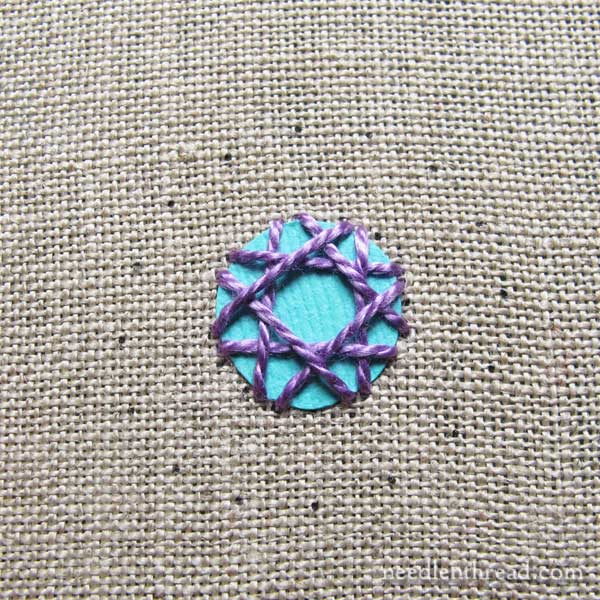
Before I started, I marked out evenly-spaced dots around my “mirror” using this technique for creating evenly spaced spokes in embroidery. Once you get the hang of the stitch, you don’t need to mark dots – you can just eyeball the spacing.
The disk is held down with the same series of foundation stitches worked with the traditional shisha stitch.
As I stitch, I’ll be traveling clockwise around the circle.
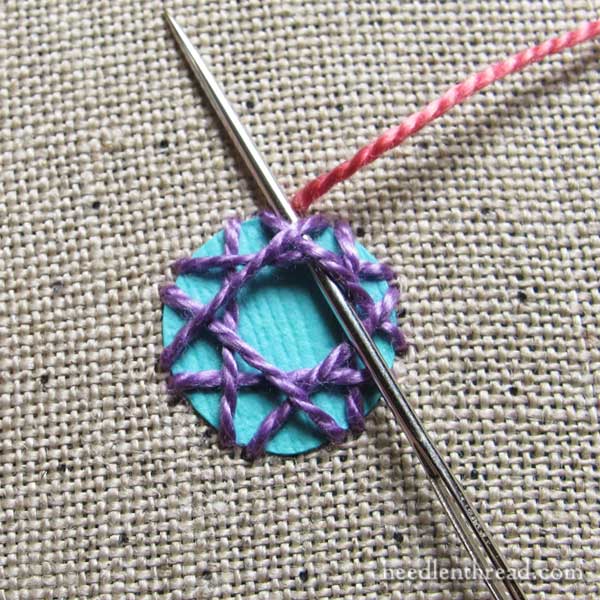
Once you have the foundation stitches worked, change your thread to a fresh length. It can be the same color as the foundation stitches or a different color, but I think shisha tends to look better when the foundation stitches and decorative stitches are the same color, in case there are irregularities in spacing over the foundation stitches.
Bring the working thread to the front at any point just outside the mirror, about halfway between two of the dots on the outer perimeter, and take the needle underneath the foundation stitches, as shown.
Since I’m traveling clockwise around the circle, I’m keeping my working thread to the right of the needle. If you work counter-clockwise around the circle, you’ll keep the thread to the left of the needle.
Essentially, this is the same thing as bringing your needle out over your working thread.
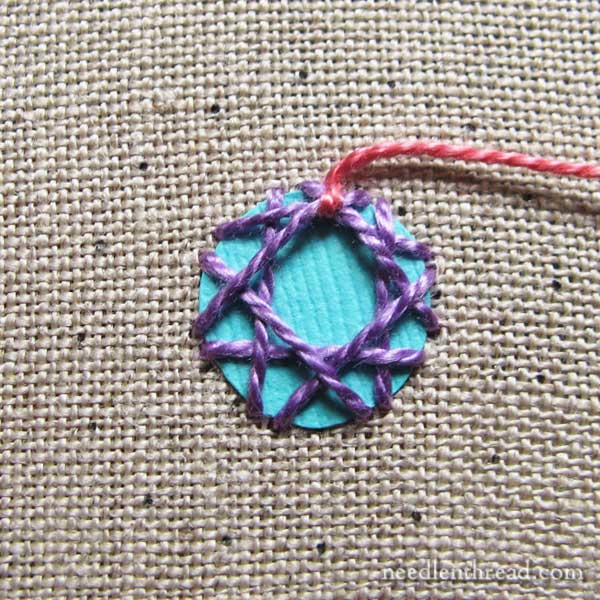
Pull the thread through snuggly towards the right. This will pull the foundation stitches towards the edge a little bit. You don’t want to pull super tightly here – just snuggly, so that you can create a nice circle around the inner part of the mirror.
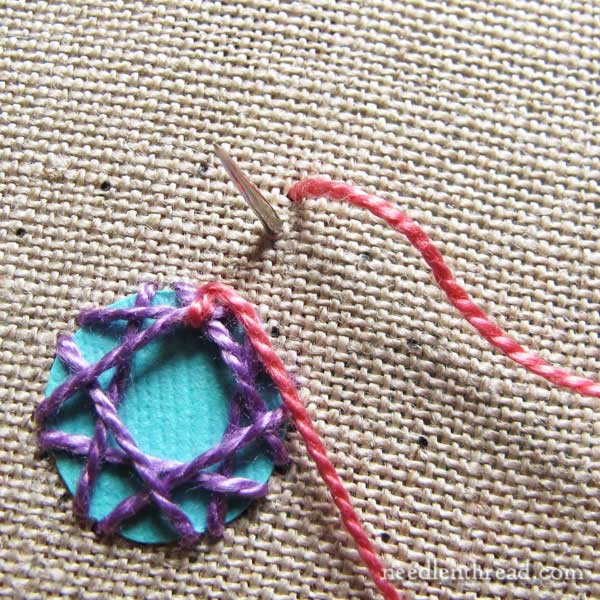
Moving forward clockwise a little bit, take your needle and thread down on the dot slightly to the right of, and a good bit away from, the edge of the mirror where you started. This is where your spokes will end, so the dots should be some distance from the mirror, to get a nice looking stitch.
Don’t pull the working thread all the way through. Leave a bit of a loop, so that you can come up above the loop with your needle, just inside the dot perimeter – a few threads away from the place you just entered the fabric, towards the mirror.
If you look at the photo above, you can see that my working thread is going down on the dot, and my needle tip is coming up not too far from the dot, towards the mirror, with a small portion of the working thread waiting on the front of the fabric, below the needle and out of the way.
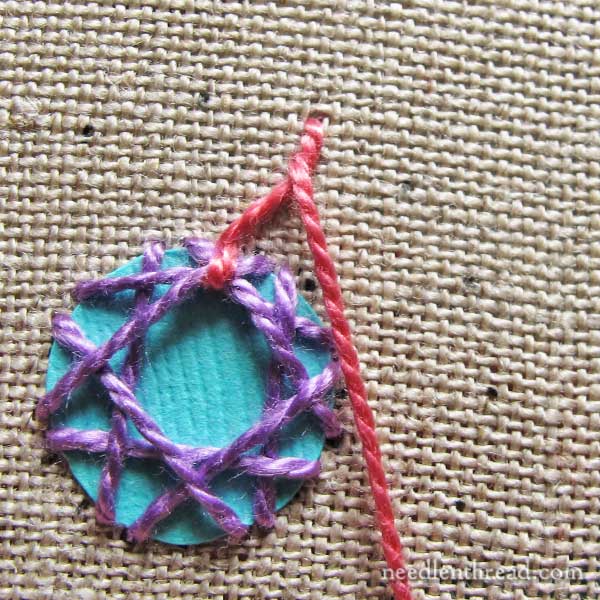
Pull the working thread through, and this is the configuration you’ll get.
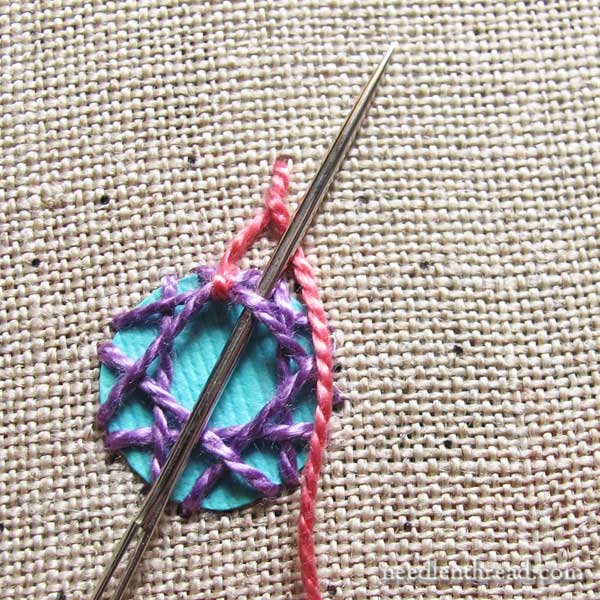
Now, take the needle over the foundation stitches and out over the working thread, as shown above, about halfway between the dot you just stitched into and the next dot on the outer perimeter…
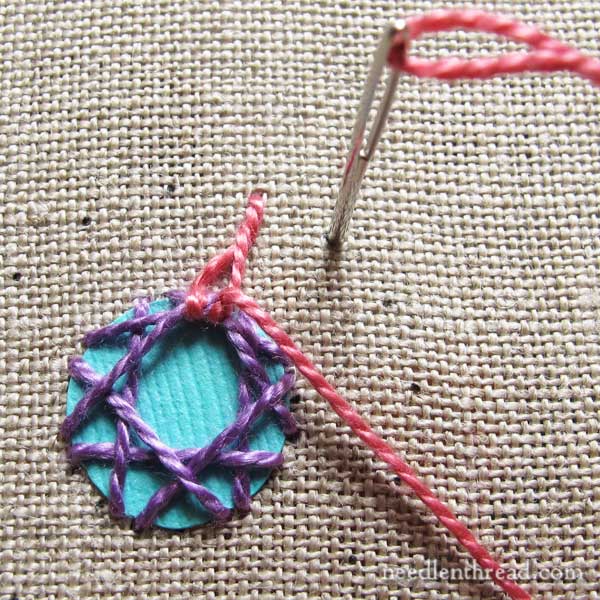
…and then, moving forward slightly clockwise to the next dot on the outer perimeter, take your needle and thread down, leave a bit of the working thread on top of the fabric…
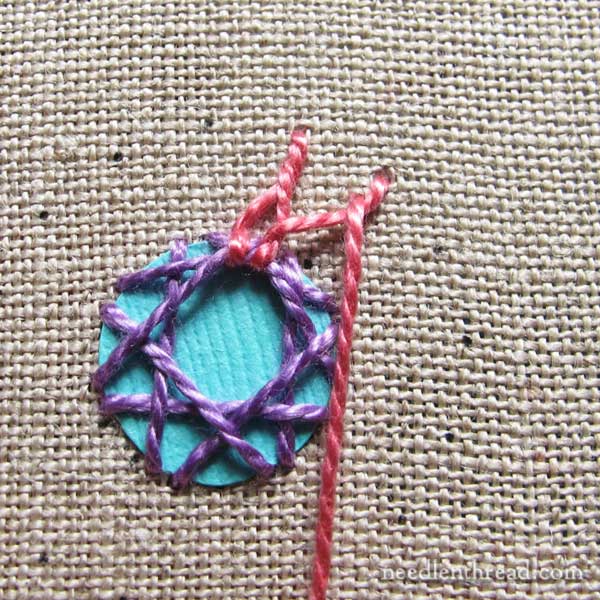
…bring the needle up just inside the dot and pull through.
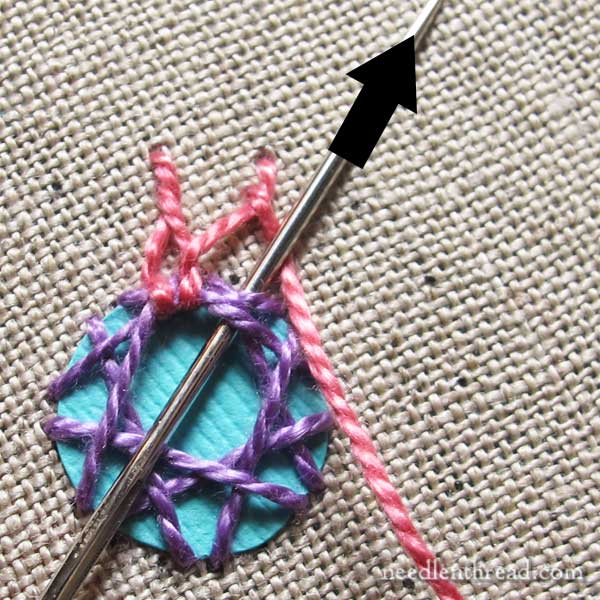
Then head back under the foundation stitches and out over the working thread.
When you pass under the foundation stitches, keep two things in mind: 1. be careful not to snag them with your needle; and 2. go under as many foundation stitches as there are at the point where you’re passing under them. Sometimes, there will only be two foundation stitches to pass under, and sometimes, there will be three.
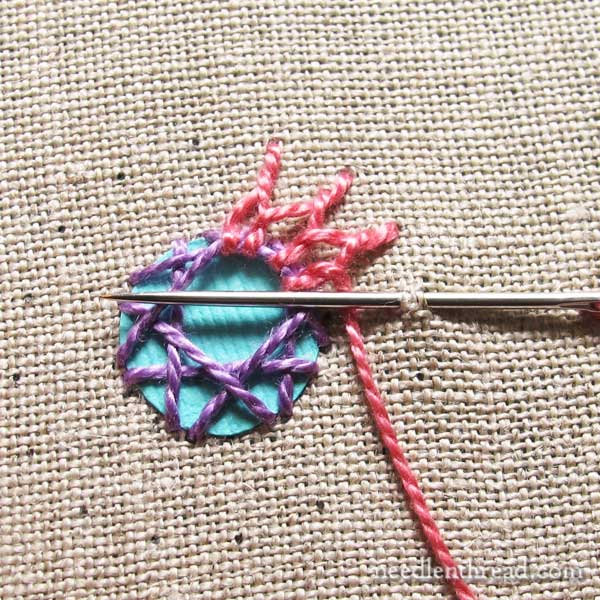
You can also use the “sewing” method on the outside perimeter of the stitch, picking up just a tiny bit of the fabric from the dot to just inside the dot, without taking your needle and thread all the way to the back.
However, if you’re working in a hoop, since you’d be angling the needle back in towards the mirror, it’s much easier to use the stab method on this stitch, taking the needle and thread to the back before emerging inside the dotted perimeter.
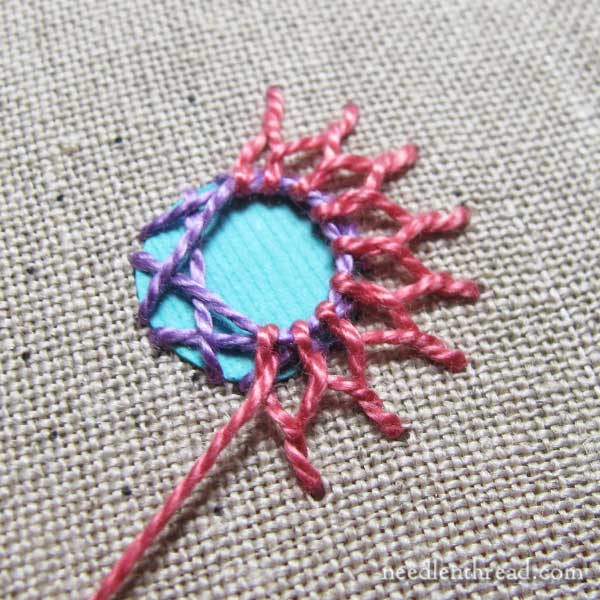
Continue working the cretan stitch around the whole mirror. Here we are, at about the halfway point!
Once you get the rhythm of the stitch down, this technique works up really quickly and easily. You’ll be around the mirror in no time flat!
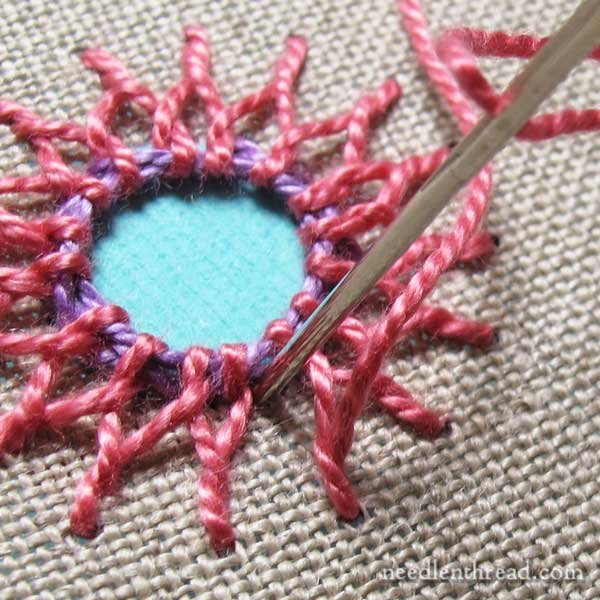
Once you finish your last cretan stitch on the outer dot, to end the circle, just take your needle and thread to the back right at the edge of the mirror, under the very first stitch you made.
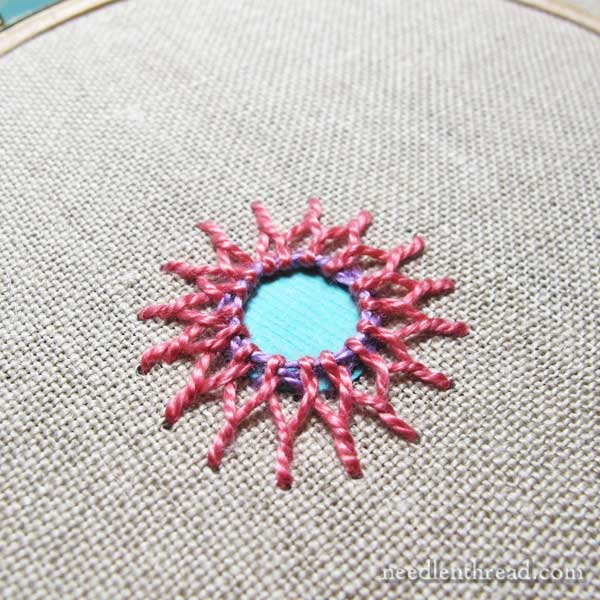
Here’s the completed cretan stitch shisha variation.
Now, how can you embellish it? Well, you’re only limited by your imagination!
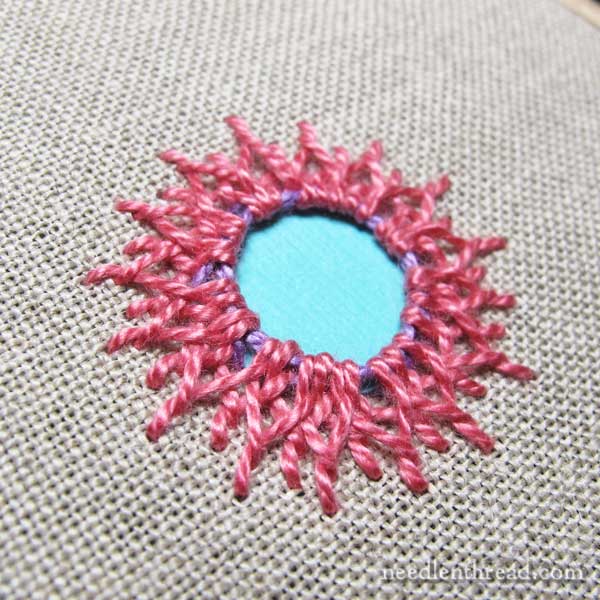
If you want a sketchy sunburst effect (this would look great in an overdyed thread in sunset colors, or in brilliant reds, oranges, and yellows), you can work another layer of cretan stitch over the first layer, off-setting between the first layer’s stitches.
I did that in the photo above, and made the second layer’s stitches a little bit longer than the first.
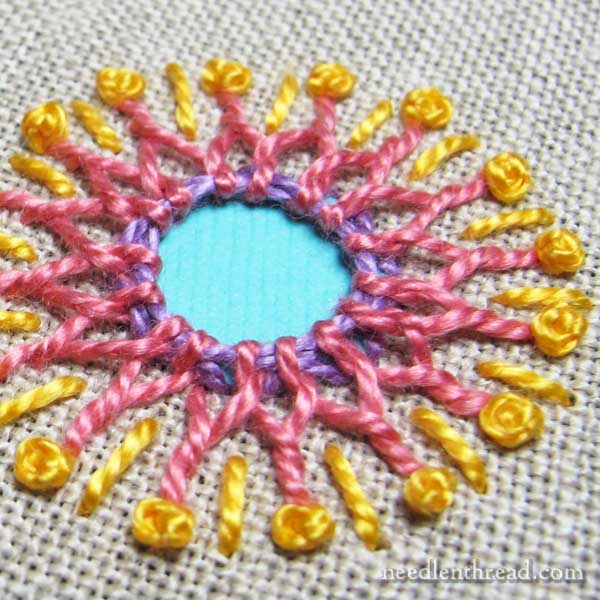
And of course, you can always embellish the shisha with other stitches. In this case, I used French knots at the tip of each cretan stitch and straight stitches between each spoke. Simple, but effective.
So there’s something to try out this weekend while you’re playing around with your needle and thread!
Further Shisha Explorations
To help you explore shisha embroidery a little further, these links might come in handy:
Shisha Mirrors for Embroidery – including ideas for mirror substitutes
Traditional Shisha Stitch Tutorial
Shisha Variation 1 – self-couched spokes and a square foundation
Shisha Variation 2 – interwoven fly stitch, ribbed
Shisha Variation 3 – super simple shisha!
Shisha, No Mirrors – in which I explore shisha and decorative stitches with decorative card stock
You can also find all these tutorials, plus practice patterns, in my e-book, Shisha & Variations.
Do you want more inspiration & information on hand embroidery?
There are all kinds of reasons to sign up for the Needle ‘n Thread daily newsletter! Check them out and sign up today!
If you’re looking for more embroidery stitch tutorials, you’ll find plenty of photo tutorials in the Stitch Fun series index here on Needle ‘n Thread. You might also enjoy browsing over 75 how-to videos for embroidery stitches and my alphabetical stitch dictionary that lists all the stitch tutorials on Needle ‘n Thread (videos and photo tutorials) in one place, in alphabetical order.


Dear Mary
I like the effect of the cretan stitch on the Shisha mirror and the various finishing torches especially the sunburst effect. I’m looking forward to embroidering the Christmas decorations with Shisha mirrors so I can incorporate the cretan stitch on one of my ornaments. The nice thing about the ornaments there are so many possibilities. Thanks for sharing the cretan stitch and showing us how to use it on Shisha mirrors very interesting.
Regards Anita Simmance
I had used the shisha mirrors to decorate a dress I made last summer. I really like the cretan stitch here, it gives me ideas for a beach bag I have that needs some embellishments. I so enjoyed making that dress that I bought several dozen mirrors to use on all kinds of things, but your sunburst idea seems perfect for beach things. Thanks, Mary!!
I know this is off topic, but could you Please tell me of a few books on learning silk ribbon embroidery? I asked you when you reviewed the book on silk ribbon flowers, but you didn’t reply. I’d like to learn the technique (if it’s not too hard) for some historical costuming ventures I’ll be working on.
Thanks, Mrs. Corbet.
Sarah
Well, I sort of jumped the gun a bit on that review – I should have reviewed Ann Cox’s other book, Beginner’s Guide to Silk Ribbon Embroidery, first. But the one I reviewed the other day was just so….pretty! I couldn’t resist! Try that one – it’s good!
Thanks bunches, Mrs. Corbet!
(That book was beautiful!)
On my Pinterest I have tons of pics of various Indian (or Hindustani if you prefer) embroidery and the mirror-work, always looks so heavy to wear! Especially when combined with metal threads. However, its so gorgeous I’m obsessed with looking. I just don’t think I’m brave enough to try yet.
Wow thanks I love it The Cretan is beautiful.
Hi Mary, Quick question; what is “over-dyed” thread/wool/cotton etc. I can’t find a satisfactory definition on the web. It all just looks like normal coloured thread.
Thank you very much,
Cynthia, Vancouver Island, Canada
Over-dyed thread is a little bit like variegated thread – the thread is usually dyed with two or more shades or colors, but it is more subtle in the changeover and more random in the color placement than variegated thread. Many overdyed threads are hand-dyed, so if you’re planning to use it, always test it first, to make sure that the colors don’t run if the piece is meant to be laundered.
I’m going to have to try this variation Mary – thank you!
Thank you for this beautiful tutorial !!!!
Hola, estoy re maravillada con es página, la verdad hermosa.
Gracias