It’s inevitable. Un-stitching, or picking out stitches, happens to all of us!
And while it can be, initially, a disheartening proposition to have to rip out embroidery stitches, it really is not such a bad thing. I always look at a mistake or a change of mind as a learning experience. And I always go into any embroidery project knowing that I’ll probably have to pick at least some stitches out. Once you realize this, mistakes or mind-changes don’t loom like dark mountains – they just become part of the whole process.
One thing that can drastically effect my attitude towards having to pick out stitches is the fabric I’m stitching on. This topic fits into the whole discussion we’ve been having about linen for hand embroidery lately.
Today, in an effort to justify my obsession with good linen, I’d like to show you one significant difference in types of fabric that you might choose for hand embroidery. It becomes very noticeable when you have to pick out stitches!
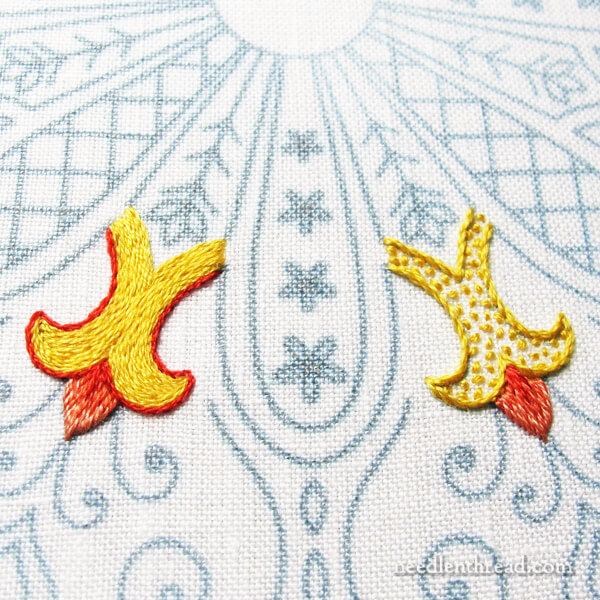
I’ve started stitching up the design that I was using in this article about stitching on yucky linen, only now I’m stitching on nice linen.
I’ve lined the white linen with white cotton muslin. You can read about backing your ground fabric (and why) here, if you’d like to know why the cotton behind the linen.
About This Embroidery Project
This particular design is a new one that I’ll share with you eventually. I have a specific look I want to develop for this particular kaleidoscope. The title might give you a clue – I’m calling it Party in Provence, and it’s meant to fit with some of the fabrics that I have that are made in Provence, France.
I wanted to get across the notion of bright sunshine in this particular background “burst” element. To that end, I wanted a nice deep yellow, and I wanted the element filled, not just outlined.
At the same time, I wasn’t sure I wanted a solid fill, so I thought I’d test some seed stitching next to a solid fill using stem stitch.
It came about that I preferred the solid fill as opposed to the textured fill of the seed stitching. So I had to pick out the seed stitch test. No biggie! I knew I’d have to pick out one or the other!
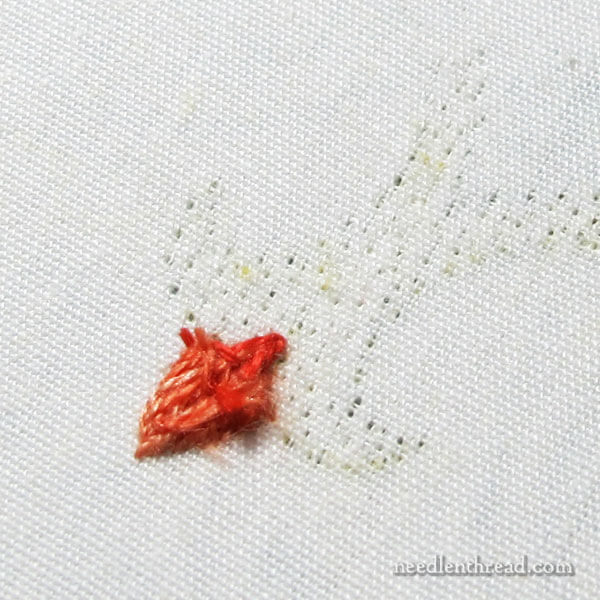
To pick out this type of stitching, I always find it easier to do the “ripping out” part on the back of the fabric. That’s where I cut through the stitches, and then, using tweezers, I pick away the stitching.
The Forgiveness Factor
Since I’ve backed my linen ground fabric with cotton, that’s what you’re seeing in the photo above (the cotton on the back of the linen). This is right after I’ve picked out all the stitches, and I haven’t done anything else to it.
You can see how the stitches make very distinct, rather messy holes in the cotton.
Want to see the linen difference?
When I flipped my frame, this is what my fabric looked like:
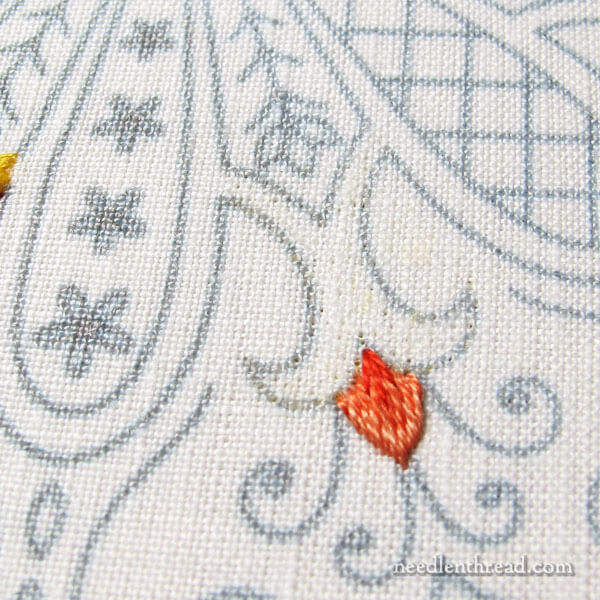
You can certainly tell that there was some stitching there, compared to the rest of the linen around the area. But it’s not as drastically evident on the linen as it is on the cotton.
Good linen is a Much More Forgiving fabric than even the best cotton.
Aside from the fact that I just love linen, this Forgiveness Factor is the main reason I prefer good linen when I’m designing a project. I know I will make mistakes. I know I will change my mind. And good linen accommodates my mistakes and my whims superbly!
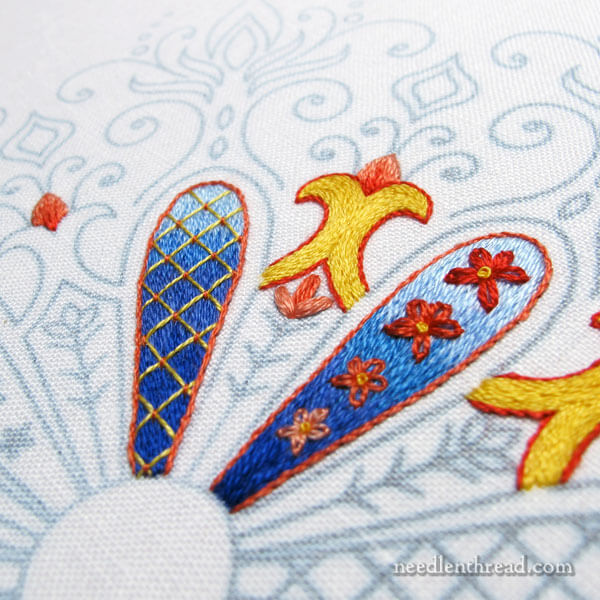
Here’s a little peek at some of the other elements I was playing with.
I’m rather stuck into this piece in an addicted kind of way. I’ll tell you more about it down the road!
Looking for More?
If you want to read more about linen for hand embroidery, here’s a list of articles that touch on embroidery linen.
If you’re looking for more information about embroidered kaleidoscopes, you’ll find my previous articles about them here.
You can find a free kaleidoscope design here, along with information on how I stitched it.
Favorite Kaleidoscopes Pattern Collection
If you’d like to stitch up your own version of Party in Provence, you’ll find the pattern available in my Favorite Kaleidoscopes collection – over 30 kaleidoscope designs for hand embroidery and other crafts.
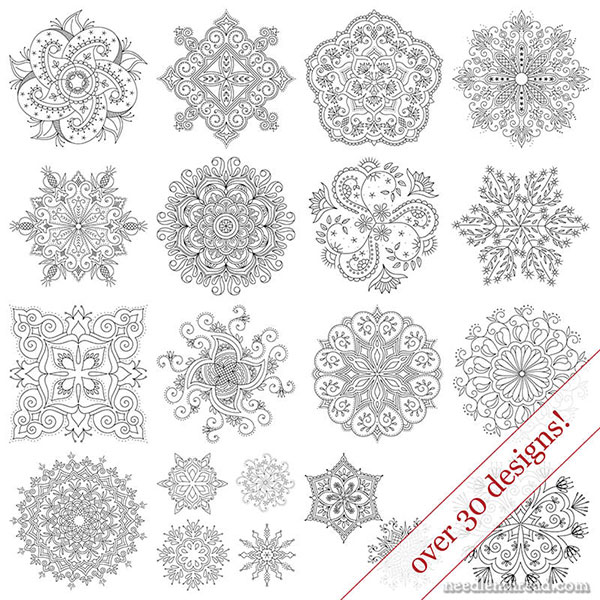
You’ll also find the pattern for Birthday Bash and Tulip Festival in the same collection!
The kaleidoscope designs range from small 4″ designs to large 8″ designs, from simple to complex. You can read about the collection in detail here, or jump straight over to my shop to grab your own copy!


I agree that the solid stitching looks nicer than the seed stitching filler. I LOVE the colors you are using for this kaleidoscope, especially that blue petal with the couched trellis stitching! You are quite amazing. I can’t wait to see more updates on this project. Thanks.
I’m curious, when you test design choices like that, do you always test on the actual piece? I feel like I’d be nervous/lazy and want to test on a spare piece. Then I could just throw it or use it for something else and not have to pick everything out.
Hi, Marissa – when I’m doing something like this that’s meant for publication, I’m working with the actual thread and fabric that I intend to use as the final finished piece. That way, I know exactly how things will work for other people who want to reproduce it the same way. Besides, it keeps me from having to stitch the whole thing – in the same way – twice! 🙂
Dear Mary
There’s nothing quite like good linen especially when you have to take stitches out. I’ve had to do this with previous projects and I remember a couple of projects where I removed stitches in the same place several times and the linen remained in tact because it was a high quality linen. The solid fill is better then the seed stitch and I love the blue design with the trellis fill it’s lovely. Thanks for sharing the fabric differences with us and I look forward to your progress on this new project.
Regards Anita Simmance
It’s looking really good, Mary! I love that dramatic gradient in the blues. Reminds me of Trish Burr’s work. And your stitching is perfect!
Would you please share what linen you are using? Have been using a natural colored linen from JoAnns and after your last article on linens for the tote bag you were working on, I could definitely see that this linen is not good quality for surface embroidery! Thanks.
Hi, Beth – this particular linen is a Sotema linen from Italy. I recommend Alba Maxima Legacy linen – you can find it through Needle in a Haystack online. It’s slightly heavier than this, but perfect for pretty much any kind of surface embroidery. I’ve used it on the majority of projects I’ve written about here, plus I use it when I do stitch tutorials and so forth. It’s just an all around good linen, about a medium weight, with a consistent weave that fills the fabric (no gaping holes) and a minimum amount of slubs or imperfections. It’s good stuff!
Hi again, Mary Thanks for the information on the Alba Maxims linen. I see it comes just in white. Is there a linen you recommend in natural color? So many projects in the Inspirations magazine from Australia use natural color linen, but not sure what they are using in their kits.
Hi Mary,
This project brings to mind a couple questions I’ve had since I started learning (very recently) about hand embroidery, about getting designs onto the fabric in particular. You mention in some of your articles doodling and creating your own designs, and here maybe we see the result of your designing and experimenting efforts. What I wonder is how you create the finished pattern you intend to embroider. Do you find shapes and objects you like here and there and trace them onto separate pieces of paper and then somehow place them all on one sheet and trace again to get the final pattern? And then, I suppose, you use whichever transfer method you like and get it onto the fabric–is that right? I feel quite in the dark about how a person comes up with a design, especially one that is not, as a whole, traced from a preexisting pattern from a book or elsewhere.
Thanks,
Mike
Hi, Mike – For my own designs, I draw my initial ideas free hand on paper, usually in a sketch book. When I’m satisfied with it, to make it print ready, scalable, and so forth, I scan it and work it up in Illustrator. While I’m working it over into a vector design, I might make subtle changes, especially when considering how well certain stitches will work with the design (or not).
When I saw the title of the article, I was expecting to see the difference between good linen and yucky linen, rather than between good linen and cotton. How does the yucky linen do when one needs to pick out stitching? I’m assuming it does poorly, which would be another reason not to buy yucky linen.
LOL. I guess I am working with good linen. I has stitched, unpick and stitched on this linen. After unpicking a second time I washed it, dried it, ironed it and stared over. It looked as good as new. Hurray! Project nearly done just need a border. Just bought double herringbone PDF. Looking forward to trying it.
Perfecto lo que indicas gracias por brindar lo que sabes