


Have you ever started an embroidery project from scratch, with just a line drawing, and found yourself wondering, “What stitches should I use?”
Whether you’re new to embroidery or you’ve been stitching for a while, chances are, you’ve run into the What Stitch Where dilemma.
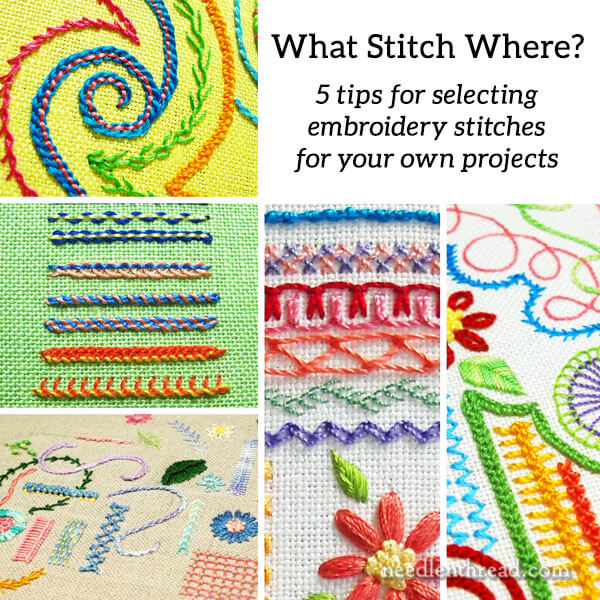
Today, I’m going to share five basic tips with you, to help you gain confidence in selecting your own stitches for hand embroidery projects. Down the road a bit, we’ll revisit the topic in much greater detail – let me I’ll explain why…
A few weeks ago, when I started sneak-peeking my newest kaleidoscope adventure (this one), I got a small flood of emails asking some variation of this question: How do you decide what stitch to use where when you’re designing a project from scratch?
This is a Huge topic, and one that definitely deserves some in-depth exploration!
In an attempt to help people who face the What-Stitch-Where Dilemma, I set about writing an article.
An article just won’t do it on a topic like this – a point I realized when my first attempt hit the length of your average dissertation.
So today, I’m going to share five basic tips to get you started, to help you build confidence in selecting your own embroidery stitches for any project. And then we’ll revisit the topic in depth later on, in a format that allows deeper exploration.
#1: Get to Know Stitches
I don’t mean get to know every stitch. But if you want to select your own stitches for your own projects with any confidence at all, you should be aware of the different types of embroidery stitches that are available to you.
Breaking down embroidery stitches into definite categories can get complicated, because different stitches can be used in different categories. Basically, for starting out, you need to know that there are line stitches, filling stitches, and isolated stitches.
A good stitch dictionary would be very helpful at this point! Here’s a list of stitch dictionaries I’ve reviewed – all of them are terrific for different reasons. If you’re moderately interested in really pursuing embroidery, you should have at least one good stitch dictionary.
A-Z Series, including Embroidery Stitches & Embroidery Stitches 2
Stitch Sampler – which is available under a new title. You can read about the the various editions of this book here, including the newest one, but it’s the same book!
Left-Handed Embroiderer’s Companion or Right-Handed Embroiderer’s Companion
#2: Practice Stitches
Whether you practice stitches by embroidering various patterns (like the embroidery patterns you’ll find here on Needle ‘n Thread) for the fun of it, or by working random stitch samplers, you need to get to know how the basic stitches work and what look they produce.
If I were to narrow down ten embroidery stitches that are worth knowing, that will help you confidently choose stitches for projects, these are the ten stitches I recommend.
Working random samplers is a fun way to “document” your discovery and progress of different embroidery stitches. I’ve written quite a few articles on sampling, along with some tutorial series and e-books, all of which can help you practice stitches:
Embroidery Stitches & Samplers
5 Reasons to Make and Keep a Doodle Cloth
Hand Embroidered Lettering and Text Sampler
The Lattice Jumble Sampler (e-book)
Stitch Sampler Alphabet (ebook)
#3: Start Simple
Perhaps you’ve stitched a lot of kits, or you’ve followed lots of step-by-step embroidery projects designed by someone else, but now you want to choose your own stitches for any design – whether it’s fun and funky iron-on transfers or some complicated drawing you fell in love with while meandering through Pinterest.
Whatever the case, start simple.
The drawing itself doesn’t have to be simple. It could be complex! But start with simpler stitches, or a simple concept or interpretation of the design.
You’ll be more likely to succeed without feeling frustrated or chucking it all in! And that success will help you move on to more complex interpretations.
Start Simple!
#4: Use Good Materials
No, you don’t have to invest a fortune!
But don’t use “craft” floss. Don’t use flimsy fabric.
Invest in decent materials – the best that you can reasonably afford – because stitching on poor quality materials using poor quality floss leads to:
1. frustration while you’re stitching – which can cause you to chuck it all in!
and
2. a poorer quality finish (no matter how good the stitching is), which can be disheartening.
You want your stitching to be as frustration-free as possible, with the nicest finish as possible. This helps build confidence!
#5: Don’t Be Afraid…
There’s nothing to be afraid of when it comes to stitching. Specifically, though, there are three things you shouldn’t fear:
1. Don’t be afraid to try anything, stitch-wise.
No matter your level, no matter how complicated it may look. You’re just trying it! Be adventurous! There’s nothing wrong with trying something!
2. Don’t be afraid of imperfection.
You might not get something right the first time. More than half the fun of stitching is the journey of discovery and improvement! And it’s ok to have imperfections in your work. They tell a story. They document your improvement.
3. And don’t be afraid to fail entirely.
The end result of whatever we’re doing might be nothing like we envision. We might even dislike it immensely! It might turn out looking like doo-doo! (It’s happened to all of us!) And it’s ok. That’s part of learning – as long as we’re willing and brave enough to get up and try again.
If we never try again after failing…well, that’s where we really fail!
Enjoy the tips! More coming up soon!
Like What You See?
If you like what you see on Needle ’n Thread, if you want to help keep the website thriving and free of annoying network advertising, why not become a patron on Patreon? Check out my Patreon page here, where I’ll occasionally add special needlework bonuses for patrons.
If you shop on Amazon, you can support Needle ’n Thread without any extra expense to you by visiting my Amazon Recommendations page here, where you’ll find books and sundries for the needleworker available on Amazon.
Dear Mary
Have been rather busy lately so have just caught up with your posts. A very useful post as I’m always in a dilemma of what stitches to use when I’ve created a design of my own. So the five steps above are really helpful when thinking about stitches to use in a project. I must start embroidering some stitch samplers as I would like to go back to basics and re-introduce myself to some stitches I haven’t used for a long time. Thanks for sharing the 5 tips for selecting embroidery stitches with us, very useful for future reference.
Regards Anita Simmance
Fabulous topic, Mary. Will love watching this develop and learning. Thanks!
Following suggestions here, I started a little “sketch cloth” to try things out on for my current big project. Some of the things I tried didn’t really work (thanks to an unfortunate choice of test thread, my attempt at a raised ribbed spider web looked rather like a nipple! :-O ), but at least they failed in a Safe Space rather than on my nice “proper” project. 🙂
I pretty much always design my own embroideries and use some of them for teaching. I appreciate your breakdown for those who want to get started on their own. I especially like point #5 Don’t Be Afraid! I always remind my students that this is supposed to be fun!!!!
Mary, thank you for today’s column. I am very interested in the pattern for Adventures in Provence. Is this a kit? or your own design? I would love to buy this pattern if, when, it’s available. Thanks for answering, Charlotte Wells
Hi, Charlotte! This is my own design, and it’ll be available here on the website in the future. Still need to sort out the approach I want to take with it!
This is a great topic to explore and I look forward to learning from it. Your 5 tips for selecting stitches is quite useful. Thanks for such wonderful topics on Needle ‘n Thread.
Knowing how the stitches are used in traditional.heirloom hand sewing also helps to know how to use them for embroidery. I often practice line stitches while hand hemming and some of the woven fill stitches while mending holes in my work shirts. The work has practical use and the time doesn’t seem so boring if I know it helps improve my embroidery or quilting. It is also fun to see how some of the traditional tailoring. padding stitches can be used as decorative stitches on th outside instead of stabilizing stitches on the inside of men’s suits or feather stitches to butt two pieces of leather or batting together–look at a baseball for an example. And never forget that buttonhole stitches were actually used to make button holes. For some fun with covered buttons, select a small motiff stitch or use a grouping of French knots and small stumpwork stitches to create your own button covers while you practice new stitches. Then sew the buttons on a shirt or purse for a fun wearable as well as a embroidery sampler. Many of our traditional embroidery stitches have practical uses in hand sewing. Edging stitches are used to keep fabrics from unraveling and a great place to practice them is on the edges of our seam allowances or cut edges of linen, even if they will never be shown in public. Mended and altered items–hand-me-downs–can be as pretty as brand new!
Can’t make the blackwork fish link work?
Oh, dear. Neither could I!! I’ve just fixed the Blackwork Fish link. Thank you so much for bringing it to my attention. Here’s the link: https://needlenthread.wpengine.com/2010/04/follow-blackwork-fish.html
Hi Mary!
Finally able to catch back up to my favorite blog-writer and I’m glad things are going well for you health-wise, family-wise and professional-wise!
My comment today was that I take the ‘fun project’ approach to trying new stitches out. I’m going to work on some stumpwork projects for SCA-related purposes, but I wanted to test methods and stitches out with something less ‘high-stakes’. So my current project on felt is being used to practice picots, raised work, and attaching slips. I also used it to ‘practice’ cutting out the top layer of fabric so the bottom layer can show through. I’m fascinated with hardanger and the needle-lace aspects of that style of needlework, but the thought of *cutting my fabric deliberately* was pretty disconcerting. So, I decided to ‘practice’ deliberate fabric cutting to get over my own butterflies.
I also want to say that you’ve been a real inspiration – I’m not sure I would have been able to venture out of my cross-stitch zone on my own without this blog to show me the different possibilities out there, and that they’re really not so intimidating after all. 🙂
-Monika in Mobile
I discovered this weekend that I haven’t explored your website nearly enough! I did download a stylised “J” to stitch for my mom, but it would have been good to further check out your site before I made the floss choice (I used DMC 5 ‘cos I haven’t yet and wanted to try it, but it was too thick for the project). The whole project didn’t go as I had hoped it would, but I made the choice to go on (another of your posts!) because it turned into a learning piece where I learned more about the fabric I was stitching on, the floss I was using and learned my choice of stitch will have to be changed. It’s done, but not great and I will try to do an improved version again in a few weeks.
Thank you for this post – it is SO encouraging and helpful. Thank you also for a great website with an absolute wealth of information. My next three projects lined up are samplers that will help me explore the same set of stitches to help me get in some more stitching practice and just enjoy doing a project! The fourth will have to be your long and short stitch sampler!
“Don’t be afraid” is the best advice. If find myself caught in this mindset (I call it “the buts”: but the time, but the money, but the materials, but if I don’t *love* it will be wasted, or I’ll never finish, etc) I just give myself permission to have fun, and learn, and just see what happens…I’m usually quite surprised with myself and how things turn out!
I absolutely love that you’re doing this! This is why I found your site (before I realized life was just better if I read it all the time)- looking for different line stitches to make little doodles on hankies, and refreshers on how to make them, and bookmaking lists of filling stitches to go back and reference and such. But it’s definitely been a journey and I’m so excited to learn from your experience!
Is there a different way to make a French knot? Thanks JoAnn Bartholomew
Hi, Jo-Ann – if you have trouble with the French knot, my video might help. You can find it here: https://needlenthread.wpengine.com/2006/11/french-knot-video-tutorial.html You can wrap the thread in either way around the needle -whichever way is easier for you – but if the French knot just doesn’t do it for you, you might find the colonial knot helpful. It’s more of a figure 8 construction and some folks find it easier than the French knot. Here’s a video for the colonial knot: https://needlenthread.wpengine.com/2007/03/embroidery-stitch-video-tutorial-2.html
I love this article! It’s so helpful for me because I’m just starting to try embroidery!
Would you consider DMC to be “craft thread” quality? A local cross stitch store has more expensive thread, but $.50/skein for DMC is about right for me. What brands do you work with most and recommend for value? Thank you!
Hi, Mary – No, craft thread is more of a no-name brand that comes in big bundles for bargain prices. They usually don’t have a specific color numbering scheme. They look like regular floss – same type skeins – but the color line is limited, and you can’t really trust them for colorfastness and thread integrity for good embroidery projects. The regular DMC 6-stranded floss is tried-and-true, decent floss. They do have a line of craft thread called Prism, I think, but it’s not something I’d use for embroidery. It’s more for kids’ crafts, friendship bracelets, and the like.
Thank you, Mrs. Corbet! This reply is a relief for me for a question I’ve had for a while.