


In this previous installment of our series on how to embroider wheat five different ways, we stitched the two stalks on the right side of the bundle using bullion knots in different ways.
Today, in the last of the four tutorials in this collection, we’re going to work a relatively quick satin stitch for the kernels on the middle stalk in the bunch of wheat, and then we’ll stitch the leaves.
I’ll be referring you to some tutorials here on Needle ‘n Thread to help you out, if you’re a beginner, so please feel free to follow the links to various tutorials that go into detail on the stitching techniques. It’s a good way to pick up little embroidery tips!
Satin stitch can be a time-consuming stitch, especially when working small elements that can be fiddly.
The nice thing about wheat is that you usually get the impression of a lot texture when you look at it, and the previous stalks that we’ve already stitched are very textured. So on this center stalk, we’re not going to sweat a perfect, smooth satin stitch. Instead, we’re keeping with a sketchy look. We’re still mixing two threads in the needle for color variation.
I’m usually a stickler for one-thread-satin-stitch, because you’ll normally achieve a much smoother finish on whatever you’re satin stitching if you only use one thread in the needle. But on this, I went for two for the top satin stitching, in order to be able to mix colors and also to speed the process along.
A hint: if you’re going to satin stitch with two threads, use a laying tool to help keep your threads from twisting, or “railroad” each stitch, by entering the fabric between the two threads, to keep them from twisting. You can learn how to use a laying tool in this article.
You can see what I mean by railroading threads in this article, if you scroll down to #3 under Stitching Tips.
For tips on satin stitch, you’ll find a boatload of articles on Needle ‘n Thread. This article, Ten Tips for Sensational Satin Stitch, will be helpful if you need some refreshers!
Finally, if you aren’t familiar with long and short stitch, you’ll find a series of tutorials here on Long & Short Stitch. You’ll find the videos for Long & Short Stitch here. And specifically, this tutorial on long and short stitch ribbon will be the most helpful for stitching the leaves in the wheat. More below!
Ok! With that background information, let’s get on with it!
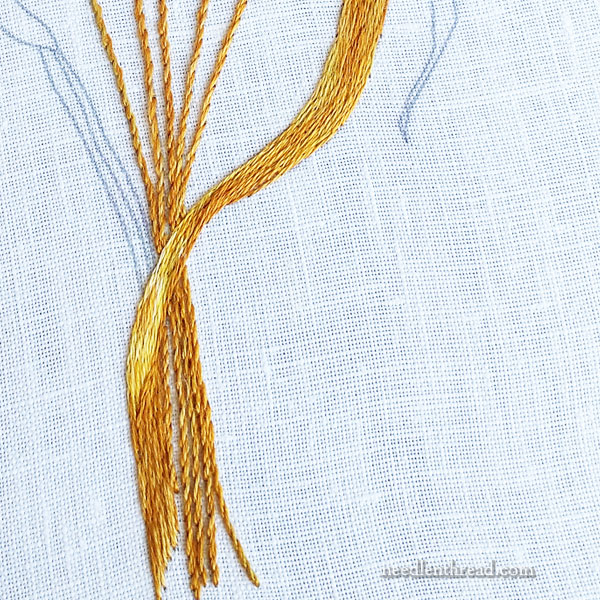
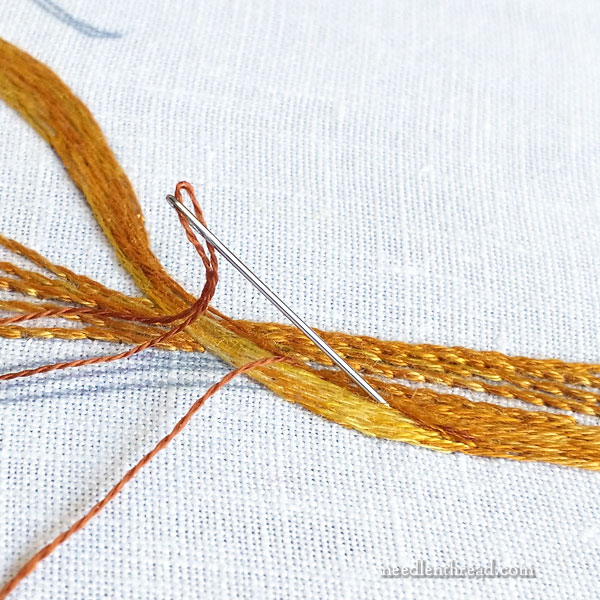
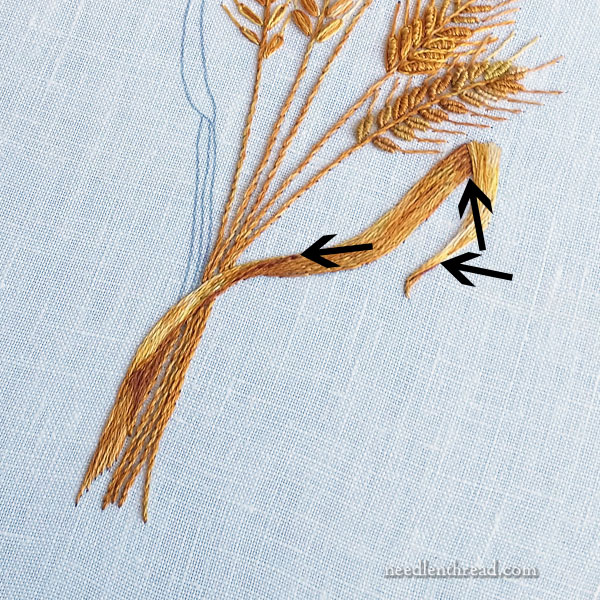
The stem on this stalk is stem stitched, just like the previous four stems.
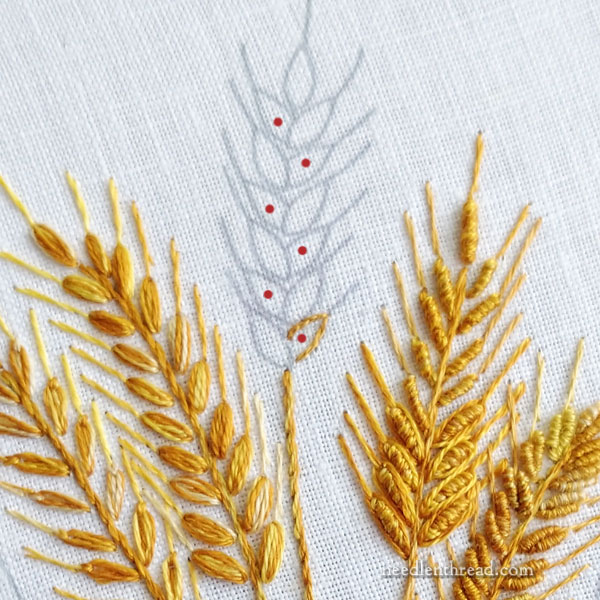
For the wheat berries, I’m using two colors of DMC Variations (you’ll find the color list in part I of these tutorials) – DMC 4073 is the lighter gold and 4129 is the darker.
You can begin at the top or the bottom of the stalk, on any of the “background” kernels – that is, the ones that are overlapped by another kernel. They’re marked with a red dot in the photo above.
You’ll want one strand of floss in the needle at first, to pad the satin stitches to give them some lift and to help keep the outline of the shape relatively smooth.
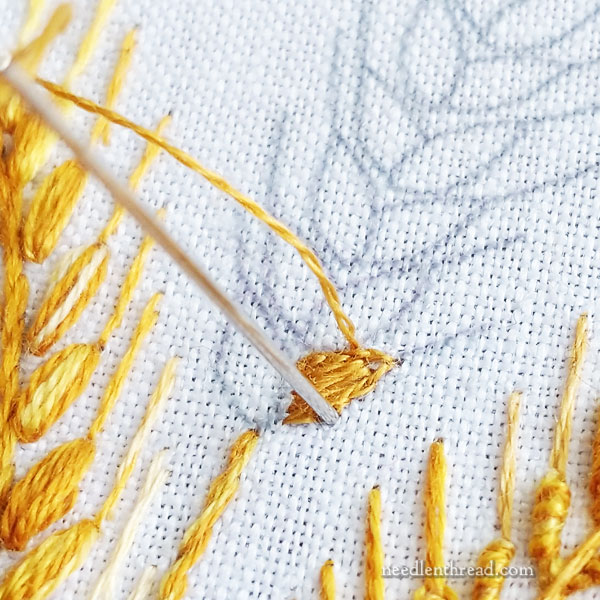
The outline of each kernel is worked in split stitch with one strand of floss in the needle. (Tutorial for split stitch here.)
Why split stitch? I answer that question in this article.
To split the stitches, come up from under them and split them as you bring your needle to the front of the fabric. If you go down into the stitches to split them, it’s called split backstitch, and there is a difference between the two stitches. You can read about that here.
All that said about the split stitch, if you have a hard time with split stitch, especially with a fine single strand of floss, then just go ahead and use either split backstitch or backstitch. It won’t make much of a different in this piece!
I used the darker variations on the background kernels (the ones with the red dots). So work the split stitch with the same color, as well as the subsequent padding stitches. You can do all the split stitching and all the padding on all the background kernels first, before moving on to satin stitch. I think it’s a good idea to do so, because as you work the satin stitching, you’ll develop a rhythm and feel for it, without being interrupted to pad the next kernel.

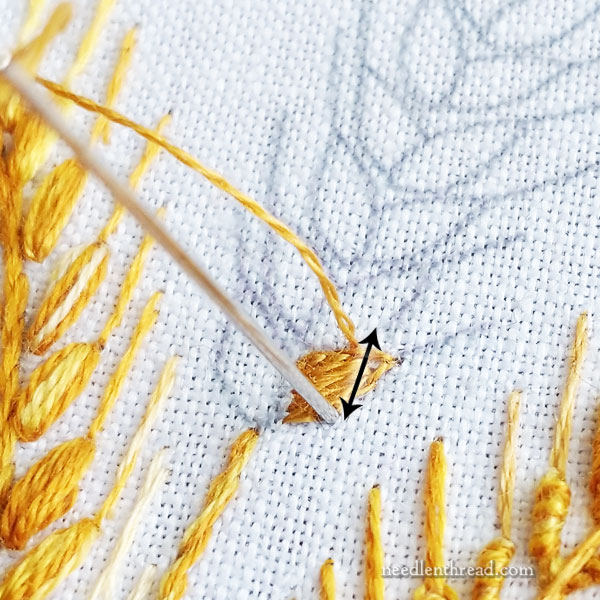
Once you’ve split stitched the kernels, switch to two strands of floss in the needle and work long stitches inside the split stitch line, from base to tip of the kernel, as indicated in the photo above.
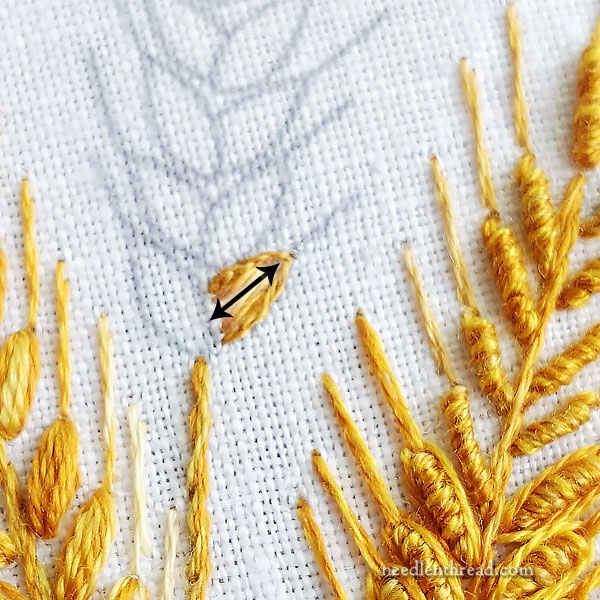
These do not have to be super tidy stitches – you just want to fill that blank area in the kernel with thread.
The arrow helps indicate the direction for this filling. It’s important to stitch in this direction, because the layer of padding stitches needs to be perpendicular, or close to perpendicular, to the top layer of satin stitch.
Now, if you want to be very meticulous about your satin stitched kernels, you can switch back to one strand of floss, and work all the satin stitching in one strand. You won’t have the same color variation on each kernel, because the kernels are so small that you’ll likely finish a kernel before your thread gradually changes to another shade.
This kernel began as one strand of floss, but Anna and I didn’t like the fact that there was no color change. After finishing the base two kernels, we switched to two strands of Variations in the needle at once, and we reversed the direction of one of the strands, so that the colors would be offset. That way, there’s more of a sketchy color combination across each individual kernel.
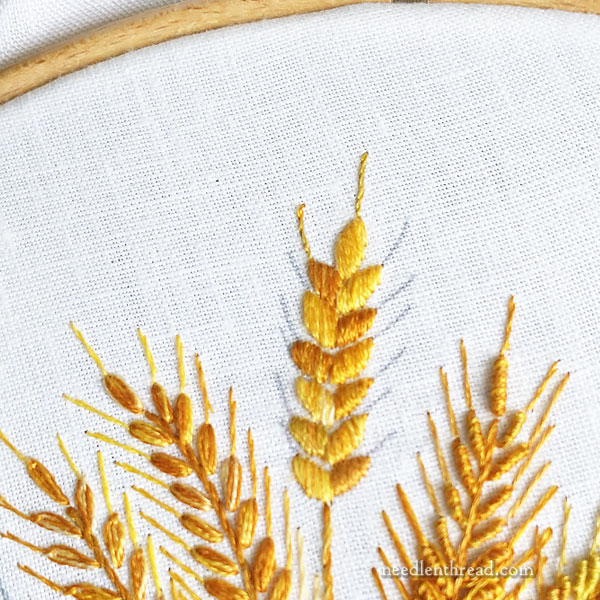
Notice that the satin stitch in the photo above is running vertical on the design and across the berry. There’s a slight slant to the stitch on the berry itself, but on the design as a whole, the stitch is vertical. We’re going to keep that direction the same through the whole head of wheat.
If you switch the direction of your satin stitch on each wheat berry, the outcome will look bizarre. So keep the same direction for the top satin stitching on all the berries.
For the overlapping berries, switch to the lighter Variations (4073), so that you end up with the darker behind and the lighter above.
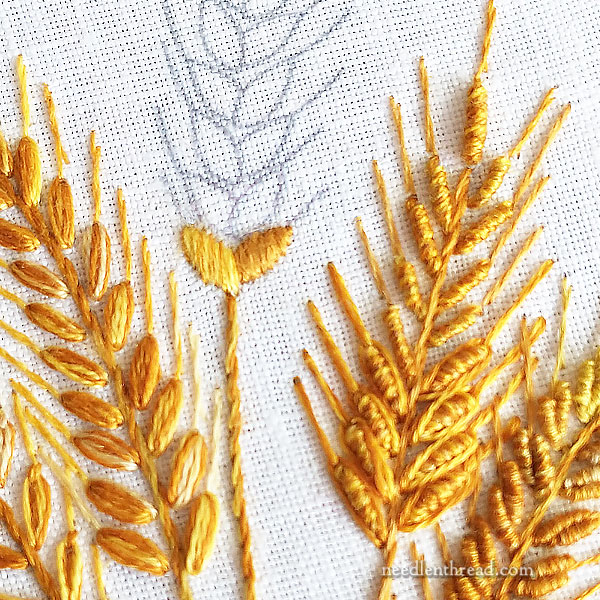
Now, from this point, go forth and stitch all the kernels…
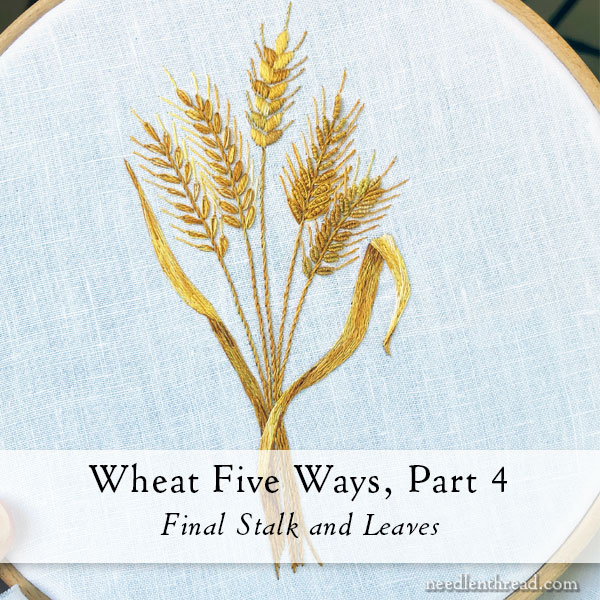
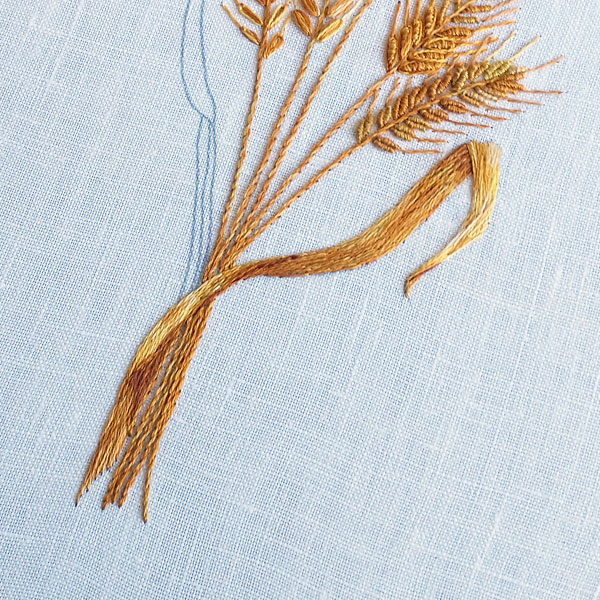
And your wheat will end up looking like this.
The beard on these kernels is worked in stem stitch, using one strand of the lighter Variations (4073).
Now that the wheat’s finished, let’s move on and finish the whole design by working the leaves.
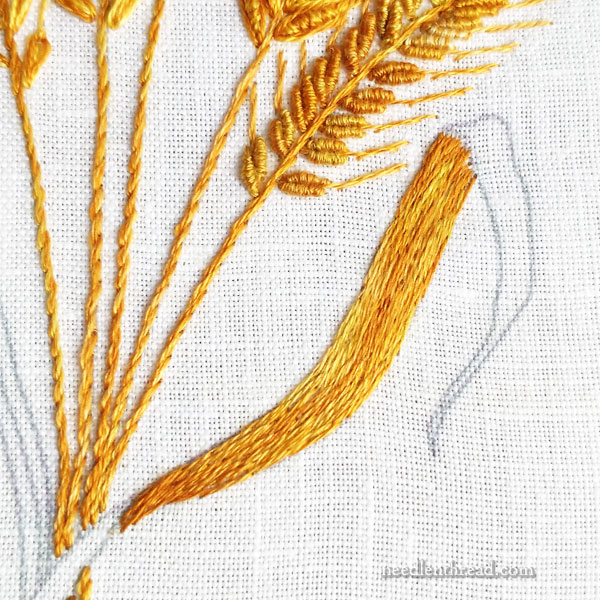
The leaves are worked in long and short stitch, using one strand in the needle.
For the leaves, we used a combination of colors, but mostly the Variations.
For the underside leaves, we used DMC 781 (solid) and Variations 4129 (the darker gold combo). Later, we touched in some dark brown in 433.
On the ends of the section in the photo above, 781 provides the “shadow” and 4129 provides all the filling in the rest of the leaf. There’s not necessary order here to get any particular color anywhere. Just work from the top right (underside edge) of the section down the tip on the lower left, starting with a few long and short stitches across there in 781, then switch to 4129 and fill the rest of that section, until you get towards the tip on the lower left, and switch back to 781.
If you’re not familiar with long and short stitch, two things:
1. Don’t be intimidated by it. In this case, it really is just a matter of working long and longer split stitches in rows to fill up that section of the leaf. It’s ok to be sketchy! The stitch is very forgiving.
2. Take a look at the tutorials for long & short stitch listed at the beginning of this article. The ribbon tutorial will be the most relevant to this shape – just don’t start in the middle, though! Start at the edge that’s under the turnover at the top of the leaf.
Work all the darker background areas of the leaf first.
Then switch to one strand of 4073 in the needle and work all the parts of the leaf that are on top of the darker areas. This would be that middle section that you see in the photo above (embroidered in the lighter color), as well as the turned over top of the leaf.
To create a very distinct shadow and break between the turned parts of the leaves, once the leaf was filled, I went back with one strand of the dark brown (433), and I worked in long, sketchy stitches here and there, wherever there was a distinct turn-over in the leaf.
To work a new stitch into an area that is already long-and-short stitched, always take your needle and thread to the back of the fabric at a low angle into the previous embroidery stitches. This will keep the thread from making a distinct ridge in the stitches, and will help the new stitch blend better.
The arrows in the photo above indicate some subtle dark brown stitches to help define the shadows.
Above, you can see the effect of the dark brown on the leaf. It defines the turn-overs.
The leaf on the left is worked exactly the same way, starting with the background section in the darker shades and then working the lighter turn-over and touching in with some dark brown.
The streaky, sketchy color on the leaves is completely due to using Variations. If you don’t have Variations, you’ll want to incorporate several shades of gold and browns to get the same effect if you want that effect.
Overdyed threads are great for this type of filling on this type of design. They don’t work for every long-and-short-stitch-filled element in embroidery, but they work great for grassy leaves like these.
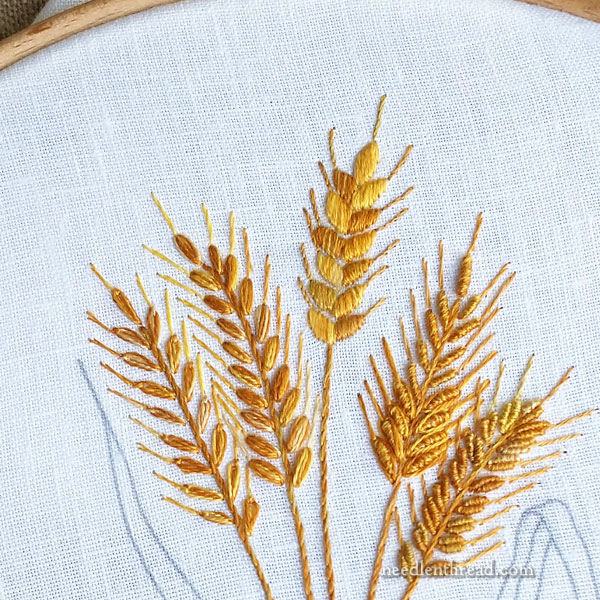
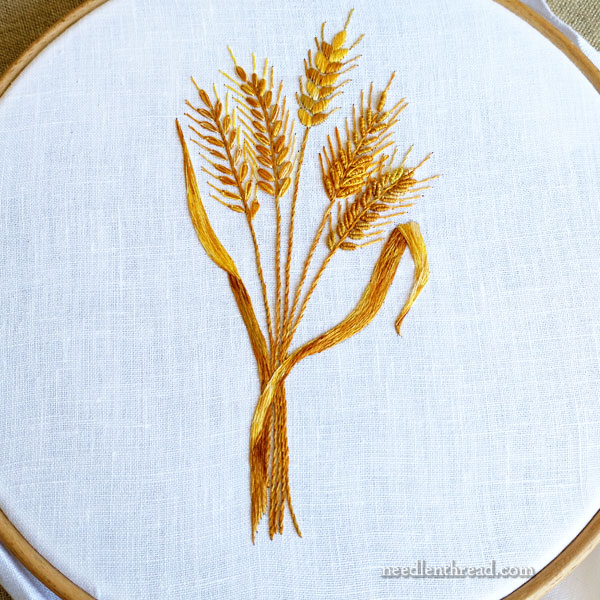
So that’s the finished wheat! Yay! You did it!
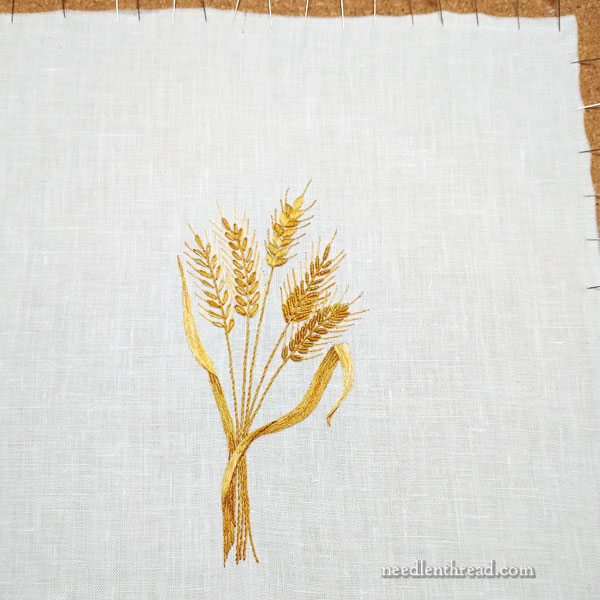
If this is to be framed, the final step before mounting on board should be to damp stretch and block the piece. If you don’t know how to do this, you’ll find two articles about damp stretching and blocking:
The basics on how to damp stretch and block a piece of embroidery
Some revisions on my tools for damp stretching and blocking embroidery
Don’t skip this step! It makes all the difference in the finished look!
You can learn how to mount embroidery on board for framing (or displaying as a tile) in these articles, where I re-frame a botched frame job:
Part 1 of Mounting Embroidery for Framing
Part 2 of Mounting Embroidery for Framing
Previous Articles
If you are looking for the previous articles in this tutorial series on how to embroider wheat five ways, here they are, chronologically listed:
The Next Series
The next series of tutorials will focus on strawberries! First, we sketched a lot of strawberries. Then, we arranged a few different designs. Then we took a more complex strawberry design and simplified it.
And then – the fun part! – we stitched it, focusing on five different ways to embroider strawberries.
Keep an eye out for the new series in a couple weeks!
I’ll have the PDF for this final part of the Wheat Five Ways series available for patrons on my Patreon page later today. If you are part of the membership on Patreon, look for it there. (I’ll also have a sneak peek of the strawberries series!)
The wheat is *almost* making me long for fall, but I need spring/summer after the cold this past 2 weeks! I hope you are staying warm, and no power issues there.
Thanks for the links to preparing embroidery for framing, I just finished 2 pieces and am ready to do them up. I hope there are suitable frames in the frame stash!
Dear Mary
I really love the way you have used the satin stitch on the last kernel it’s lovely, but I like them all and it is difficult to choose a favourite. The long and short stitch used on the leaf with the different coloured threat is also lovely. In fact the whole wheat design is lovely and stands out in it’s glorious sun colours. Thank you for sharing with us the tutorial on the wheat I thoroughly enjoyed watching the technique you used on the design and showing us how you did it.
Regards Anita Simmance
Love your wheat – and thanks for all the helpful hints and tips
Wow beautiful instruction. Love this site.