


Tomorrow, I’m teaching someone to embroider.
Now, you might think I’m a little off my nut. You might think that I teach people to embroider all the time. But in fact, I don’t. I used to, when I had space. But I don’t have space, and my dream of a dedicated studio where I can teach locally is yet a distance away.
But I have a friend who wants to learn to embroider. She is desperate for a hobby – something to provide her with a creative outlet at the end of a long day’s work.
I said, “You need to learn to embroider.”
She said, “Can you teach me?”
And I said, “Sure!”
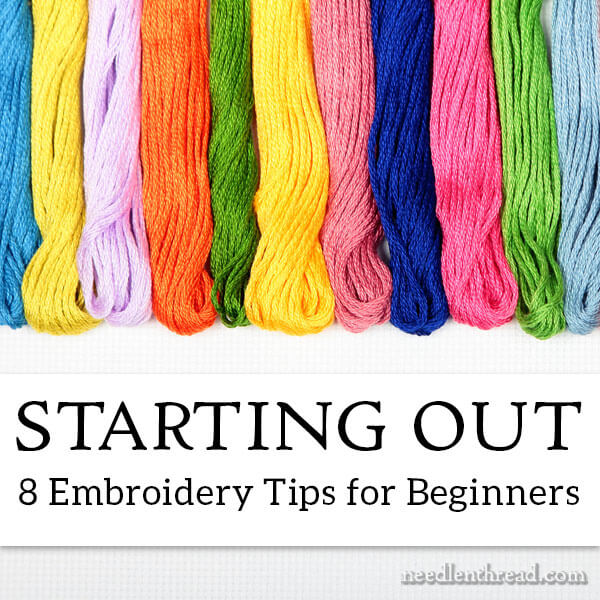
In putting together notes on what to cover, I came up with a list of a list of 8 worthwhile topics to discuss with a beginner.
I thought I would share those with you today and provide you with links to further information on the topics, just in case you’re just starting out with hand embroidery, or you know someone who is and you want to lend a hand.
Preliminaries
I’m always one for launching straight into a project, and, with a beginner, I like that project to be something usable. So we’re starting tomorrow with a nice simple design on a hand towel. Nothing elaborate, nothing difficult. Just something to learn several stitches on and to get comfortable with stitching in general.
One of the preliminaries for any beginner is what design to use, but this question of design is so particular, so very personal, that I can’t tell you, “Start with this.” The “this” that I choose might turn you off embroidery entirely.
Before you start to embroider, you have to have an idea of what you want to embroider. Once you’ve answered that, you can move on to other topics that you should know a little bit about.
1. How to Transfer a Design
If you’re not embroidering a kit that’s already set up for you, you’ll definitely need to know how to transfer an embroidery design.
This article covers all kinds of ways to transfer an embroidery design. Take a look at the comments, too! There are plenty of ideas in there from the Needle ‘n Thread community.
2. How to Prepare Floss
With a beginner, I always start with DMC stranded cotton. It’s just a good place to start!
First, you should know what a pull skein is and how to conquer it.
Second, you should know how to strip or separate your floss.
3. Hoops and Frames
I always start beginners with their work in a good hoop. While some teachers really promote plastic hoops with the “lip” on the inside ring (for example, Susan Bates hoops), I don’t normally go that route.
If you want a good, taut fabric surface, with tension maintained through the stitching session, use a good quality wooden hoop with solid brass hardware and with the inner ring bound.
For further reading, here are some articles on hoops and frames:
Binding the Inner Ring of an Embroidery Hoop
How to Set Up an Embroidery Hoop
4. All About Needles
You can’t really embroider without a needle. It is The Essential Tool of the Embroiderer.
This article discusses the needles you need for hand embroidery and what their different functions are.
This article is my case for using chenille needles in lots of embroidery circumstances.
This article provides all kinds of links to other articles about embroidery needles!
5. All About Embroidery Scissors
While not quite as essential as the needle, a good pair of scissors is the embroiderer’s best friend.
I’ve discussed and reviewed lots of embroidery scissors here on Needle ‘n Thread.
Sharp & Small: Scissors for Hand Embroidery is the article that sums up what I like in a good pair of embroidery scissors.
If you’d like to peruse embroidery scissor reviews, you’ll find them here under the tag “needlework tools” – along with reviews of all kinds of embroidery equipment and tools.
6. All About Fabric
Linen is my go-to fabric for most of my embroidery, although I do dabble with other natural fibers as well, such as wool, cotton, and silk.
I don’t mind natural fiber blends, either. But I don’t play around too much with synthetics.
This article, 5 Things You Need to Know About Embroidery Fabric, will provide further reading on the subject.
7. The Embroidery Environment
Everyone’s stitching environment is different. Some might have a whole dedicated room for stitching. Others might have a favorite chair and not much more space than that.
But one thing that every stitching environment needs to ensure success with embroidery is decent lighting. Good lighting not only improves your stitching, but it preserves your eyes. And you can’t really stitch without eyes!
You’ll find lots of articles that include reviews of needlework lights, magnifiers, tools, and other equipment under the tag “Needlework Tools” here on Needle ‘n Thread. Feel free to explore them for ideas and options on lighting!
8. Ten Essential Embroidery Stitches
Finally, there’s the whole question of stitches. What stitches do you really need to learn, to get started with hand embroidery?
Well, there’s no hard and fast rule on that question, but I think these top ten hand embroidery stitches provide an excellent foundation for a successful life as an embroidery addict, even if you never learn any other stitches!
The End
And that, my friends, is enough to provide a good foundation for the beginner. The information above serves as a good springboard, too, for further explorations. But this is certainly enough – and maybe even a little overkill – for getting a person started in embroidery.
But if you have anything you think should be added to the list (or, in fact, anything that should be subtracted from it…) feel free to leave a comment below!
Like What You See?
If you like what you see on Needle ’n Thread, if you want to help keep the website thriving and free of annoying network advertising, why not become a patron on Patreon? Check out my Patreon page here, where I’ll occasionally add special needlework bonuses for patrons.
If you shop on Amazon, you can support Needle ’n Thread without any extra expense to you by visiting my Amazon Recommendations page here, where you’ll find books and sundries for the needleworker available on Amazon.
9. A really good teacher. Which is where your friend has hit the jackpot.
Thank you
I just taught my friends daughter the beginning of cross stitch this summer.
I’ve been looking for ‘easy’ and ‘small’ patterns for awhile that could hold her interest and finally found the copy of patterns I learned off of 20+ years ago. They’re all plain X’s with a smidge of back stitch thrown in. (Most other small patterns I’ve found that would interest her use fractionals or a lot of back stitch.)
The first piece finished actually looks quite good for a beginner (and left handed at that). She had a few X’s that went too far to the left on the return, but overall really good. Her difficulties seem to be either having the tail too long in the eye, and getting the floss tangled when pulling through. (And threading the needle, but that’s an issue for everyone heh.)
My concern with her stitching is the environment. There’s next to no natural light in that house, and a 1 year old around so her stitchy time tends to be coordinated with baby’s nap time (assuming baby cooperates lol).
Something that might be part of your environment section…how to store the project when you’re not working on it, short and or long term breaks.
Excellent advice. Howeve, I’d like to add what I feel is very important for a first project of any type: choose a small and simple project. I feel that a beginner needs that so the stitcher doesn’t feel overwhelmed and can easily get the satisfaction of finishing the project. My 2 cents. 🙂
Have fun! I always wanted to teach quilting or crochet, so far – no takers….
I am so happy to see your beginners tips on embroidery, my Mom and Aunt taught me much as a young girl, I am now 76 and will be 77 in Nov. and have so forgotten so many stitches and procedures, etc., I want to start with embroidery once again, I will be fully retired from a part-time job at the end of Oct. so your articles and information is so much appreciated, as I am looking forward to now do some embroidery projects. Thank you so very much…….
Ann Collins
Mary, though I’ve been embroidering quite a long time, I still feel like a beginner. I know quite a lot of stitches. My long and short stitch is pretty bad.
What I have problem with is deciding what stitch to use when I see a new pattern.
How do I overcome this? How do you decide which stitches to use?
Could you maybe do an article on this topic?
I’ve been working on some designs from regular line drawings. It’s the first time, in 50 years anyway, that I’ve tried to embroider much without stitch or color indications. I know other stitches but I can’t seem to get past stem stitch and back stitch very often on these.
I’m so glad you are looking forward to this, we need more embroidery teachers. I am currently attending a SAGA Convention and am taking all embroidery classes. I’ve learned about two different new marking methods: Frixion Pens and Marvy Le Pen markers. One of my teachers uses the Frixion pens even on whitework, as it is covered and any marks that may remain will (she says) fade over time. Another uses Le Pen in teal, which is washable. She used it with great success on an RSN certificate project. It also may be hard to find.
Thank you so much for providing all these links, they are very helpful. We have bandied your name and website about in almost every class this week. Always with positive results, and many people hurriedly scribbling down your website URL.
i just wanted to say that reading you is always a great pleasure!
Hand work, embroidery and silk ribbon
emb are my favorites. I cannot stress
enough how important natural light is
for ease and quality of stitching.
Even with good Ott
lights I find myself straining with glare.
Im 68 and have new glasses but the
results are so much easier in nat lght
It does cut down on my embroidering
time though.
Mary, thank you for the time & love you put into your website. I am new to this beautiful craft & have learned so much.
I would add a needle threader to list. Frustration from trying to thread a needle can undermine a project.
Hi Mary, It’s wonderful that your friend wants to learn how to embroider. Many of my friends do not share that interest. My only suggestion is that she choose colors that she would enjoy stitching.
Mary, You are a wonder. Reading through your list, I shake my head and say “Duh! of course”. I’m not a beginner, but I’d like to go back through your topics, too. Your well-indexed site is a treasure trove.
You’ve distilled a lot of wisdom in your list of essentials. Thank you.
Mary you have a pair of scissors that I have had scissor envy for some time now. They are matt as the Dovo you have but are very sleek and simple in design. Could you let us know the brand please?
Regards
Sandy NSW Australia
The PreMax ring lock scissors are the same time of finish as the Dovos. Maybe those are the ones you’re thinking of?
Someone forwarded one of your posts to me and I have been “hooked” ever since. I think it might have been the one where you talked about your struggles with cancer and how you hoped to stay focused. Well, you have my focus for sure. You continually amaze me with your zeal and energy in spite of your sickness. This post is just one more example. Thanks for keeping on keeping on. I want to catch your enthusiasm.
I am a beginner.so this helped a lot but please give us a run down on embroidery terms….like surface embroidery for instance. One I find most confusing. Thanks
Hi, Erica – surface embroidery is a very general term for embroidery that’s not counted work. It’s pretty much an umbrella term that covers all kinds of techniques – crewel work, for example, is a kind of surface embroidery done with wool; goldwork is a kind of surface embroidery done with real metal threads, etc.
I am 86 years old and have been sewing since I was about 6 years old. My grandmother taught me to sew, knit and crochet. I learned blanket and buttonhole stitch as two separate stitches. They now seem to both be what I call ‘blanket’stitch and Hedebo stitch is what I call buttonhole stitch. Before swing needle sewing machines I must have hand stitched hundreds of button holes in shirts and blouses using the Hedebo stitch, not the blanket stitch. Can someone please sort out this puzzle for me.
Buttonhole and blanket stitch are pretty much used interchangeably in most embroidery books these days. I think of blanket stitch, though, as farther spaced than buttonhole, but it’s he same stitch construction. Taylor’s buttonhole is the stitch with the extra loop or knot on the very edge.
Hi Mary, I am following you for some time now and I always find your tips and suggestions very interesting. Presently I am trying my hand at teaching embroidery to my 7 year old niece. We started this summer and as fist approach she tried her hand at cross stitch. I think she found it intesting because when i suggested we might stitch name places instead of drawing them for Christmas, well she agreed immediately. It is quite a tradition for her and me to prepare name-places for the Christmas day dinner table (we will be 12) so this year we hope to surprise everyone with something special.
I have been inspired by your website to start a project. The last time I embroidered was in the 1960s or early 1970s – I loved the kits that were so easy to find then (Bucilla was one brand, I think).
Anyway, with help from your beginners tips I have come up with a design, transferred it, ordered a better hoop than I had, ordered some lovely linen, and started my project! I am really enjoying it.
Thanks for inspiring me to start again, and for the great resource.
That’s great to hear, Kathy!!
Also encourage your friend to join a chapter of EGA if she is fortunate to have one in her neighborhood.
Dear mary, please could you explain something to me ? I am not a beginner anymore, at least i do think so, and yet, i read your article from the first to the last line, had fun, found it interesting and even learned several things… I do not know many people able to write something each time so interesting and even captivating…thank you so much and enjoy teaching your beginner…
Cathy
Thanks, Cathy!
I just checked Amazon for the Pilot ENO pencil. It says the product is currently unavailable and they don’t know when or if the product (from Japan) will be available again. Bummer! Is there a runner up product you recommend as a replacement for tracing patterns?
Hi, Shirley – if you check out the linked article up there, you’ll find different products listed for tracing. Micron pens, mechanical pencils, etc.
Thank you, Mary. As a member of an Embroiderers’ Guild I often have people asking about embroidery and ‘where do I start’. For someone not known in the family for organisational skills this is very helpful.
Is there a right way to open up a package of floche?
I’ll write about that soon!
Thank you Mary ! I am just beginning to embroider & am very excited. I appreciate your tips.
I do not consider myself to be a very good embroiderer. But I have started a Stitchers group. I tell them, Im not a teacher but I am willing to show you what I have learnt. I bring my books for inspiration and instructions. If people need help choosing colours or stitches, I say what about this or that. I get them to bring something with them that they would like to do. For those absolute beginners I start them with basis stitches on gingham (the small squares) I tell them keep your stitches uniformly to the holes. I draw 2 hearts on the gingham and tell them to stitch rows of different stitches and colours. So far my beginners are doing well. I do not criticize their work, if they are happy with stitches they have done I have done my job to expand my craft. The hearts are stuffed and they are proud to have done something they thought they would never do.
I love your site, and have learned quite a lot from your posts.
However, I am not finding anything that tells me how properly to end a thread when embroidering a dish towel. I ended the threads on my first set with knots, which I know is anathema to embroidery–but is just weaving the ends in sturdy enough for an embroidery that will be used and not only admired?
thanks,
sue
Hi, Sue – When working on a dish towel or anything similar, I whip my thread around the stitches on the back, and then I hitch it with a half knot. It’s always held ok for me, even through the laundry. But you can definitely use a small knot on the back of towels and the like, if you think it would be more secure. As long as you trim the ends and don’t have any major straggling thread, it will still look neat enough, I think!
Hello Mary
This is a question rather than a comment. I hope that’s alright.
I’m not that long new to embroidery self taught as I guess many of us are in hand crafts. My son bought me my first kit a few years ago and that was me hooked.
I’m doing a lot of scripture pictures verses but not from kits just free hand and I’m hopeless at drawing so can’t draw on my canvas to follow so I find Im removing some stitchest which leave the marks of the needle holes is thi because my needle is to thick?
I screenshot lots of pictures from net to copy as I think kits restrict from what you have in mind to do especially personalised projects.
I hope you don’t mind me asking on this comment page but don’t know any other way of contacting you.
Thank you
Maureen
Lordbless
Hi, Maureen – It could be because of the fabric you’re using. You said “canvas” – are you using needlepoint canvas, or do you mean fabric? And if so, what type of fabric are you using? If you’re using a firmly woven cotton or something similar, there’s more of a chance you’re going to leave holes with your needle, especially if your needle is somewhat large to accommodate heavier thread. A good linen is less likely to show needle holes, and even if it does, they will normally disappear pretty easily by just scratching over them with the eye of your needle. But cotton isn’t quite as forgiving.
What does the back of your work look like? Mine is a mess! I want to embroider on napkins for gifts but the back is embarassing! What do I do?
Hi, Jill – well….the back of my work looks ok, but I don’t really obsess over it, except when it will be seen on something like embroidered hankies, tablecloths, napkins, etc. To answer the question, though, I think a whole blog post is in order. I’ll put it on the schedule!
I know what you mean about the back of your work but i did scripture fir my Christian friends at Christmas and framed them so you didnt see the back if the work because it was i a frame. Ive made bible markers and used a piece of lining to sew on the back so that covered it up that way.
Can only give you these suggestions that i have used myself.
Hope you sort yours out.
How many strands does one normally embroider with.
Hi, Louise – It really depends on the type of stitching you’re doing, how bold you want your design, and so forth. I would say that two strands are a good starting point. If you find that the line is not heavy enough, try three – or if it’s too heavy, try one. Two strands are fairly commonly used in redwork and similar styles…
Thank you very much for your tips, its really good and works.
Thank you for this article. Enough to get me sorted and started.
Best wishes
Kanchana Abeysinghe
Kandy
Sri Lanka
Can you give me a link to a hoop you would recommend ? I tried searching on your site but I didn’t see one 🙂 any other links would be great too! Very much a beginner 🙂
Thank you so much for your oh so useful article. I am just begining to learn and you have helped me immensely. I bought an easy kit to start but my end goal is to embroider some pillow cases. I think they would make wonderful gifts. You are appreciated. Happy New Year.
I am new to embroidery but I would want to invest in it because i have the same passion. I really like your lessons because they are so educative and a beginner like me can easily master the same. Thanks much for the insights.
I like that you provided some embroidery tips for beginners such as preparing the floss. You said that there are basically two things you need to know to get your floss prepared. The first one is to know what a pull skein is and secondly, you should be able to understand how to strip or separate the main floss. Honestly, this is the first time I’ve ever heard of the terms “pull skein.” I guess I’ll just have to read more about this for additional learning before I do my very first embroidery project. Thanks.
I would like to read more. Thanks.
This is a wonderful list for a total beginner/newb like myself! Thank you for sharing!!!!
Very well explained. Somehow I desist from using a hoop. Is it absolutely essential for an advanced embroidery enthusiast?
I think it really depends on what type of embroidery you’re doing, Bernice. There are some types of embroidery that can go with or without a hoop. Other types benefit greatly from a hoop. If you’re getting the results you want without a hoop, then I wouldn’t worry about it! 🙂
I initially learned embroidery at my grandmothers knee 45 years ago, egad the years fly by. Sadly life took over, family, work, other hobbies etc. and I hadn’t touched embroidery for about 35 years. Due to a surgery I had to come up with something to fill my time with that was one handed and I decided embroidery was the perfect answer. Oh boy was it! In some ways it was like learning how to all over again, in others it was like seeing a long lost friend. Your site was one of a few that helped me fill in the spaces between my two sides. I really appreciate all the time, effort and knowledge that you share on your site. As do 2 of my granddaughters who have decided they wanted to learn.
I don’t know if people realize how much simpler it is to learn and teach when you start out with the right basic equipment and supplies! The differences the correct needle can make or the right thread is very important. I have met ladies that tried to start thier self embroidery lessons with silk instead of cotton, because it looked so easy in some video, and quickly gave up.
Thank you for all you do! I hope those who are begining this wonderful hobby take your advice to heart. If they do I am sure they will enjoy it as much as I and my granddaughters do. (My granddaughters are 8 and 10. Both have done a sampler pillow. The younger on is now learning to add beads to her embroidery and the older is working on a memory quilt for her mother.)
Hi. Great and all, and maybe I missed it cuz I’m scanning lol…
What do you do with them when you are done?! I’ve washed the marker off but I have extra fabric and can see the thread through my linen…(I’m not very neat yet)…
Also… if you don’t leave it in the hoop, what do you do with it?
Just wondering what you use to crewel embroider for thread. Most use wool and seriously hard to find in America. Can you recommend shops in US?
Also can you use just regular DMC cotton floss to embroider? I’ve read both yes and no. I’m self taught so if my questions are stupid I apologize…
Hi, Sarah – Regular cotton floss is the most common thread used for hand embroidery, so yes, you can use it. But what are you embroidering? If it’s a crewel design, chances are, it’s a lot larger than a typical hand embroidery design. Crewel wool is thicker (heavier) than floss, so it covers faster. To work a typical crewel design with floss might take forever. But there’s no embroidery police! You can stitch whatever design you want, using whatever threads you want. If you’re just getting into embroidery, you’ll find that DMC cotton floss is probably the easiest thread to work with, and it’s the most easily available.
As for crewel wool, there are plenty of needlework shops in the US that carry it, but it isn’t normally found at big box craft stores and the like. It’s usually found at small, locally owned needlework shops. Right now, your best bet is to order it online. Wooly Thread carries the whole line of Appleton crewel wool. Needle in a Haystack carries several different types of wool thread for embroidery.
Thank you so much for this excellent overview! I recently started my first embroidery project having done basically no research and just winging it — I’m overall pleased that I seemed to figure out a decent chain stitch and satin stitch (now having done a little research and knowing what those are called lol). I figured out the pull skein thing the hard way too…. anyway suffice it to say, I really appreciated this overview! It’s so hard to know what you don’t know and I am looking forward to using the stitch guide to add to my repertoire. 🙂
Suas aulas são maravilhosas! Estou apaixonada por seu trabalho. Obrigada por compartilhar!
Suas aulas são maravilhosas! Estou apaixonada por seu trabalho. Obrigada por compartilhar!
Thank you so much for all this information! My Grannie taught me how to embroider years and years ago, but getting back into it recently, I had no idea there were so many more stitches, needles, etc. Excellent article.
Thank you! ‘Very well written, organized, and informative.