


Day before yesterday, we talked a little bit about developing an embroidery pattern that incorporates monograms into a one-word design. We started with the letter J in this Holly and Joy design. Yesterday, we added the letter O, and today, we’ll finish off with the last letter, a simple decorative border, and some layout options.
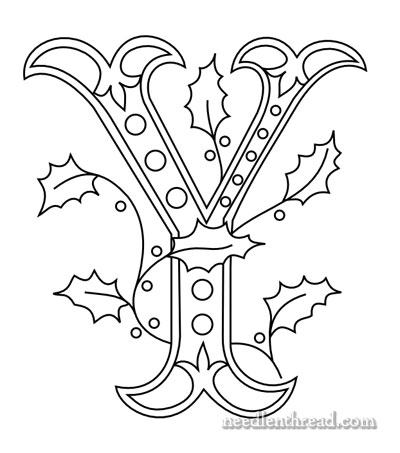
The letter Y completes our simple word – JOY. But it’s looking rather lonely (and very large), so let’s put them all together!

There they are – and they’re ok as they are, but we can go a little farther if we want.
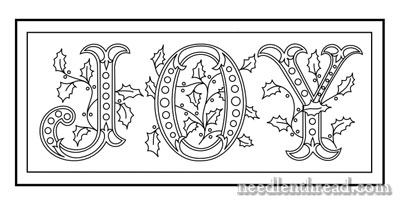
To block the letters in and kind of “ground” the design, we can add a couple line borders.
There are heaps of ways to interpret lines in embroidery. You could, for example, embroider the inside, lighter line in a simple chain stitch. The outside, heavier line, you could work in a heavier braid type stitch. Plaited Braid Stitch would look lovely, as would Cable Plait Stitch, or Hungarian Braided Chain Stitch, or even this variety of interlaced chain stitch. For something a little lacier and open, you might try something like Spanish Knotted Feather Stitch, and you could dress that up a bit by adding little beads to the side loops it forms. It all depends on how heavy or decorative you want the outer line.
But then again, you might decide that you want something other than lines around your lettering. Let’s try something a little more decorative:

Adding a stylized holly border works pretty well.

And you can flip the direction of the holly, if you want.
What about changing the orientation of the lettering?
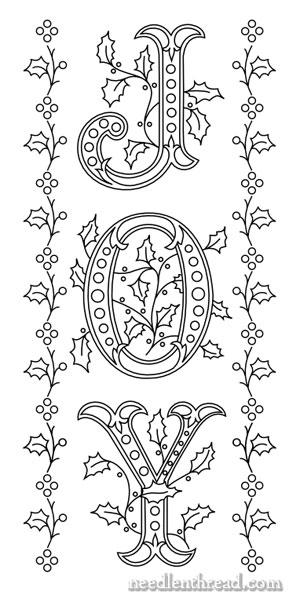
There’s no rule that says lettering has to be horizontal. You can line the letters up vertically, too. If the holly edges are too “busy” in this version (I think they are a bit busy), you can revert to a simple line border – or no border at all!
Embroidering the Letters
The type of embroidery you use on the individual letters in the design will depend on a couple things: 1. What you want the finished design to look like; and 2. Your stitching skills.
If you want a lacy, open, light design, you might just outline all the letters and decorative elements of the letters, in a stitch like stem stitch. Satin stitch, of course, is the Ultimately Beautiful Stitch for monograms, but if it is beyond your skill level right now to produce a good satin stitch, then you might opt for filling the outlines of the letters with stem stitch filling or split stitch filling. The dots inside the letters? You could use the Rhodes stitch in dots, which we looked at the other day. Or satin stitch dots. Or you could just outline them. Again, it all depends on the look you want, and your skill level.
The holly? If you want it only outlined, try a stitch like stem stitch (rather than the fly stitch holly leaves we created last week). The style of lettering is a little formal, and I think it calls for something a little more structured than the fly stitch holly. If you want the holly leaves filled, you could opt for long and short stitch, and shade them a bit (if you’re working in colors), or you could opt for a variety of other filling stitches.
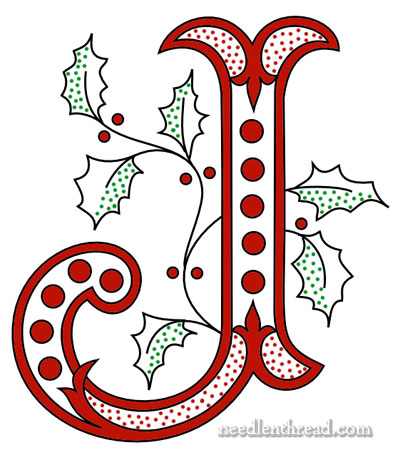
And of course, never underestimate the power of the simple seed stitch, especially when working with monograms!
Holly and Joy – Free Embroidery Patterns
Here’s a list of free Holly and Joy embroidery patterns for you. You can mix them up in any way you like!
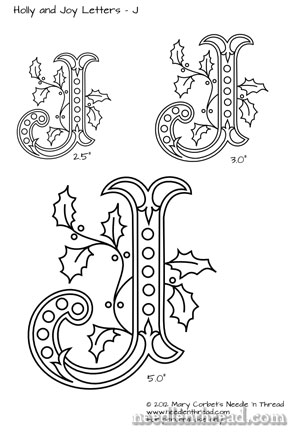
The individual letter pages offer three sizes on them: 2.5″, 3.0″, and 5.0″ monograms. If you choose “no scaling” in your printer settings, they should print at the right size. And of course, you can always enlarge or reduce them as needed.
Individual monograms:
Holly and Joy – J Monogram (PDF)
Holly and Joy – O Monogram (PDF)
Holly and Joy – Y Monogram (PDF)
Holly and Joy:
Holly and Joy – 4″ high horizontal (PDF)
Holly and Joy – 5.5″ high horizontal (PDF)
Holly and Joy – Vertical (PDF)
I hope you enJOY Holly and Joy!
Looking for inspiration & information on hand embroidery?
There are all kinds of reasons to sign up for the Needle ‘n Thread daily newsletter! Check them out and sign up today!
Thanks so much for sharing! I love your blog. I hope to use this sometime.
Mary,
These are really nice designs. I was thinking that moving around or removing some of the holly leaves on the outside of the O, in order to make the letters fit nicely together, could be something to try.
I have thoroughly enjoyed your little JOY series. I plan on making it up for several family members this coming year for next years Christmas. I like the vertical Joy and it speaks miniature bell pull to me. Thank you so much Mary.
Dear Mary
Thanks for your article it’s beautiful so festive. I really wish you and your family a lovely Christmas and look forward to more lovely articles on Needle n Thread in the New Year may you have a blessed New Year and thanks for all do to inspire us.
Regards and Love Anita Simmance
I wouldn’t have guessed adding a border would make such a big change. These are so lovely, thank you for making them, Mary!
Merry Christmas, everyone!
Thank you so much, Mary! I LOVE the vertical version, but all are beautiful! Maybe I’ll get this done in time for next Christmas?! Merry Christmas to you and yours.
xoxo
JOY in Southern Indiana
Dear Mary,
What a JOY!! The Merriest of Christmas to you and yours.
Best,
Tania
Mary,
These are really great “doable” embroidery designs, and really like the suggestions for stitches you gave. It just so happens I bought a new, red tablecloth made of 100% cotton and it would be ideal to use as a foundation for this JOY-ful design! Merry Christmas to you and yours.
-Sharon in France
It took me a while, but now I get it! What a great design! Thanks very much and Merry Christmas to you too!
Thank you for this beautiful, JOYful gift! Your lessons, tips, and inspirations are always a bright spot in my days. I learn something from every post. They make me want to try something new, and they always make me smile. Thank you so much for your work, and for your generosity in sharing your talents with your readers! I look forward to following your adventures in 2013. Merry Christmas, and best wishes for a happy 2013.
Thank you for the beautiful pattern. I pinned it on one of my boards. Hope it’s okay to share.
Thanks, Linda – Sure is! I’m on Pinterest, too. You can find me here: http://pinterest.com/marycorbet/ ~MC
What a lovely gift. Thanks so much.
Mary I think this would be a great first Gold project. Doing the letters in a silk or even cotton thread with the little bit of out line and maybe the dots in gold. Or doing gold leaves and the dots in gold. I have been afraid of doing gold because of the cost but I don’t know if it is Christmas or the Beautiful letters something is yelling gold to me.Maybe the dots on the letters and berries in gold what do you think?
Hi mary,
Merry Christmas. Thanks of the tutorial with the lovely letters (JOY) and also for the stitch fun tutorials. I tried the christmas evergreens, the star stitch and the gulloish border and it was very easy and looked beautiful. Thanks for such wonderful ideas. Love u.
Beautiful! Have a Merry one, Mary!
Thank you so much for this lovely lettering and everything you put into it and all you do to inspire us and teach us.
Hope you have a very Merry Christmas!
Thanks for sharing these great patterns
What a wonderful gift!… Thank you very much!…
I wish you a merry Christmas…
Merry Magical Christmas to you and yours!
Thank you for your beautiful designs. I’m thinking of ways to use them… hmmmm.
Thank you Mary for a great year of inspiration and sharing!
Susy
I love the patterns! I am looking for wildflower
patterns if anyone has some.
Thank you for this beautiful design.
Just seeing this JOY design discussion. Such fun! Is the rest of the alphabet anywhere else?! 🙂
Thanks!
Thank you for the pattern. Have had a hard time finding Christmas patterns without Santa.
Thanks so much for sharing this, it’s beautiful.
Thanks so much for sharing this pattern, Ms Corbet! It made a wonderful gift for my mom’s birthday, which is a few days before Christmas. She’s going to make it into a pillow. =3
Don’t know how I missed this series but I am sure glad I found it. Too late for this year but a definite make for next year. And I love the vertical one the best. Thanks so much for sharing your talent. It has taught me SO much since I am just starting out. I keep coming back to ALL of your stitch instructions. Thanks again, Mary!!!!!
thank you so much for these patterns. I will never finish for this year, but it will be hanging up next year!! Your work is always outstandingly beautiful and I really appreciate your sharing with me!
This is such a beautiful & classic design! Thank you so much for letting us download it for free!
Christmas Stencil
Mary Corbet, I love you! This website is my little bit of pleasure when I need a pick me up and reminder about one of my favourite things in the world to do…embroidery. It’s truly a wonderful place to go and get lost in. Thanks from Downunder – southwest corner of the world! xo
Thank you very your generous sharing.I always look forward to your informative emails and projects.
great patterns for my beadwork embroidery. thanks for giving these out.
Thank you for all your wonderful embroidery designs. I’m looking forward to working on many of them.
Regards,
Rosemary
I just discovered you’re blog, fantastic designs, thank you !
These are just lovely designs. Thank you for sharing your talents.
Thank you for the printable pattern. I truly appreciate it.
Thank you. I’m so grateful to you for putting your website on each of the patterns you offer. It makes it so much easier to have that information right at my fingertips when using a pattern if I need to get back to your website for some reason regarding the work.
I’m still glad I named my sweetest July daughter, Joy!
Thank You! These are wonderful.
Beautiful !
Thank you . They’re beautiful and inspirational.
Thank you so much for this. It brings me JOY! Happy holidays to all.
Thank you. These are lovely.