


Stems and branches – you’re bound to run into them at some point in hand embroidery!
Whether it’s tree branches, wispy herbal shoots, curly vines and tendrils, heavy stalks, or stylized stems on stylized flowers, it’s highly probably that at some point in your embroidery journey, you’ll have to make a decision on the stitches to use to interpret these types of growing things.
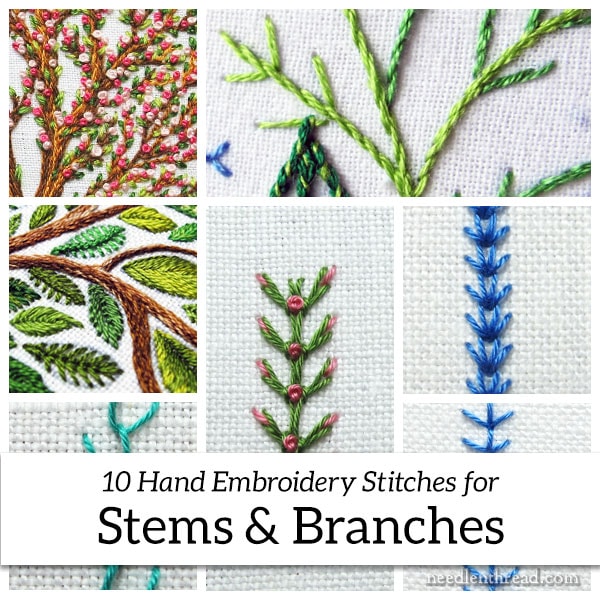
To help you make just such a decision, I’ve put together a list of my favorite 10 hand embroidery stitches to use for stems and branches, with information on how they can be used and links to tutorials.
It’s actually hard to narrow down a list to ten favorite stitches for branches and stems. When I started brainstorming the stitches I’ve used to produce branchy effects, I ended up with some 20+ possible stitches and variations.
Then I went through that list and circled the ones that I’ve used more frequently, that I fall back on as reliable for interpreting stems, vines, tendrils, branches, tree trunks, and the like.
Here’s the resulting list!
1. Stem Stitch
Stem stitch is my my most frequently used stitch for these types of stitching situations. It takes curves well, and it can be worked as a very delicate line when using fine threads, or as a bold line, using heavier threads.
It can also be used to fill an area, and it works really well for filling in tree trunks and branches. I used the stem stitch, for example, on the trunk and branches of this leafy tree.
Here’s a tutorial for stem stitch, and here are some tips on working stem stitch filling.
2. Outline Stitch
Anything you can do with stem stitch, you can do with outline stitch. The result, however, will be slightly different!
With outline stitch, you’ll get a smoother line (you won’t have the ropey look of stem stitch), and you’ll get a totally different look when filling with it. The rows of outline stitches worked close together when filling won’t blend the same way, so you’ll end up with a slightly more ridged look to your filled area.
To add a certain interest and texture to things like tree trunks, throwing in an outline stitch line or two occasionally among stem stitch filling will add a little subtle texture.
You can find a tutorial for outline stitch here.
3. Split Stitch
If you want very fine tendrils or wispy stems, split stitch worked with one strand of floss (from the six) will give you a most delicate look.
Split stitch works best with a softly twisted, non-divisible thread, like a single strand of stranded cotton or silk, a strand of floche, a strand of coton a broder, or a strand of crewel wool.
One of my favorite threads to use with split stitch is coton a broder #25, which you can read about here. You can also see a tree trunk worked coton a broder in this article, here.
You can find a tutorial for split stitch here.
4. Backstitch
Backstitch on its own will work “ok” for stems and whatnot, but it won’t produce a very smooth effect for the line. It tends to look chunky or choppy on its own.
But, if you want to smooth the line up, all you have to do is whip it! I prefer whipped backstitch to plain backstitch, if I’m using backstitch on a stem.
Two fun points about using whipped backstitch: you can change the weight of the line easily, and you can lighten or darken the color of the line easily, simply by choosing the right color and the right number of threads to whip the backstitch with.
For a delicate line, for example, you might stitch with two strands of dark green floss, and then lighten the line a bit by whipping with one strand of light green floss.
For a heavier, darker line, you might backstitch with three strands of dark green floss and whip the line with two strands of a dark brown.
5. Chain Stitch
For stems and tendrils and branches, there are different ways you can use chain stitch. Primarily, though, I like to use whipped chain stitch in the same manner as whipped backstitch, changing weight and color by changing the number of foundation threads and the number and color of the thread used for whipping the foundation chain stitch.
Chain stitch makes a great filling, too, and would work well on a tree trunk. You can even mix chain stitch in with other stitches (like stem stitch and outline stitch) to add new texture to the tree.
To whip chain stitch, the method is exactly the same as that used for whipping backstitch.
6. Fly Stitch
When working stems for greenery among flowers – maybe some light, airy filler – fly stitch is a terrific option! It works up quickly, and it’s open, branchy nature gives a nice spread for filling out an area.
You can find a tutorial for vertical fly stitch here.
7. Feather Stitch
Feather stitch can be used the same way as fly stitch, as a nice, airy filler for greenery. The result is a little looser and less formal, compared to fly stitch.
You can find a tutorial for feather stitch here.
8. Up & Down Buttonhole, Slanted
I like this combination of up and down buttonhole stitch, worked on a slant, to create a branchy line that can be further decorated with color to give a floral effect. The link will take you directly to the Stitch Fun tutorial for this whole stitch combination.
9. Wheatear Stitch
Wheatear stitch, or wheat stitch, is a chain stitch variation that creates a branchy effect, too. You can dress it up any way you want! I like to whip it and add French knots to the tips or scattered between the little branches, if I’m working a floral vine or a little floral accent.
10. Twisted Chain Stitch
Twisted chain stitch is another variation of chain stitch, resulting in a barbed look on one side of the chain stitch. You can manipulate the length of the “barbs” and the direction of the twist, to achieve an alternating, interesting thorny line. This is demonstrated in the twisted chain stitch video, here.
Lots More!
There are many other line stitches in hand embroidery that work well for stems and branches. The stitch you choose depends on many things, including the type of texture you want on your branch, whether you’re trying to achieve a realistic look or a stylized look, whether you want something heavy or something delicate…
A Good Stitch Dictionary is Useful!
If you want to explore other possibilities further, I strongly suggest investing in a good stitch dictionary! A good stitch dictionary will help you master a whole variety of stitches, so that you have a wide repertoire to pull from, when you’re debating about how to interpret stems or branches in embroidery.
If you don’t have a stitch dictionary yet, I’ve listed my favorites on my Amazon Recommendations page, right near the top. I’ve reviewed quite a few stitch dictionaries here on Needle ‘n Thread, and you’ll find those reviews listed in my Books Index, right here.
On that note, I’m heading to work to stitch up – you guessed it – a whole slew of stems and branches!
Have a wonderful weekend!
This article contains an affiliate link to my Amazon Recommendations page, which means Needle ‘n Thread gets a tiny kickback for any purchases you make on Amazon through that link, without any added expense to you. Every tiny bit helps, so thanks very much for keeping my Amazon page in mind when you shop Amazon!
Thank you for putting these together–a handy guide.
Good morning, Mary! Lately, because I’ve been busy sewing clothes for myself, I’ve been just browsing your articles, or even just filing them away in my “embroidery” folder in my email to read later. But this morning was cooler and I’m beginning to think of stitchy things other than clothes and I read your article beginning to end and checked out most of the stitches. I have a wall quilt that I’ve been on again/off again for several years and trees have been the bugaboo. Now I have some great ideas to proceed with. Sometimes, it takes seeing how another person uses a stitch to go “Aha, and I could do this with it!” You provide such a terrific service to everyone who loves needles and thread, you know that? I hope so! God bless your talent and hands and you have a great week as well!
Thanks, Devon! 🙂 Your wall quilt sounds like a great project!
Thank you for all of your wonderful information! I look forward to reading your articles every day. Yes, I share with my friends, lots of them.
Mary.
I just want to take a moment and thank you for your blog. I find it to be one of the best blogs I have ever followed and I am so appreciative for the useful information, tutorials and teaching that you share.
I am relatively new to embroidery and find your posts so very helpful!
Cheers!
Thank you, Mary, for all this excellent information. I can assure you, it has been duly noted and will be constantly used. Cotton Brodeur us new to me, so I’ll definitely be thread shopping at the resource you’ve listed.
I so look forward to your posts. You’ve taught this 70 year old a lot about embroidery, which I assure you is thankfully accepted.
Dear Mary
Thanks for the list of stitches for stems and branches and the links to the instructions, this is such a useful and helpful list as sometimes when starting a project it is difficult to choose the stitches to use. I must invest in stitch dictionary book. Thanks for sharing with us this very useful stitch list and for the links.
Regards Anita Simmance