


Lately, I’ve been having a discussion with some beginning embroiderers about filling stitches that work well on surface embroidery projects, especially where you’re filling small elements here and there in a standard stylized or realistic design.
I thought I would share the results of that discussion here, in a distilled version, in case you struggle with how to fill different elements in your hand embroidery projects and where to use what filling technique.
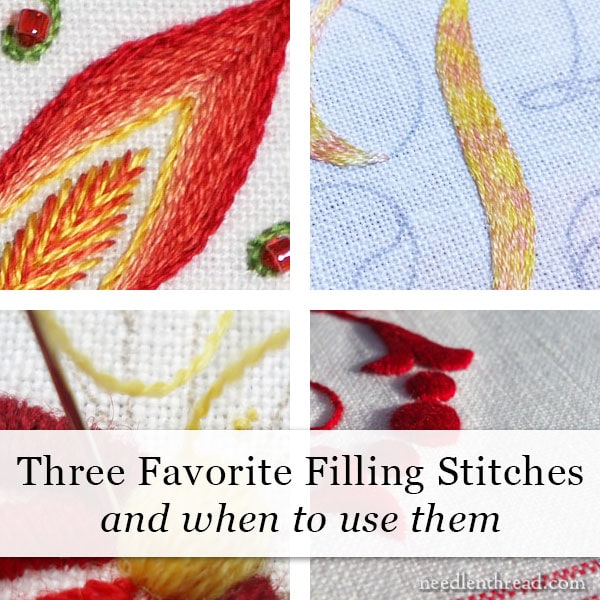
So, now that the three day weekend is over, let’s get back to some basic embroidery tips by looking at my three favorite standard filling techniques and where and when to use them.
Satin Stitch
Satin stitch creates a smooth, solid filling.
It’s a basic stitch in concept, but it can be a tough stitch to master. A good satin stitch, used in the right place, looks great! A poorly executed satin stitch – and used in the wrong place – can look a little less than pleasing.
I use satin stitch frequently, so you’ll find it scattered all around on Needle ‘n Thread. You can browse through articles tagged with satin stitch here, if you want to find some examples of it and some tips on how to improve your satin stitch.
If you want your satin stitch to look really good, here are some guidelines to keep in mind:
1. Use satin stitch on small elements. The size of the element really depends on the thread you’re using and the technique you’re using to fill with satin stitch.
Making satin stitches that are up to an inch long is almost stretching it on any element – one inch is a long satin stitch! But if you are padding the satin stitch and if you’re using a heavier weight thread (like a wool, for example), then longer stitches can work.
For the most part, satin stitching should be kept to smaller elements (around 1/2″ or shorter is a good length for satin stitch), because otherwise, the stitches can lose tension over time and look pretty bad.
2. Work satin stitch with one strand of whatever thread you’re using – or make sure you’re using a laying tool, if you’re using more than one strand.
The whole idea of satin stitch is to achieve a nice, smooth finish to the satin stitched element. Using more than one strand may result in a rough finish, due to the threads twisting over each other instead of lying parallel. If you use more than one strand, a laying tool will help the threads lie parallel. You can see how to use a laying tool here.
3. Work satin stitch over a split stitch outline. Here’s an article on why and why split stitch.
4. Pad your satin stitch. It helps lift satin stitch elements up a little, and it adds friction underneath the satin stitches, to help keep them in place. This article is about padding in general (and satin stitch isn’t the example used), but you can see what the notion of padding is and how it works.
Long & Short Stitch
Whether you want to fill an area with solid color, subtly shade an area with gradual changes in shading, or fill an area with bold, blended colors, long and short stitch can do all of the above.
And it can do it in a large areas or small areas, intricate shapes or simple shapes.
And it is a very forgiving filling stitch!
You can see long and short stitch used for the shading on this flower I’ve been working on recently. You can also see it used to fill this monogram using a variegated floss and this project, where it was used to fill two intertwined hearts. You’ll also find it used in myriad ways in lots of projects here on Needle ‘n Thread!
When you fill with long and short stitch, here are some tips to keep in mind:
1. Work over a split stitch outline, to define your edges.
2. Work with one strand of thread. If you use two strands in the needle, you’ll end up splitting them by coming up between the two, which will leave thin or open areas in your filling.
3. Split the previous rows of long and short stitches by coming up into them rather than going down into them. If you go down into the previous row, your stitches will not blend smoothly – they will create a ridge on the top of the embroidery.
Stem Stitch Filling
While we normally think of stem stitch as a line stitch, it also makes a great filling by working lines of stem stitch close to each other in an area to be filled.
It can work for larger spaces, but it’s best in “flowing” shapes – like narrower, wavy leaves or flowing filled curves or tree trunks and branches and the like. It would be a very dense filling to use on large, open spaces.
Stem stitch filling can be solid or shaded. Here are three articles that deal with shading and stem stitch filling:
Shaded stem stitch filling on small elements on my Provence Kaleidoscope design
Shaded stem stitch with three strands of floss on a bunch of leaves. Scroll down to the middle of the article, where you see the bunch of three green leaves.
Shaded green vines worked with stem stitch.
When you fill with stem stitch, here are some tips to keep in mind:
1. You can use multiple strands of floss in the needle at once – how many depends on how heavy or fine you want your embroidery to look and whether or not you’re shading. If you’re shading, use two or three strands so that you can achieve a smooth transition in shades using the techniques mentioned in the articles I linked to above.
2. Work the stem stitch from left to right with the working thread below the needle. If you reverse direction to return along the shape you’re filling, moving right to left, then make sure the working thread is above the needle. Otherwise, you’ll end up with rows of stem stitch and outline stitch, which will break up the smooth blended lines you could otherwise achieve.
For Beginners
For absolute beginners, stem stitch is the easiest stitch to tackle as a filling stitch, because it’s an easy line stitch to master. However, it’s not the best choice for larger, open elements in a design.
In the order of “ease” to achieve a nice filling, I’d rank long and short stitch next, after stem stitch, and it can work in larger spaces or smaller spaces.
Satin stitch is the most challenging of the stitches mentioned above, when it comes to producing a beautiful and smooth satin stitch filled element, but it should be reserved for smaller-width elements. It’s not ideal for larger elements, unless you plan to stitch something on top of the satin stitch to keep the longer stitches in place.
Here are some further articles to help you explore these filling techniques, where you can pick up extra tips that will make your embroidery easier and your results better:
Twelve Helpful Hints for a Sensational Satin Stitch – a list of satin stitch tutorials and tips
Long and Short Stitch Lessons – a series of long and short stitch lessons in a small sampler that I worked ages ago, that will help you tackle long and short stitch in pretty much any shape situation.
Twelve Tips for a Better Stem Stitch – a list of stem stitch tips to help you master the stitch in any situation.
Other Filling Techniques
Of course, there are other filling techniques to use in hand embroidery, and we’ll cover some of those later on, for those of you searching for ways to fill larger areas with solid (or shaded) color.
These three stitches are definitely worth adding to your stitch repertoire, though, because they give you three good options for filling elements on all types of hand embroidery projects.
If you’re just coming off a three-day weekend, I hope it was a pleasant one! I took the holiday yesterday to do some background work on the computer and to begin an organizational job – which I didn’t finish. Today, I’ll finish that before I pick up my needle and thread!
Hope your week is off to a good start!
When I just started embroidery I made a set of hankies for my dad. One involved a filled shape that looked pretty good with chain stitches that had almost no loop – like long petals instead of round. But I hate when he uses it. I filled it in red and now I get paranoid he’s bleeding… XD
Thank you, I never would have thought of using the stem stitch as a fill stitch 🙂
Dear Mary
A very good article I have used all these stitches and as you say stem stitch is the easiest of the three filling stitches. I find the hardest satin stitch as I have great difficulty obtaining a smooth finish. The L & S stitch I have to really concentrate on because of the stitch direction and changing the constant change of the thread colours which produce a flowing texture. I always follow your instructions when I am starting a new project which require any of the stitches above and often re-look at your videos to get a sense of stitch direction. Thanks for sharing these tips on filling stitches with us and for the links on further instructions. I hope you had a good holiday I have just started a another felt bird the parrot from the book Folk Embroidered Felt Birds by Corinne Lapierre looking forward to making it.
Regards Anita Simmance